
BEFORE
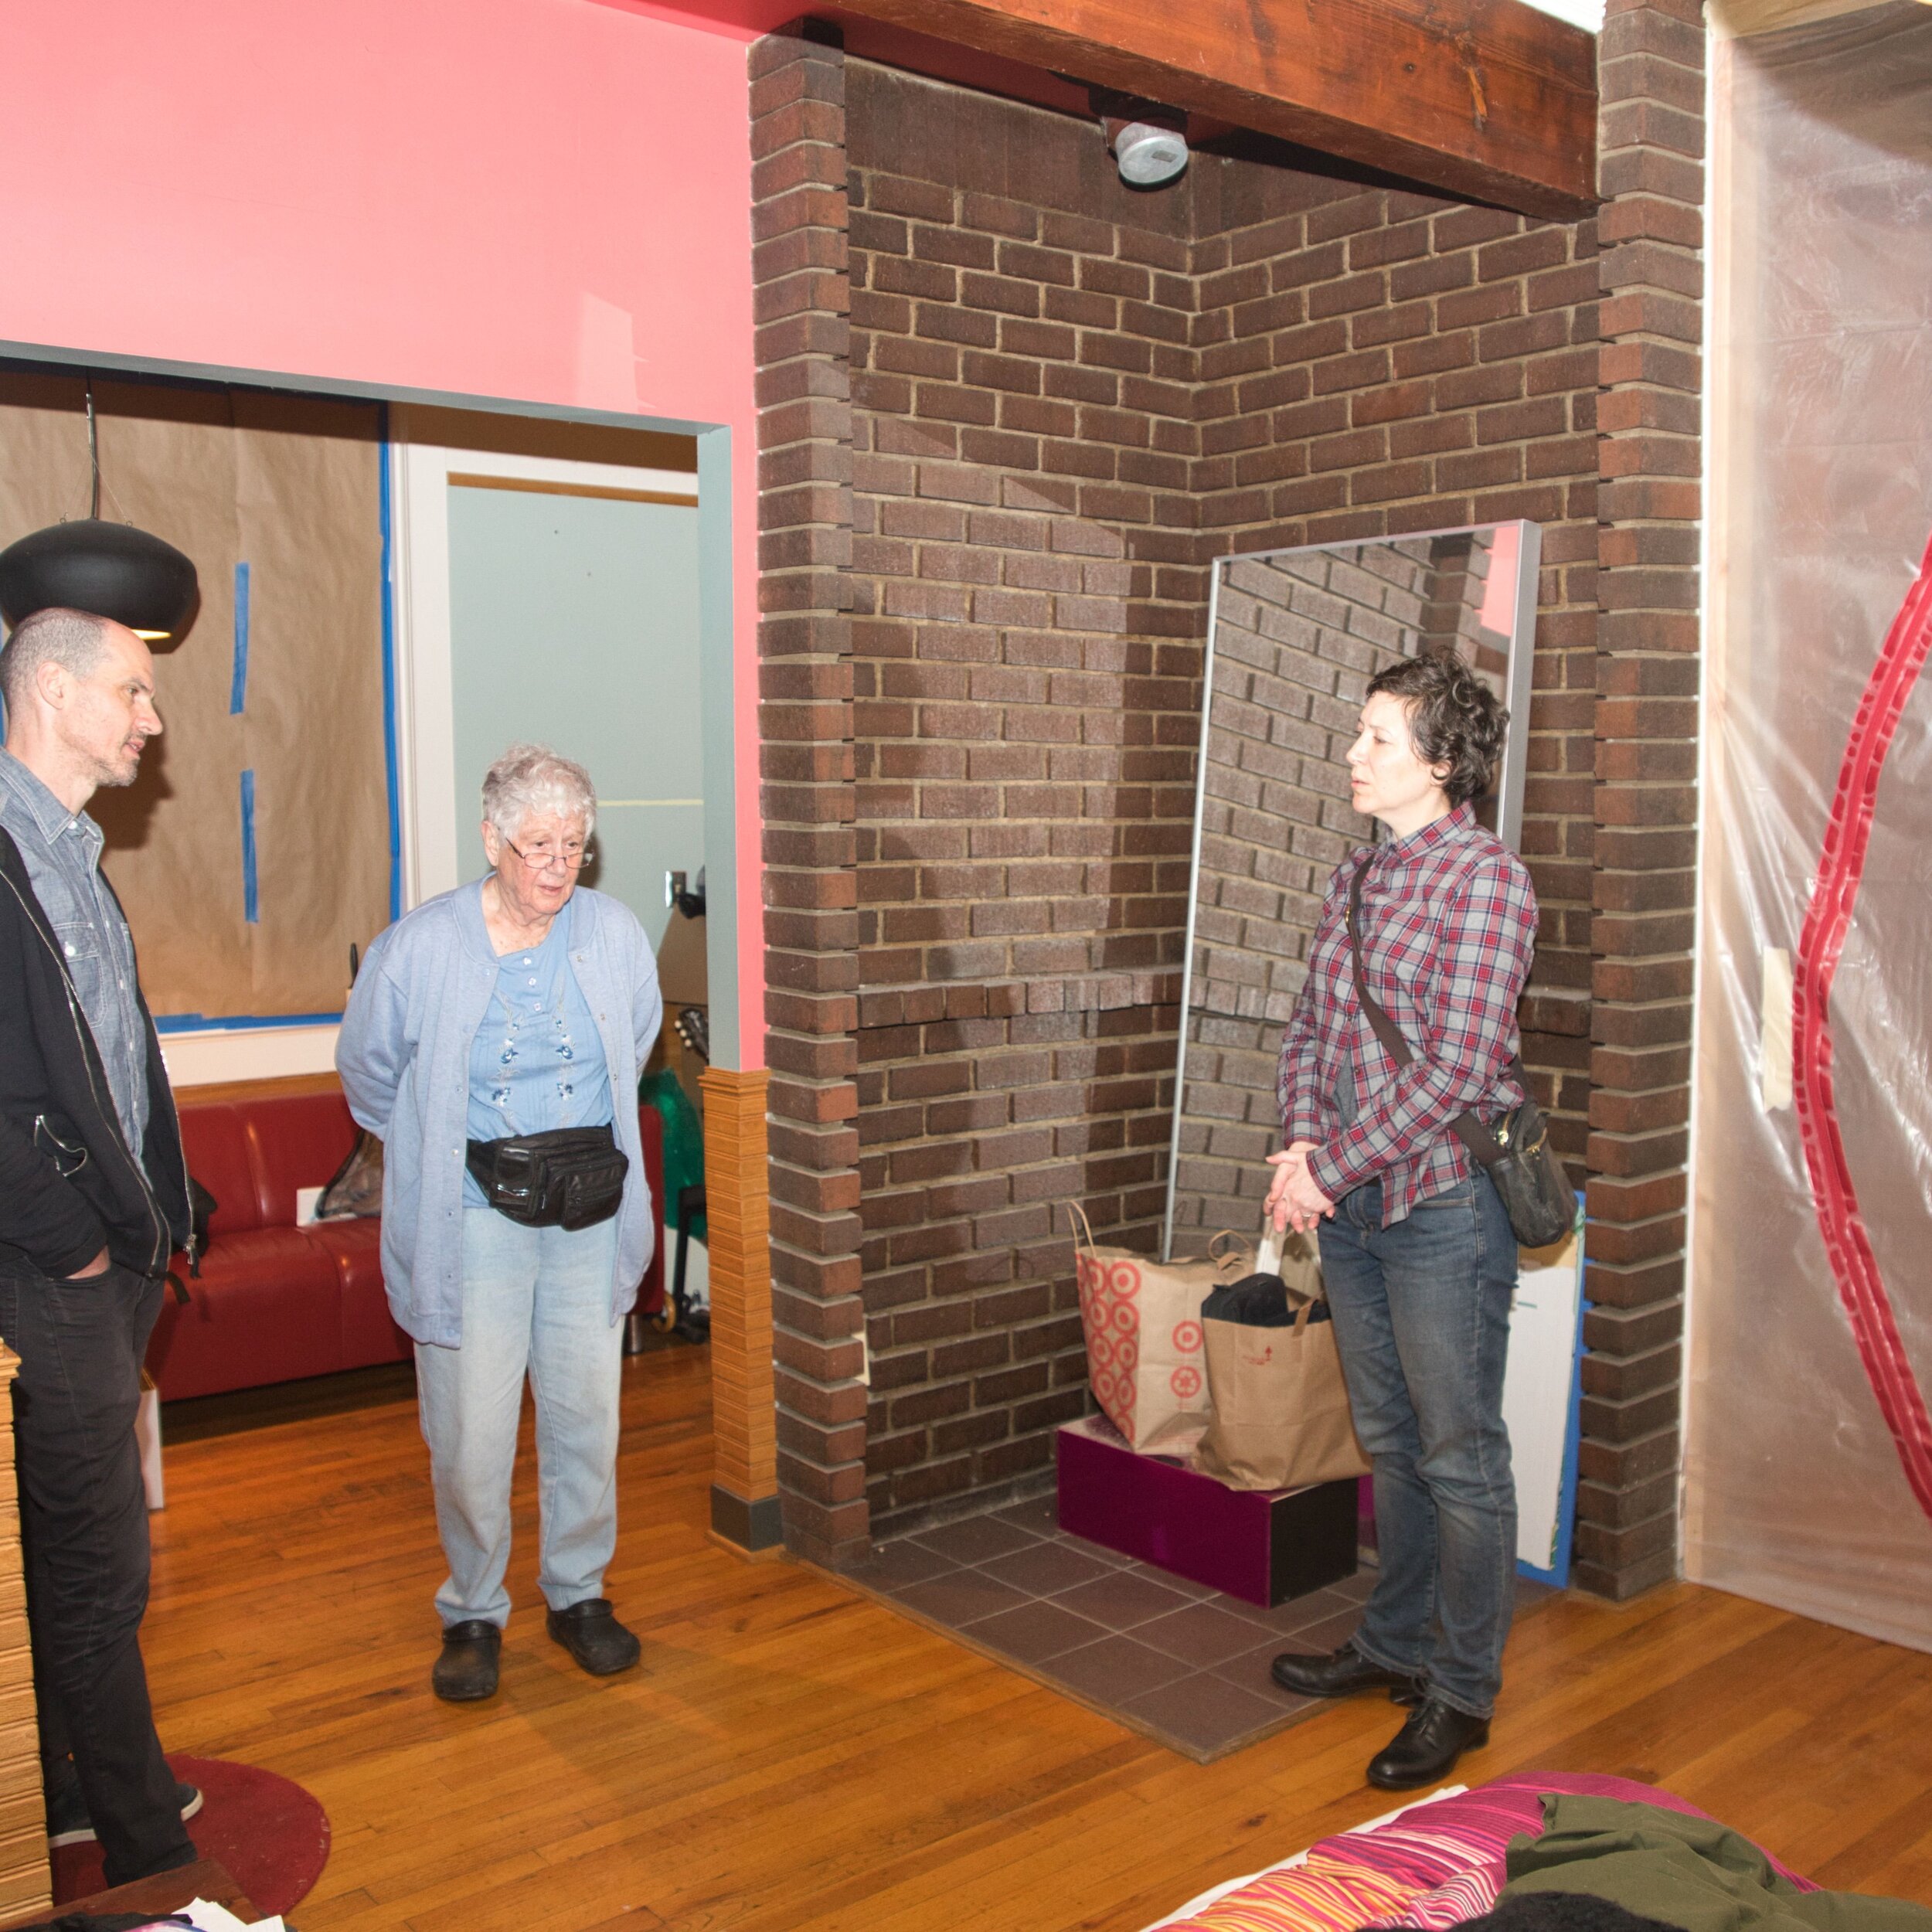
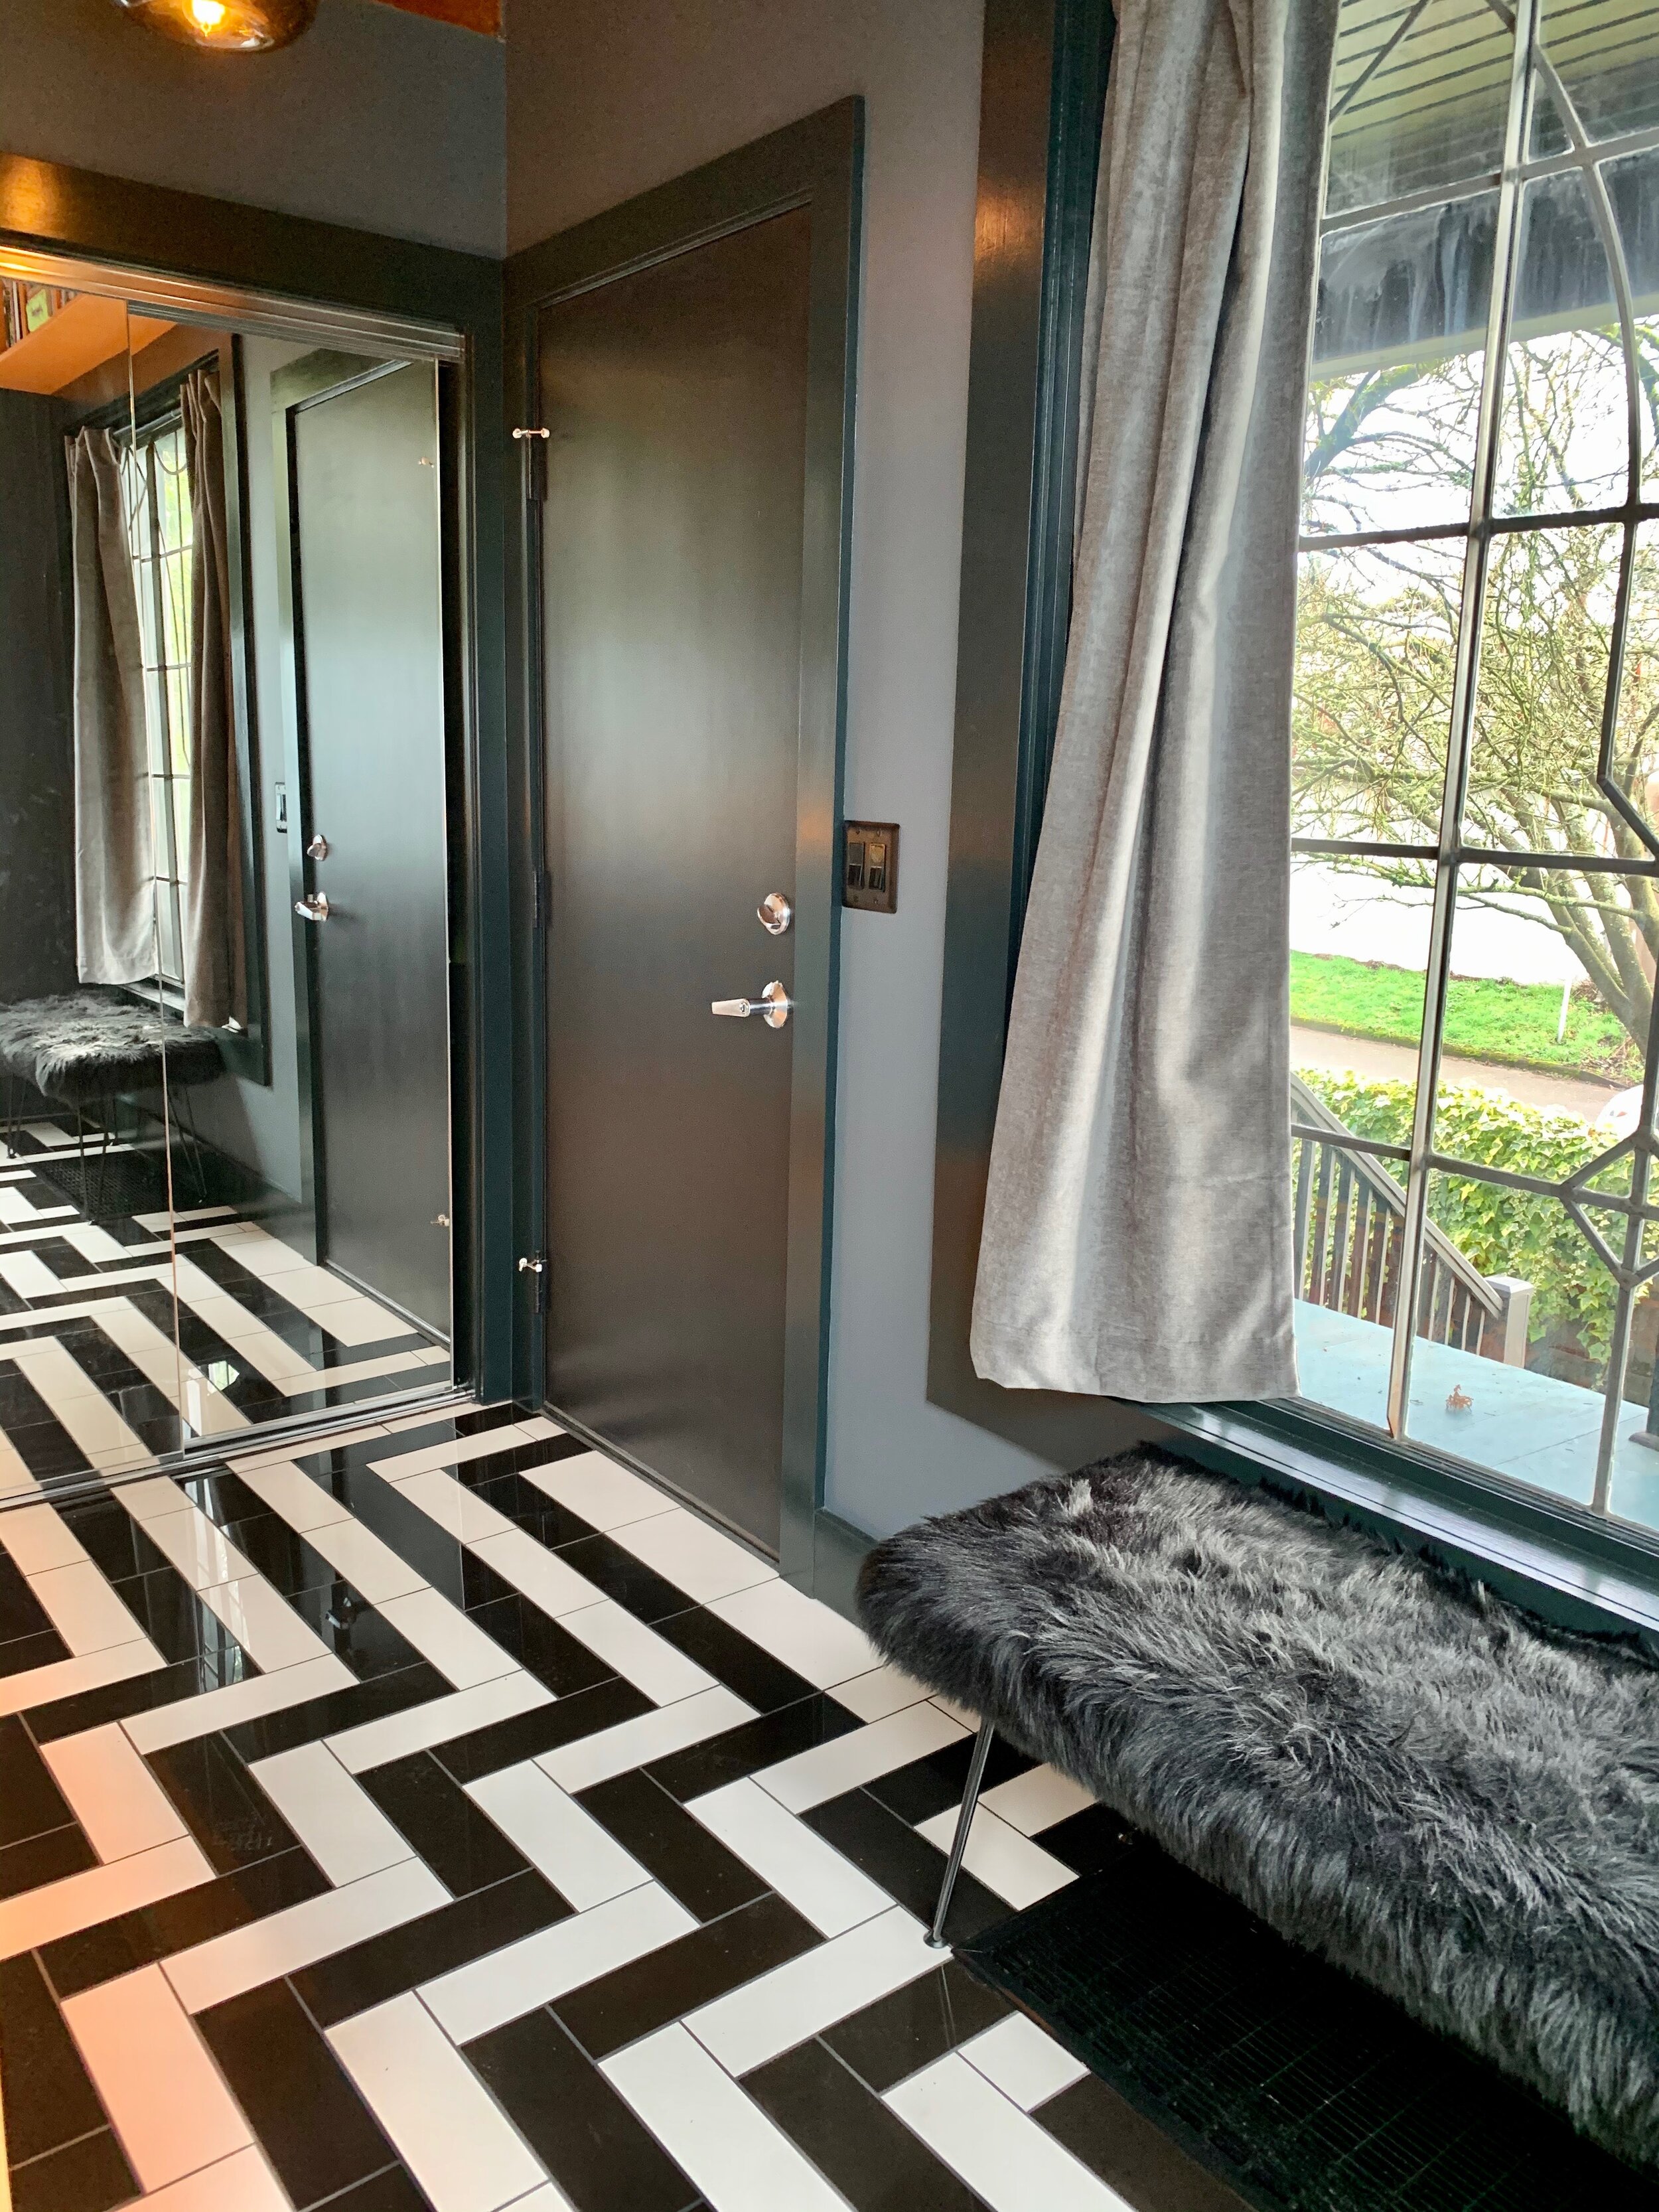
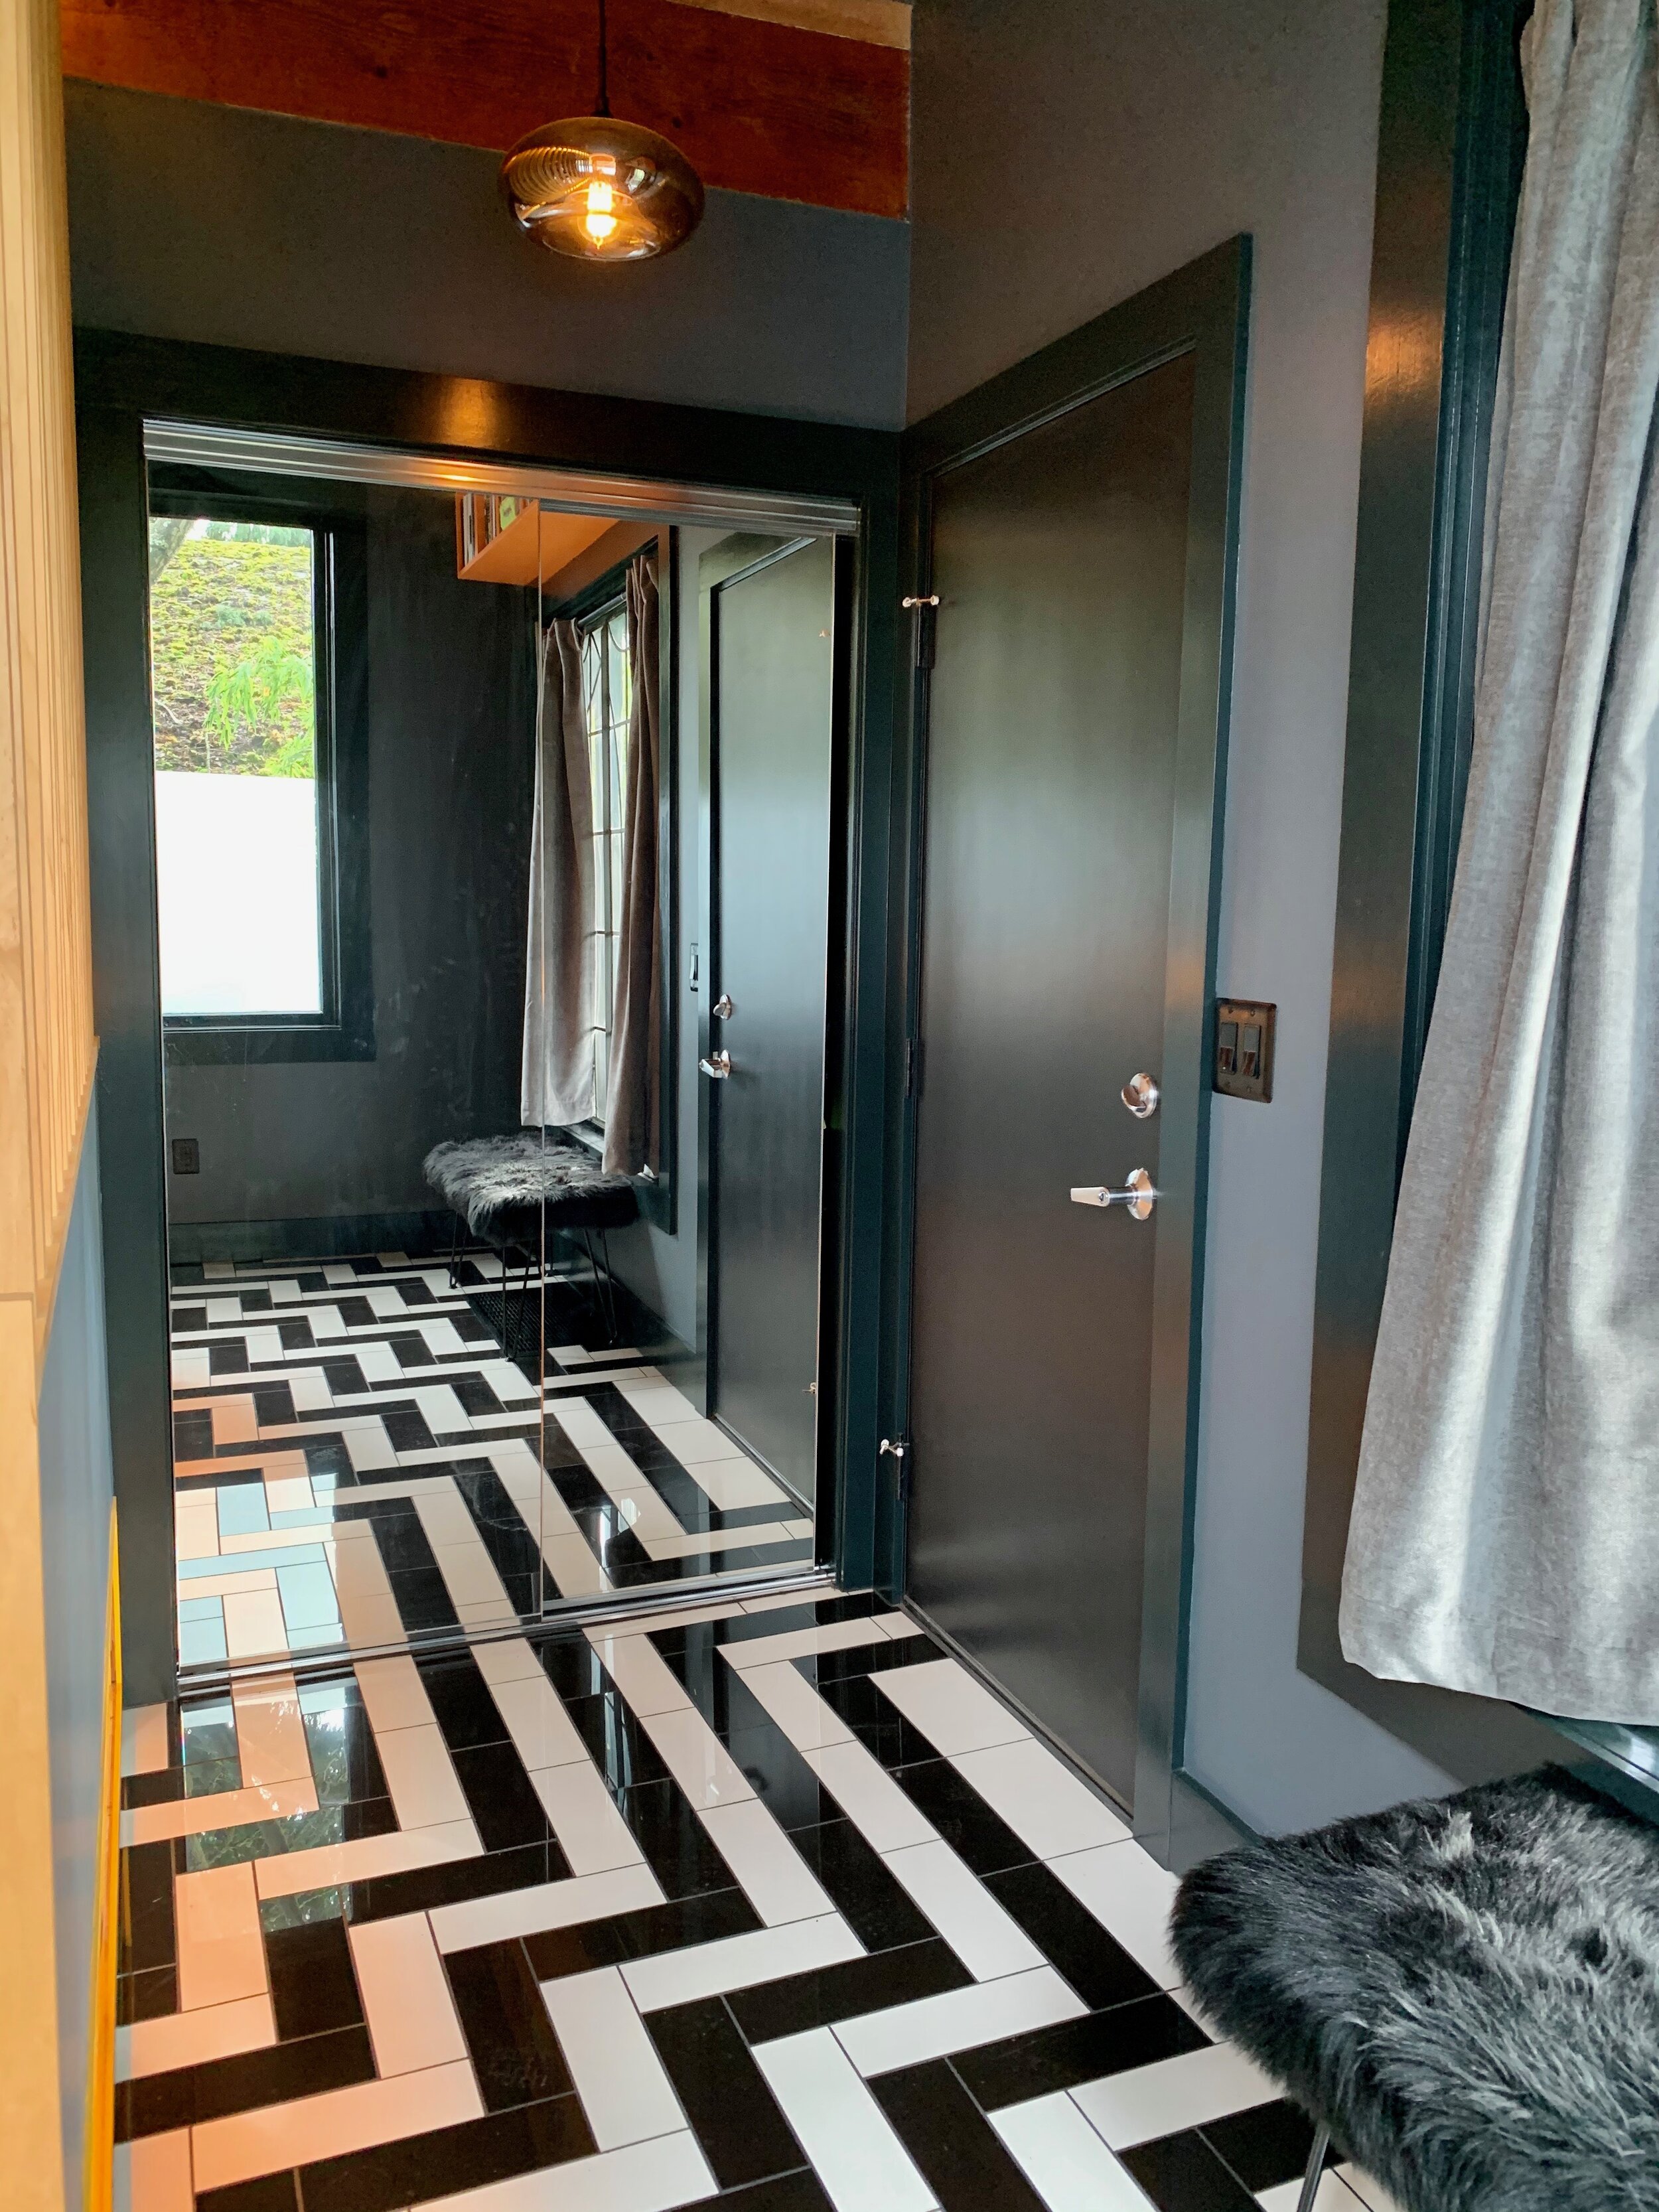
The layout of our 1899 house was chopped up into a series of teeny zones. We had no entryway, just a narrow niche that faced the brick surround and stairs to the 2nd floor (now that is bad feng shui: all the xi flies right upstairs!). If you opened the door too wide, it hit the niche wall and swung back in your face. The only downstairs closet had been torn out, so coats and shoes piled everywhere, especially on our never-used micro dining room table.


NEW LAYOUT
A true transitional portal
CONCEPT
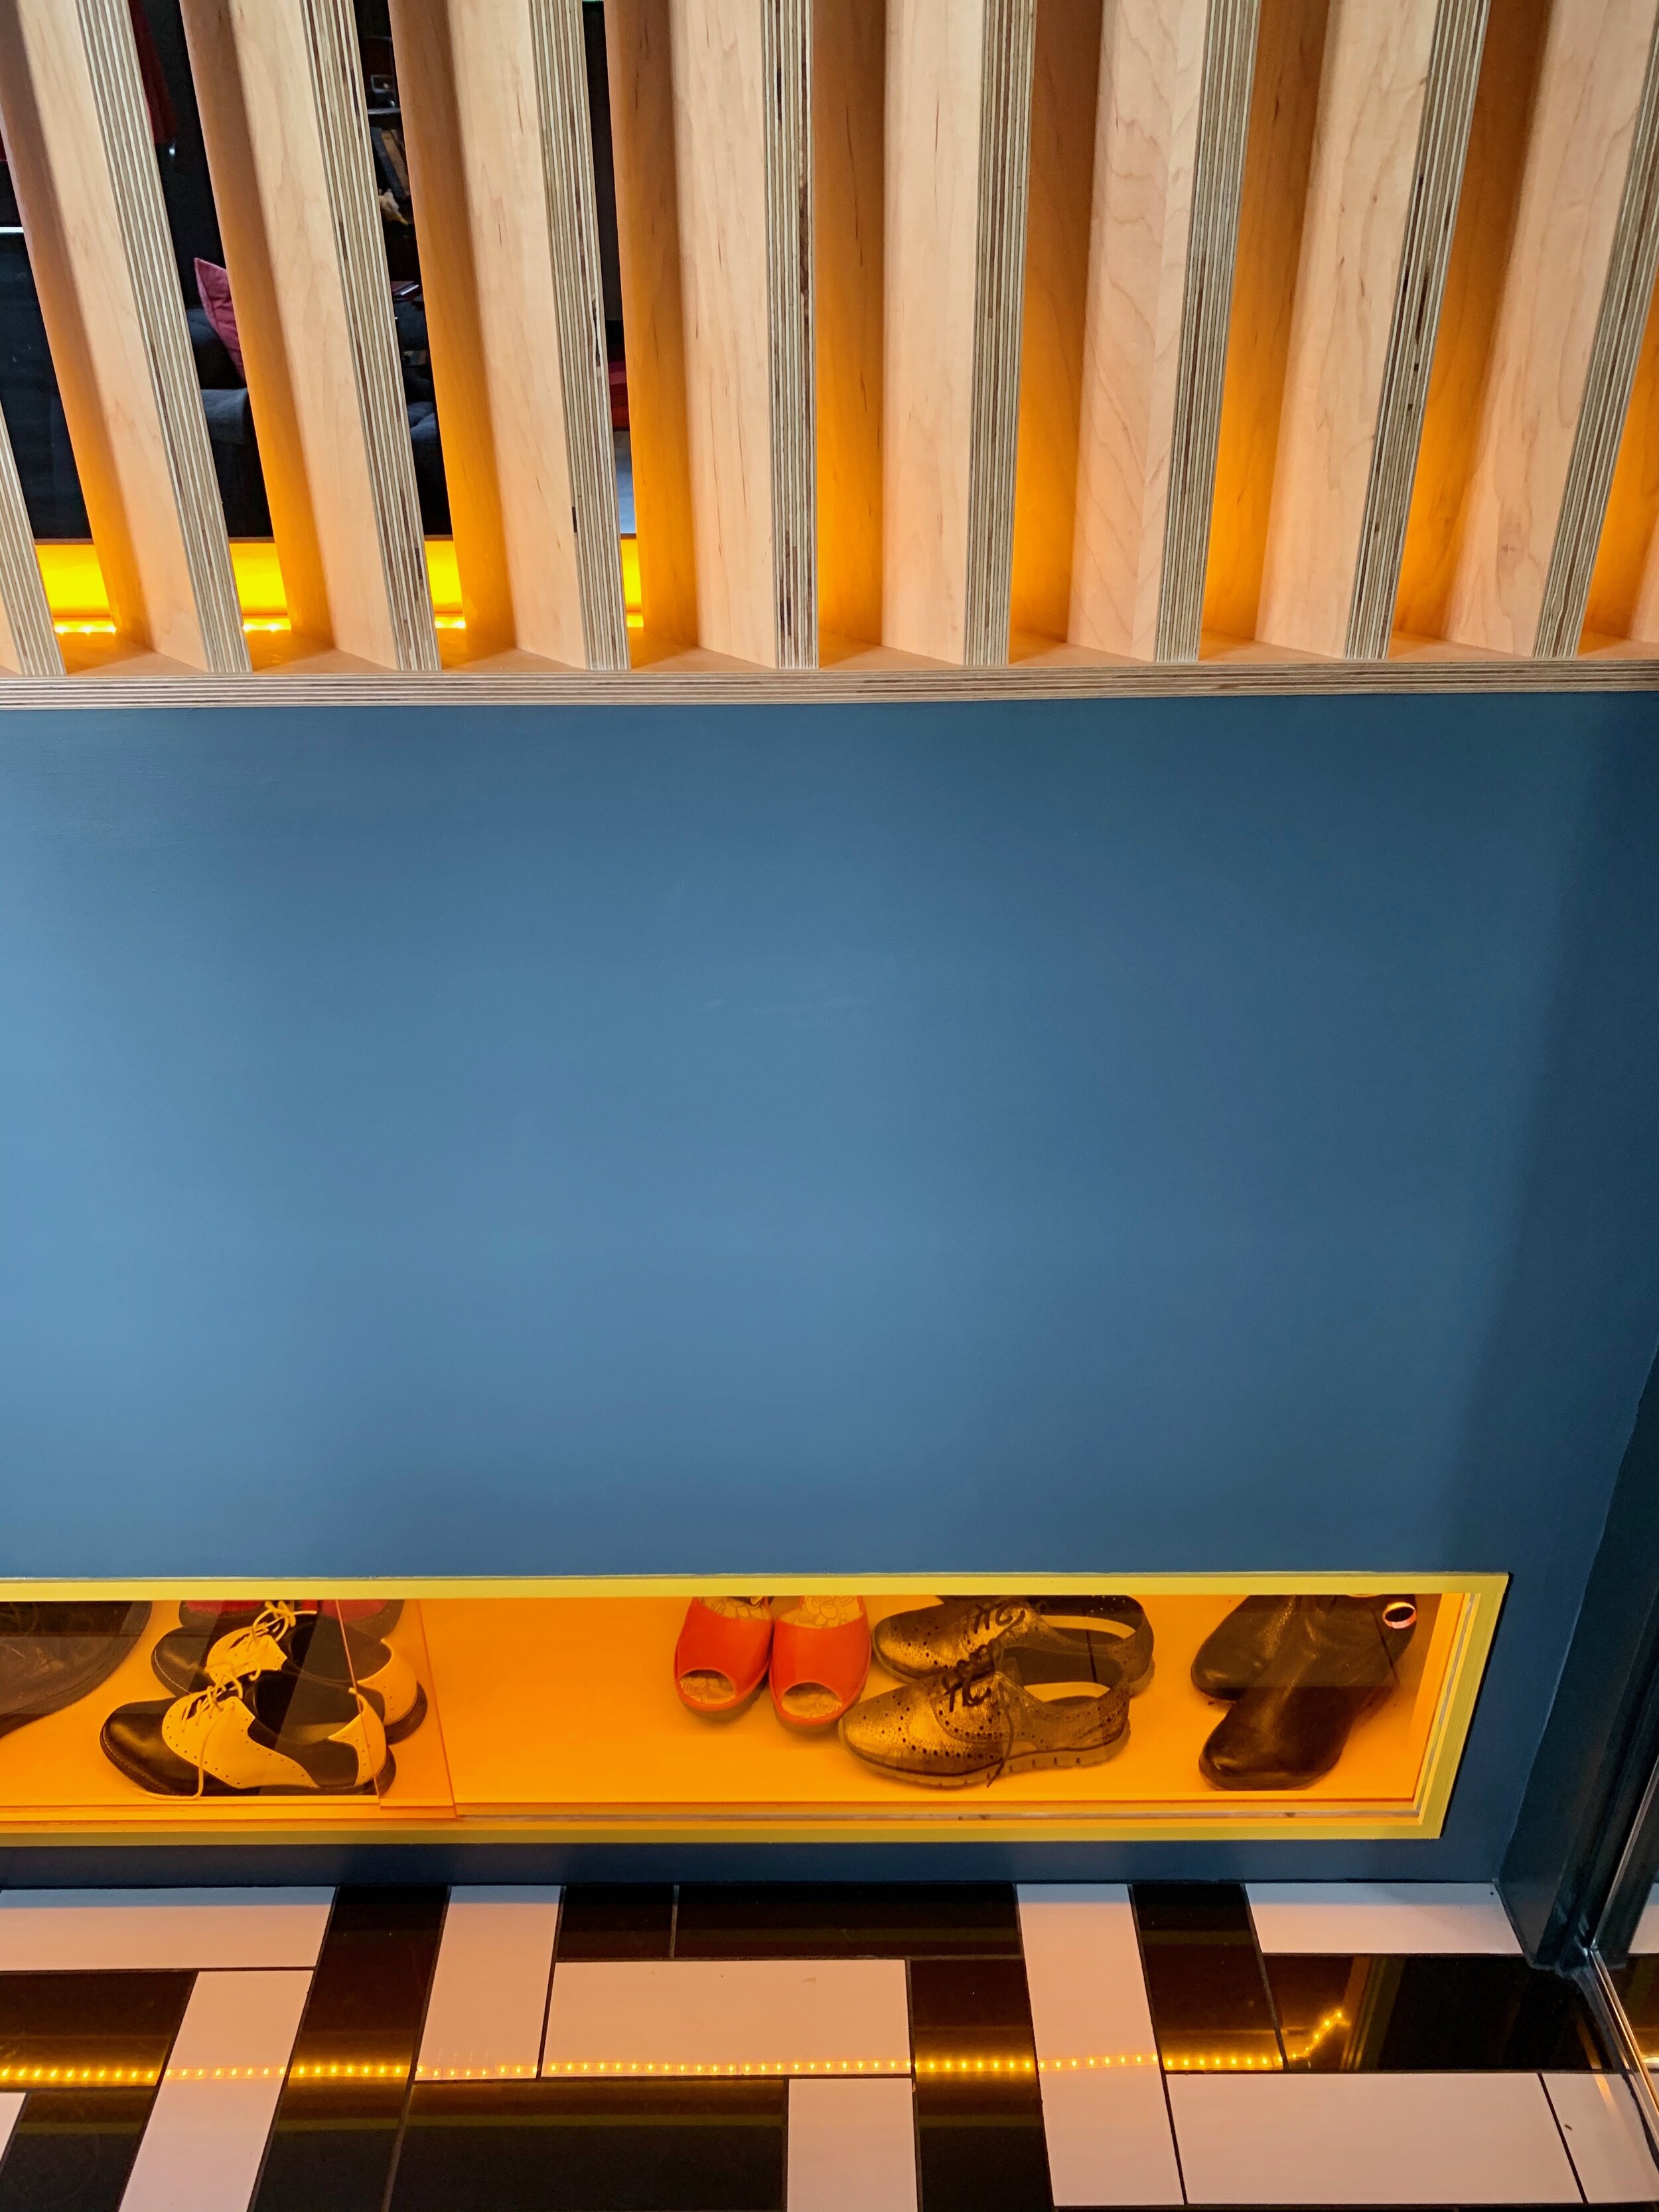
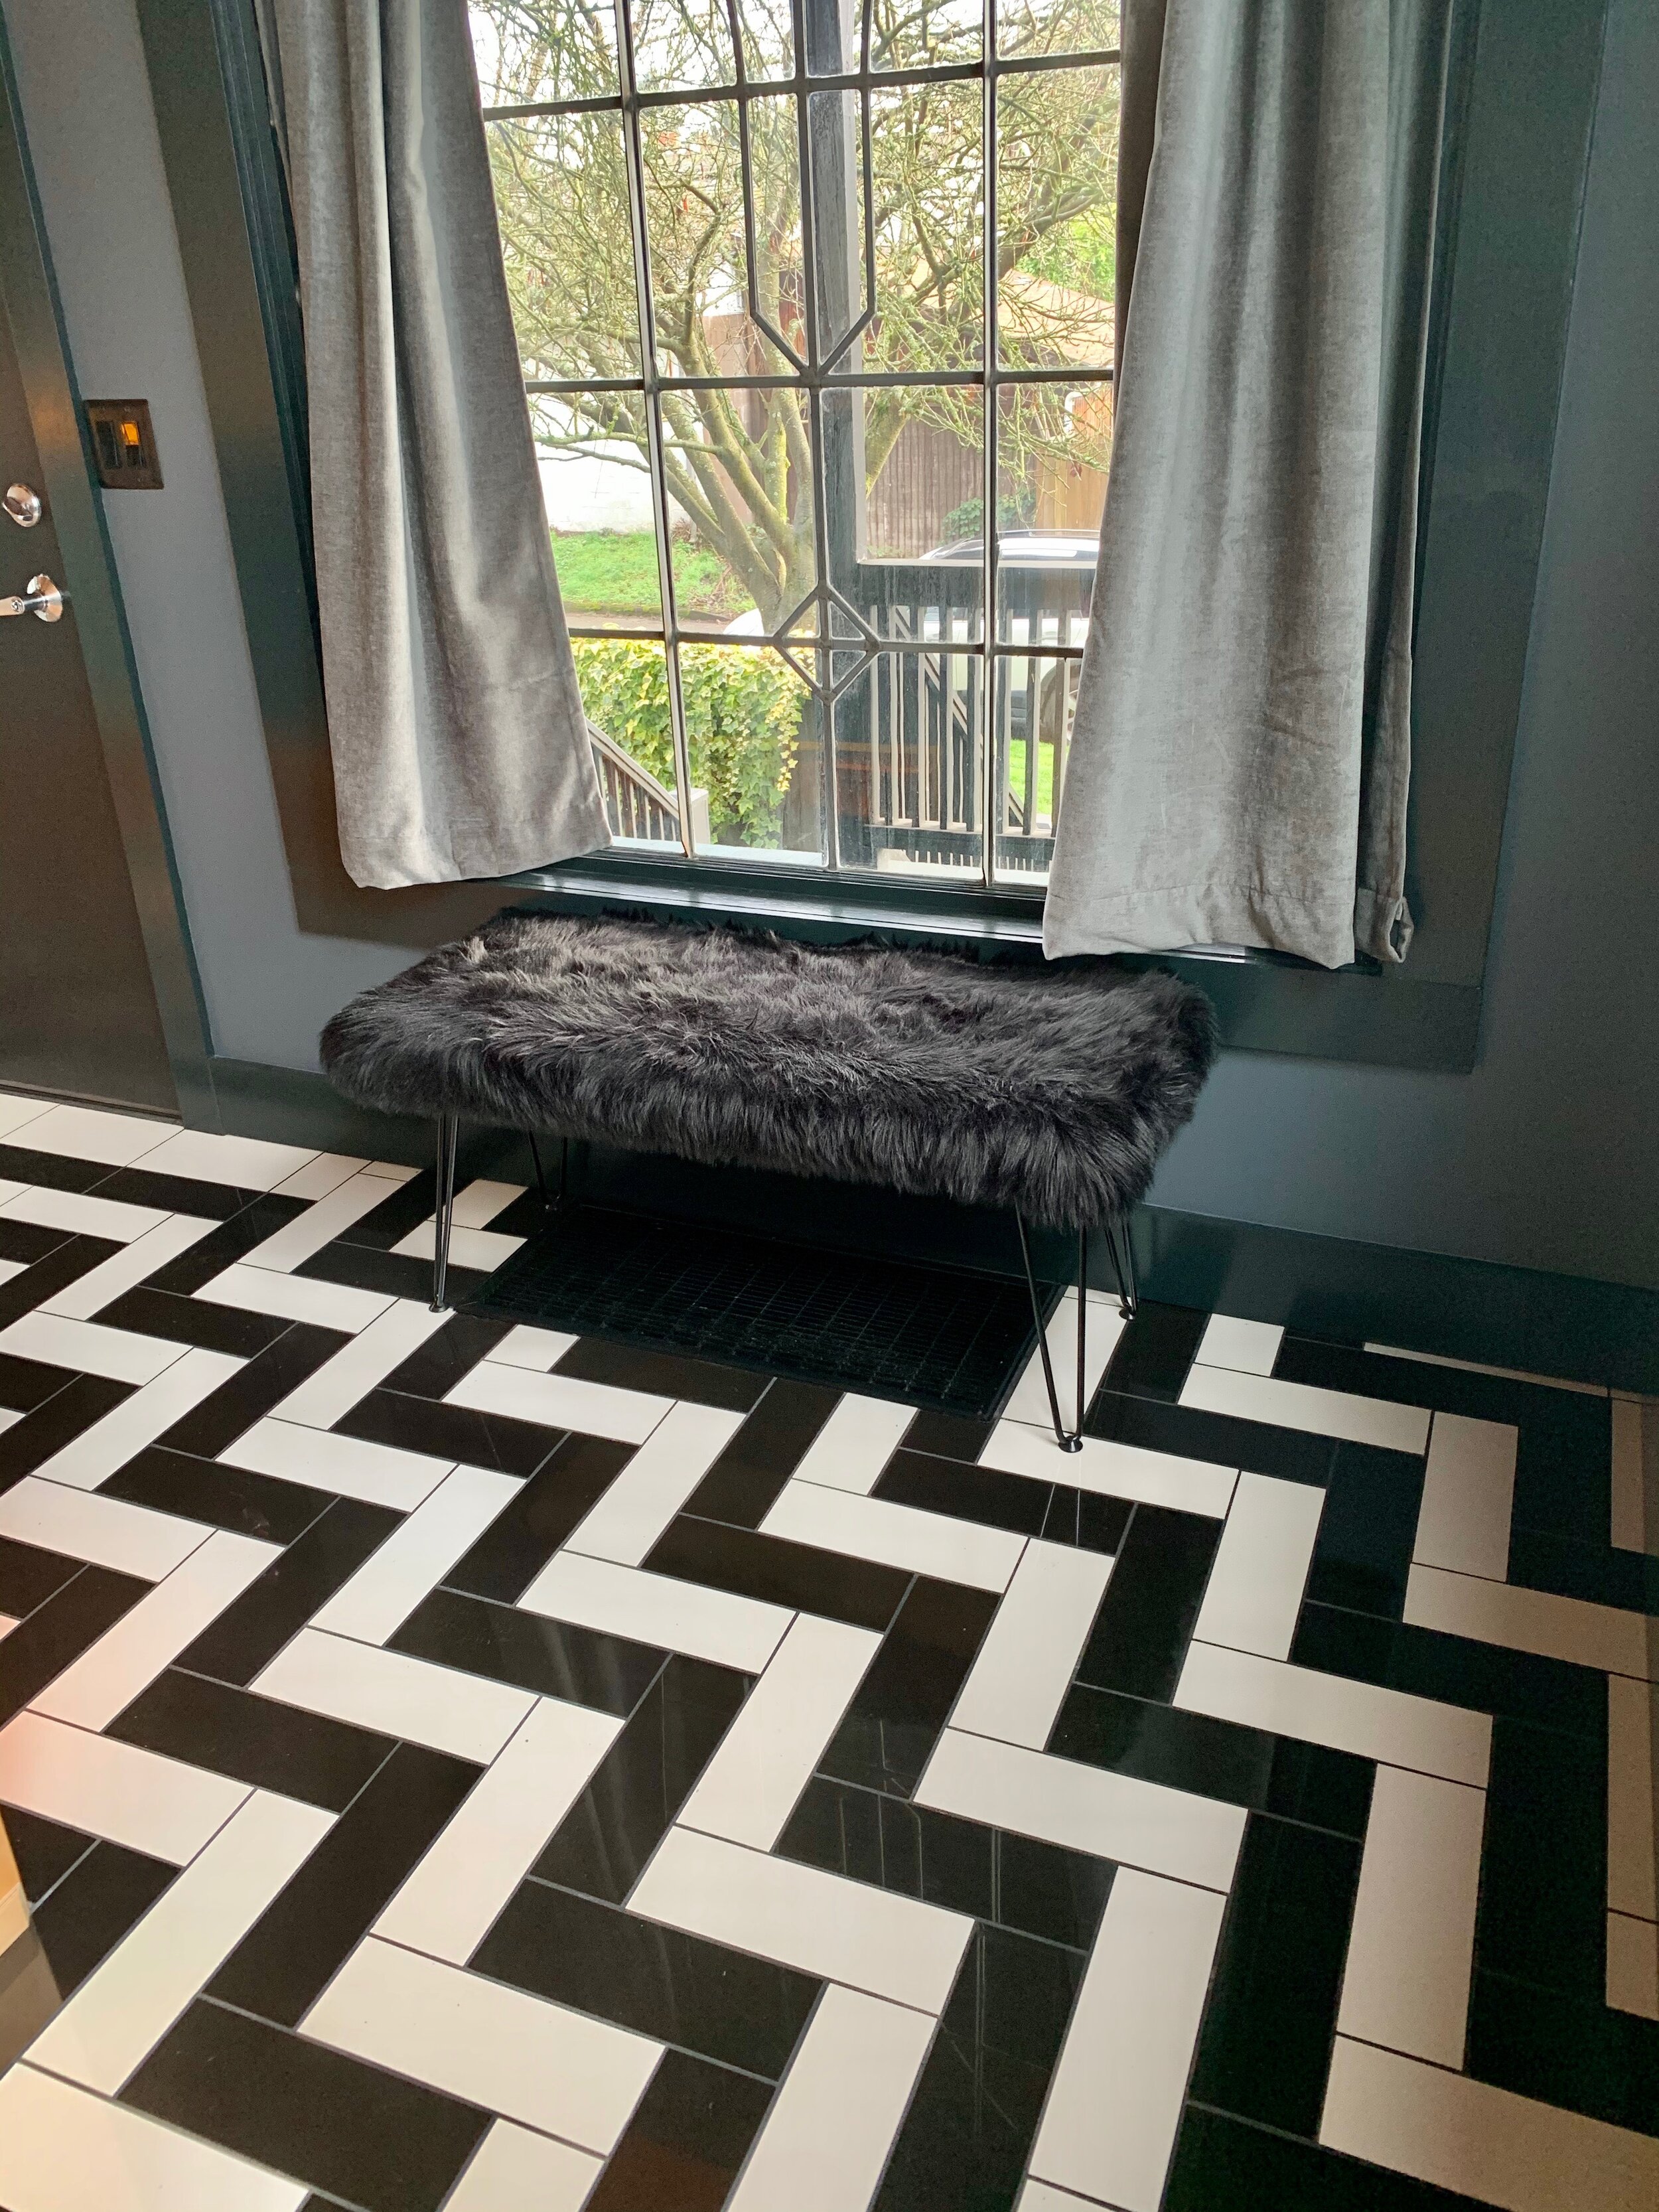
An entryway is the true transition from public to private. It should both lead you in and prepare you for the space you enter. For us, it’s the first hint of the ZIGZAG motif I chose to focus the flow of the first floor. We created a proper coat closet, a shoe hutch, and a place to put yourself together on your way out or in. The door faces a subtle magic trick: a wooden screen made of angled slats that block all sight lines (you can’t see inside, the people inside can’t see you). It feels like a hall. As you round the corner, shafts of the room become visible through those slats. Sounds elaborate…and it was/is. With such a small footprint to work with, every piece has dual function.
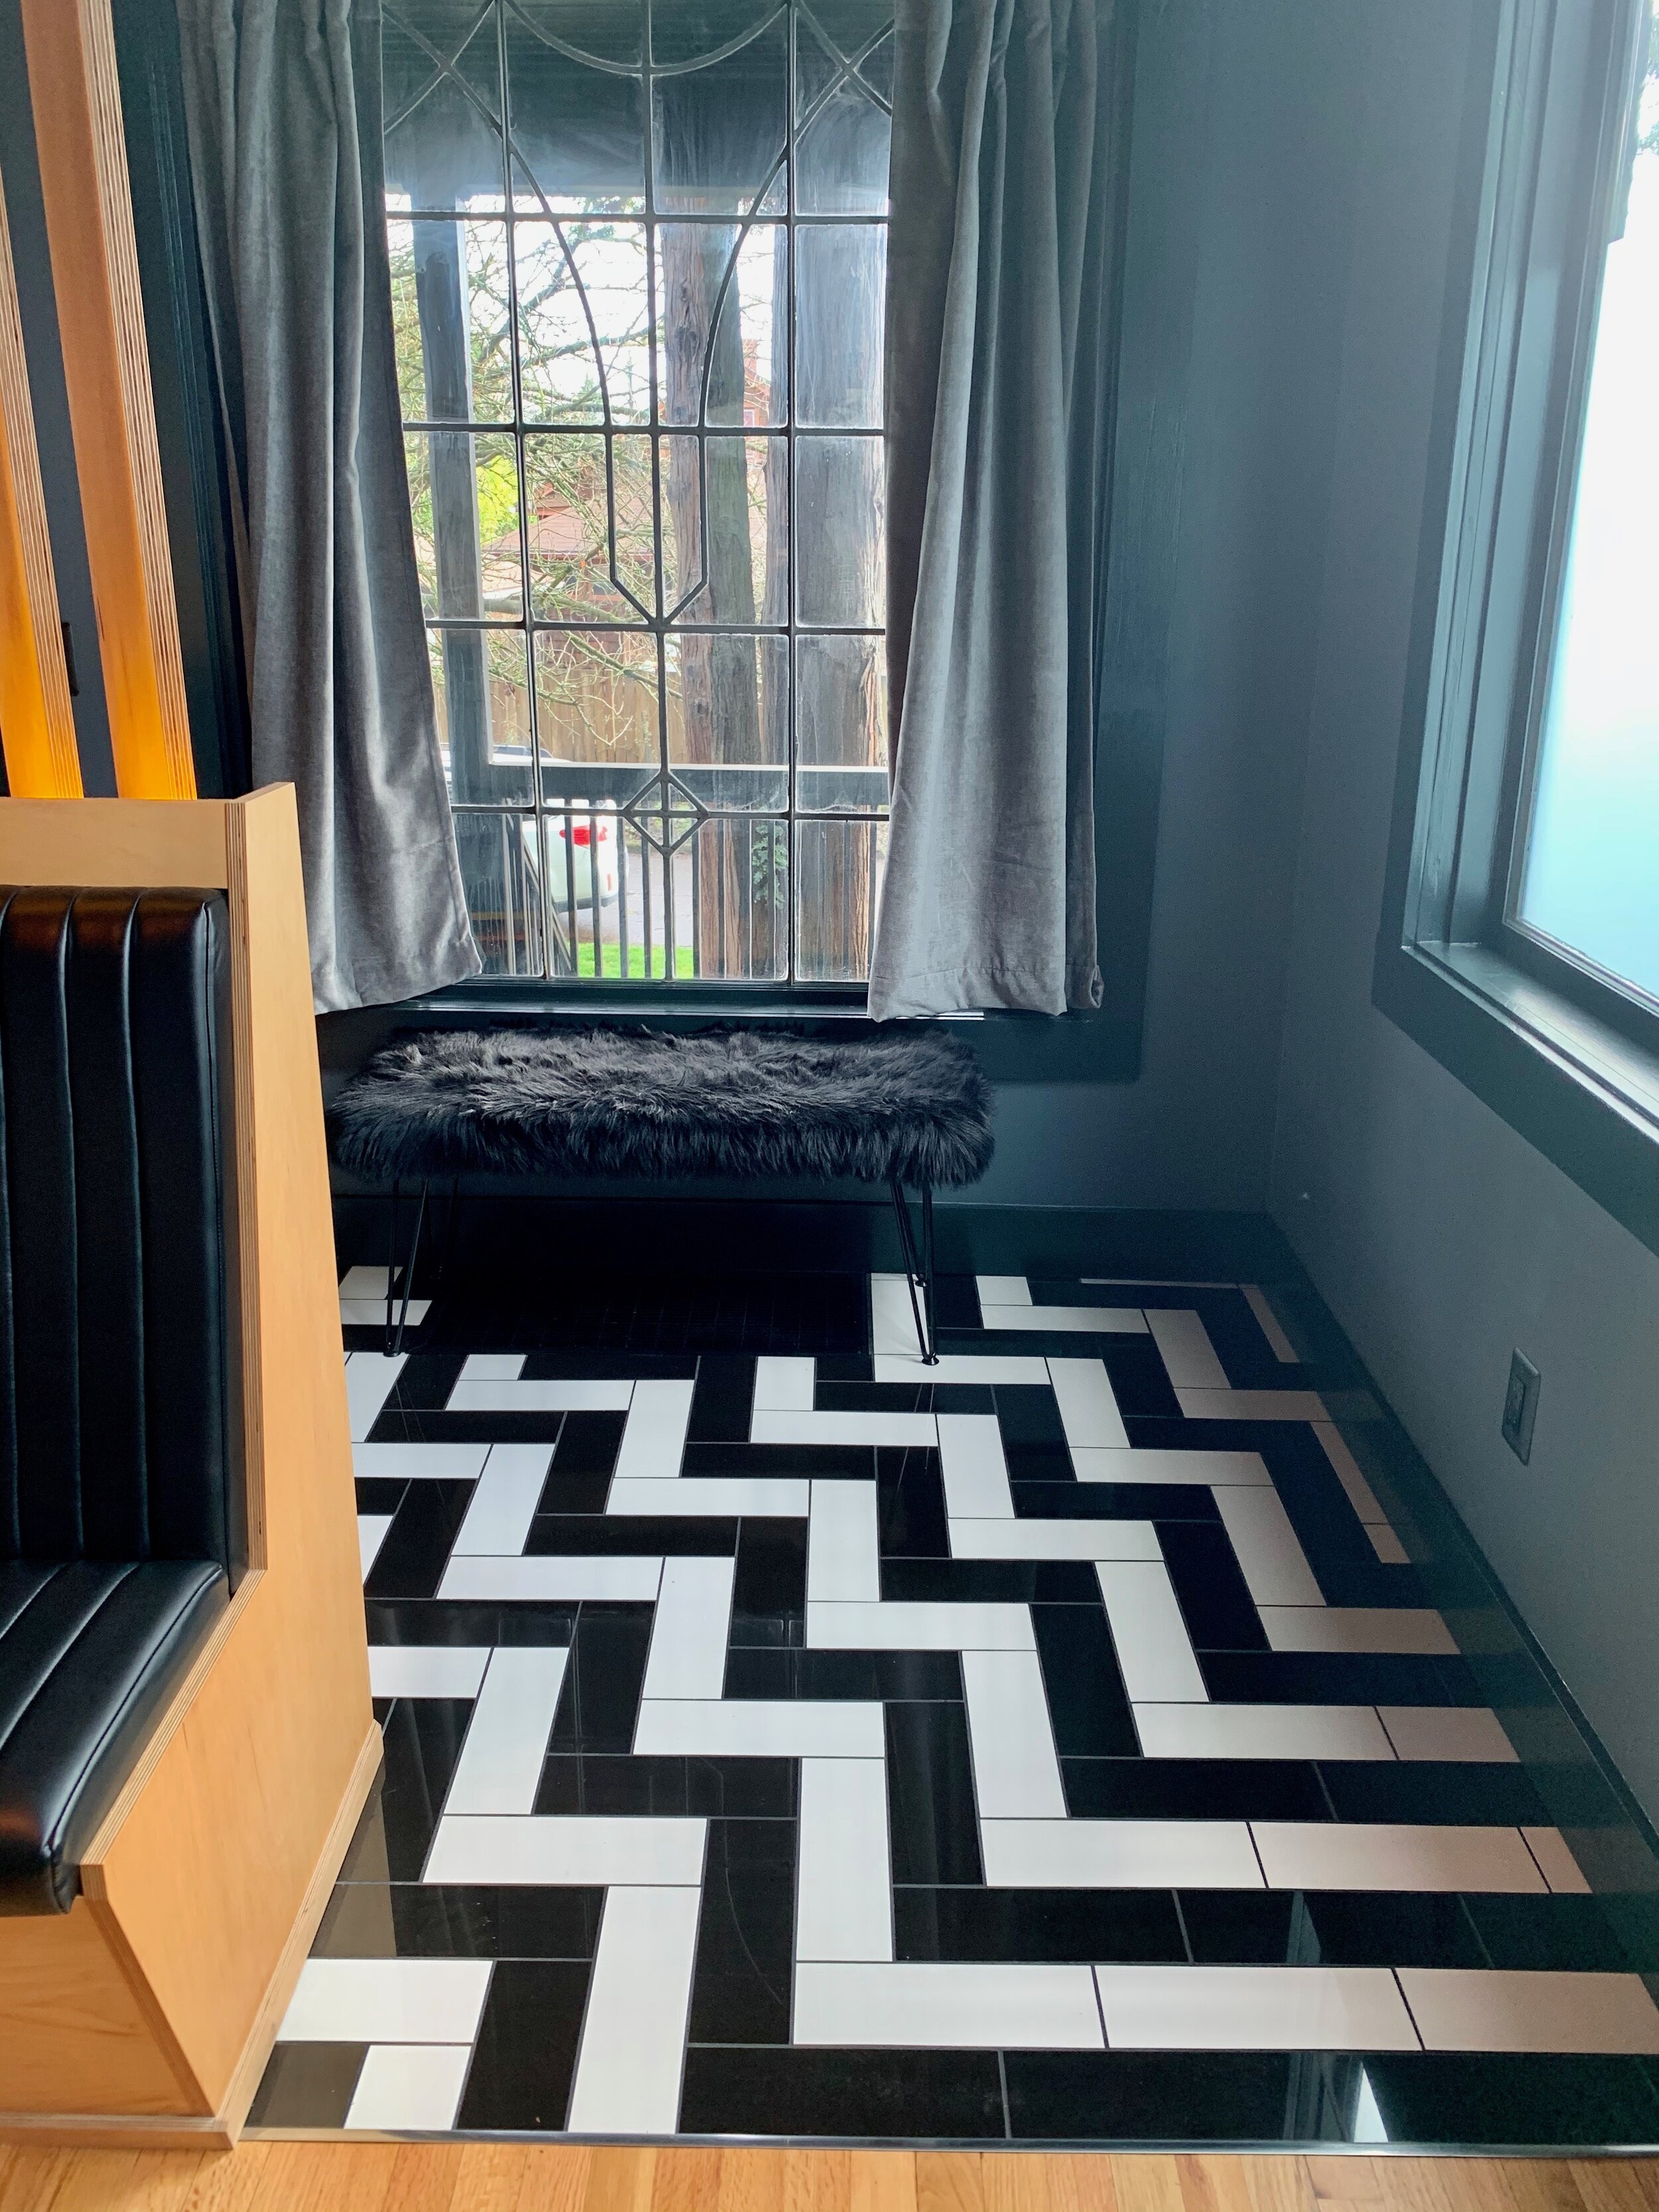
TILE INSPO:
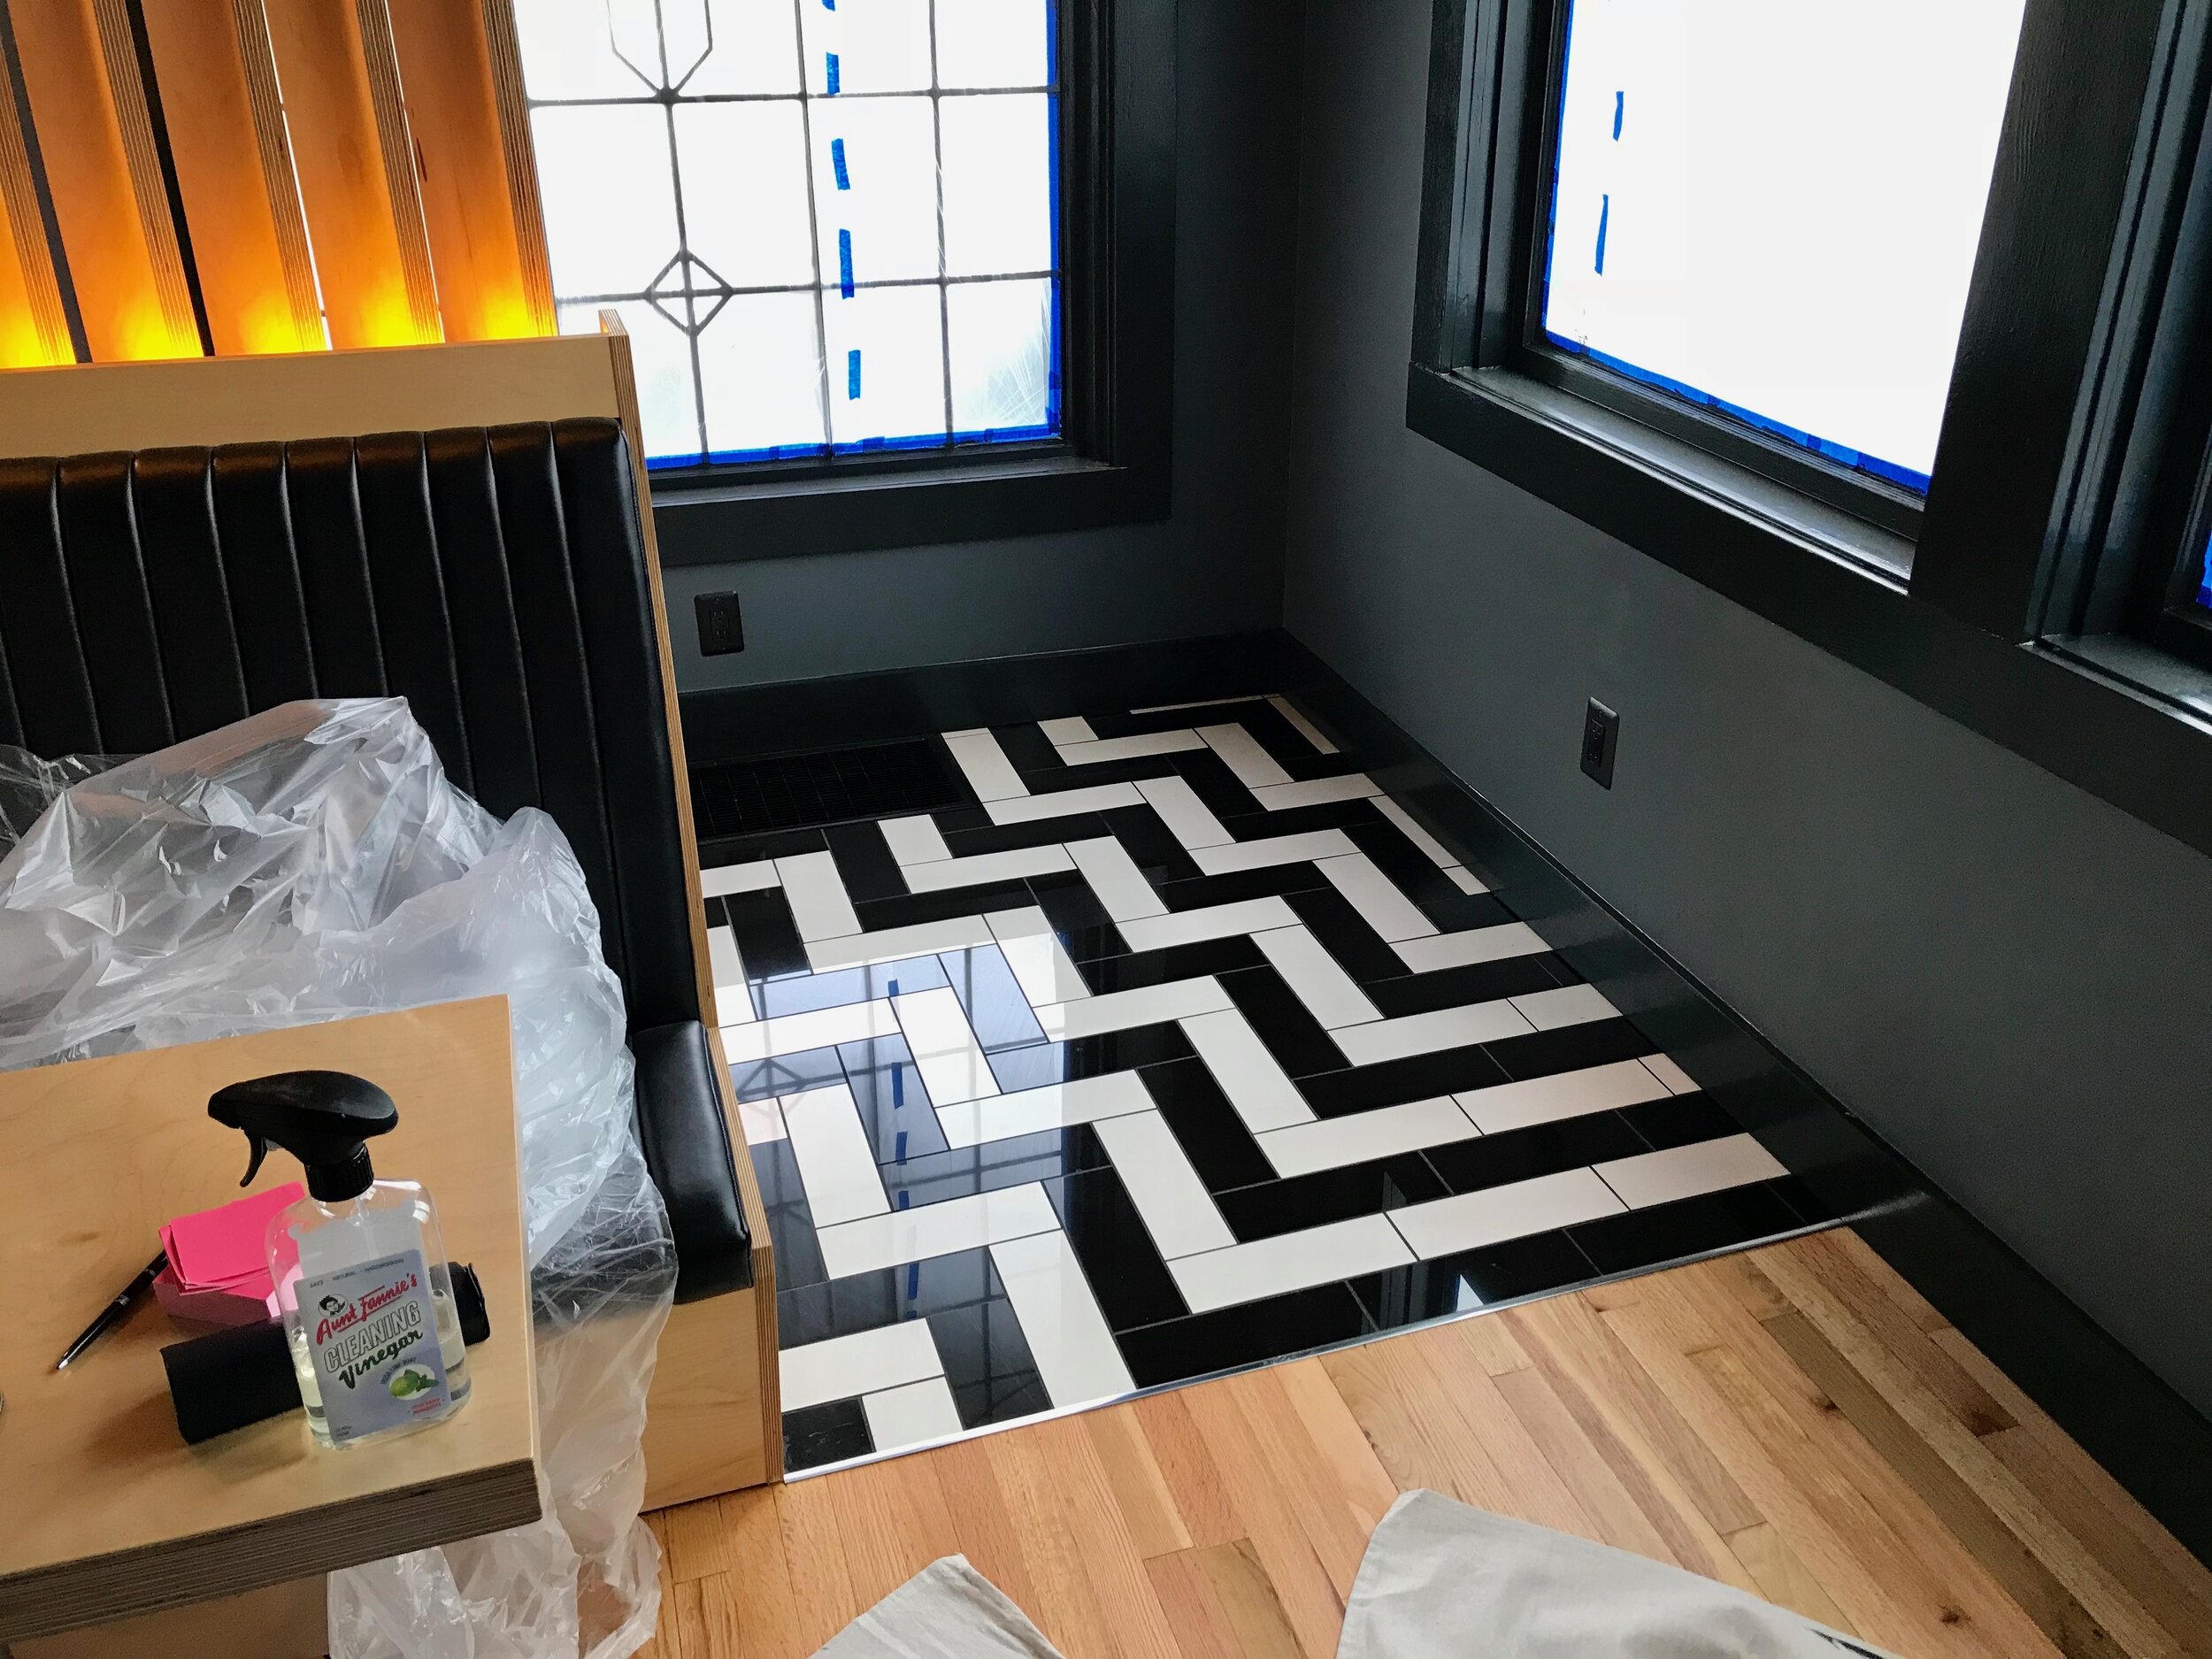
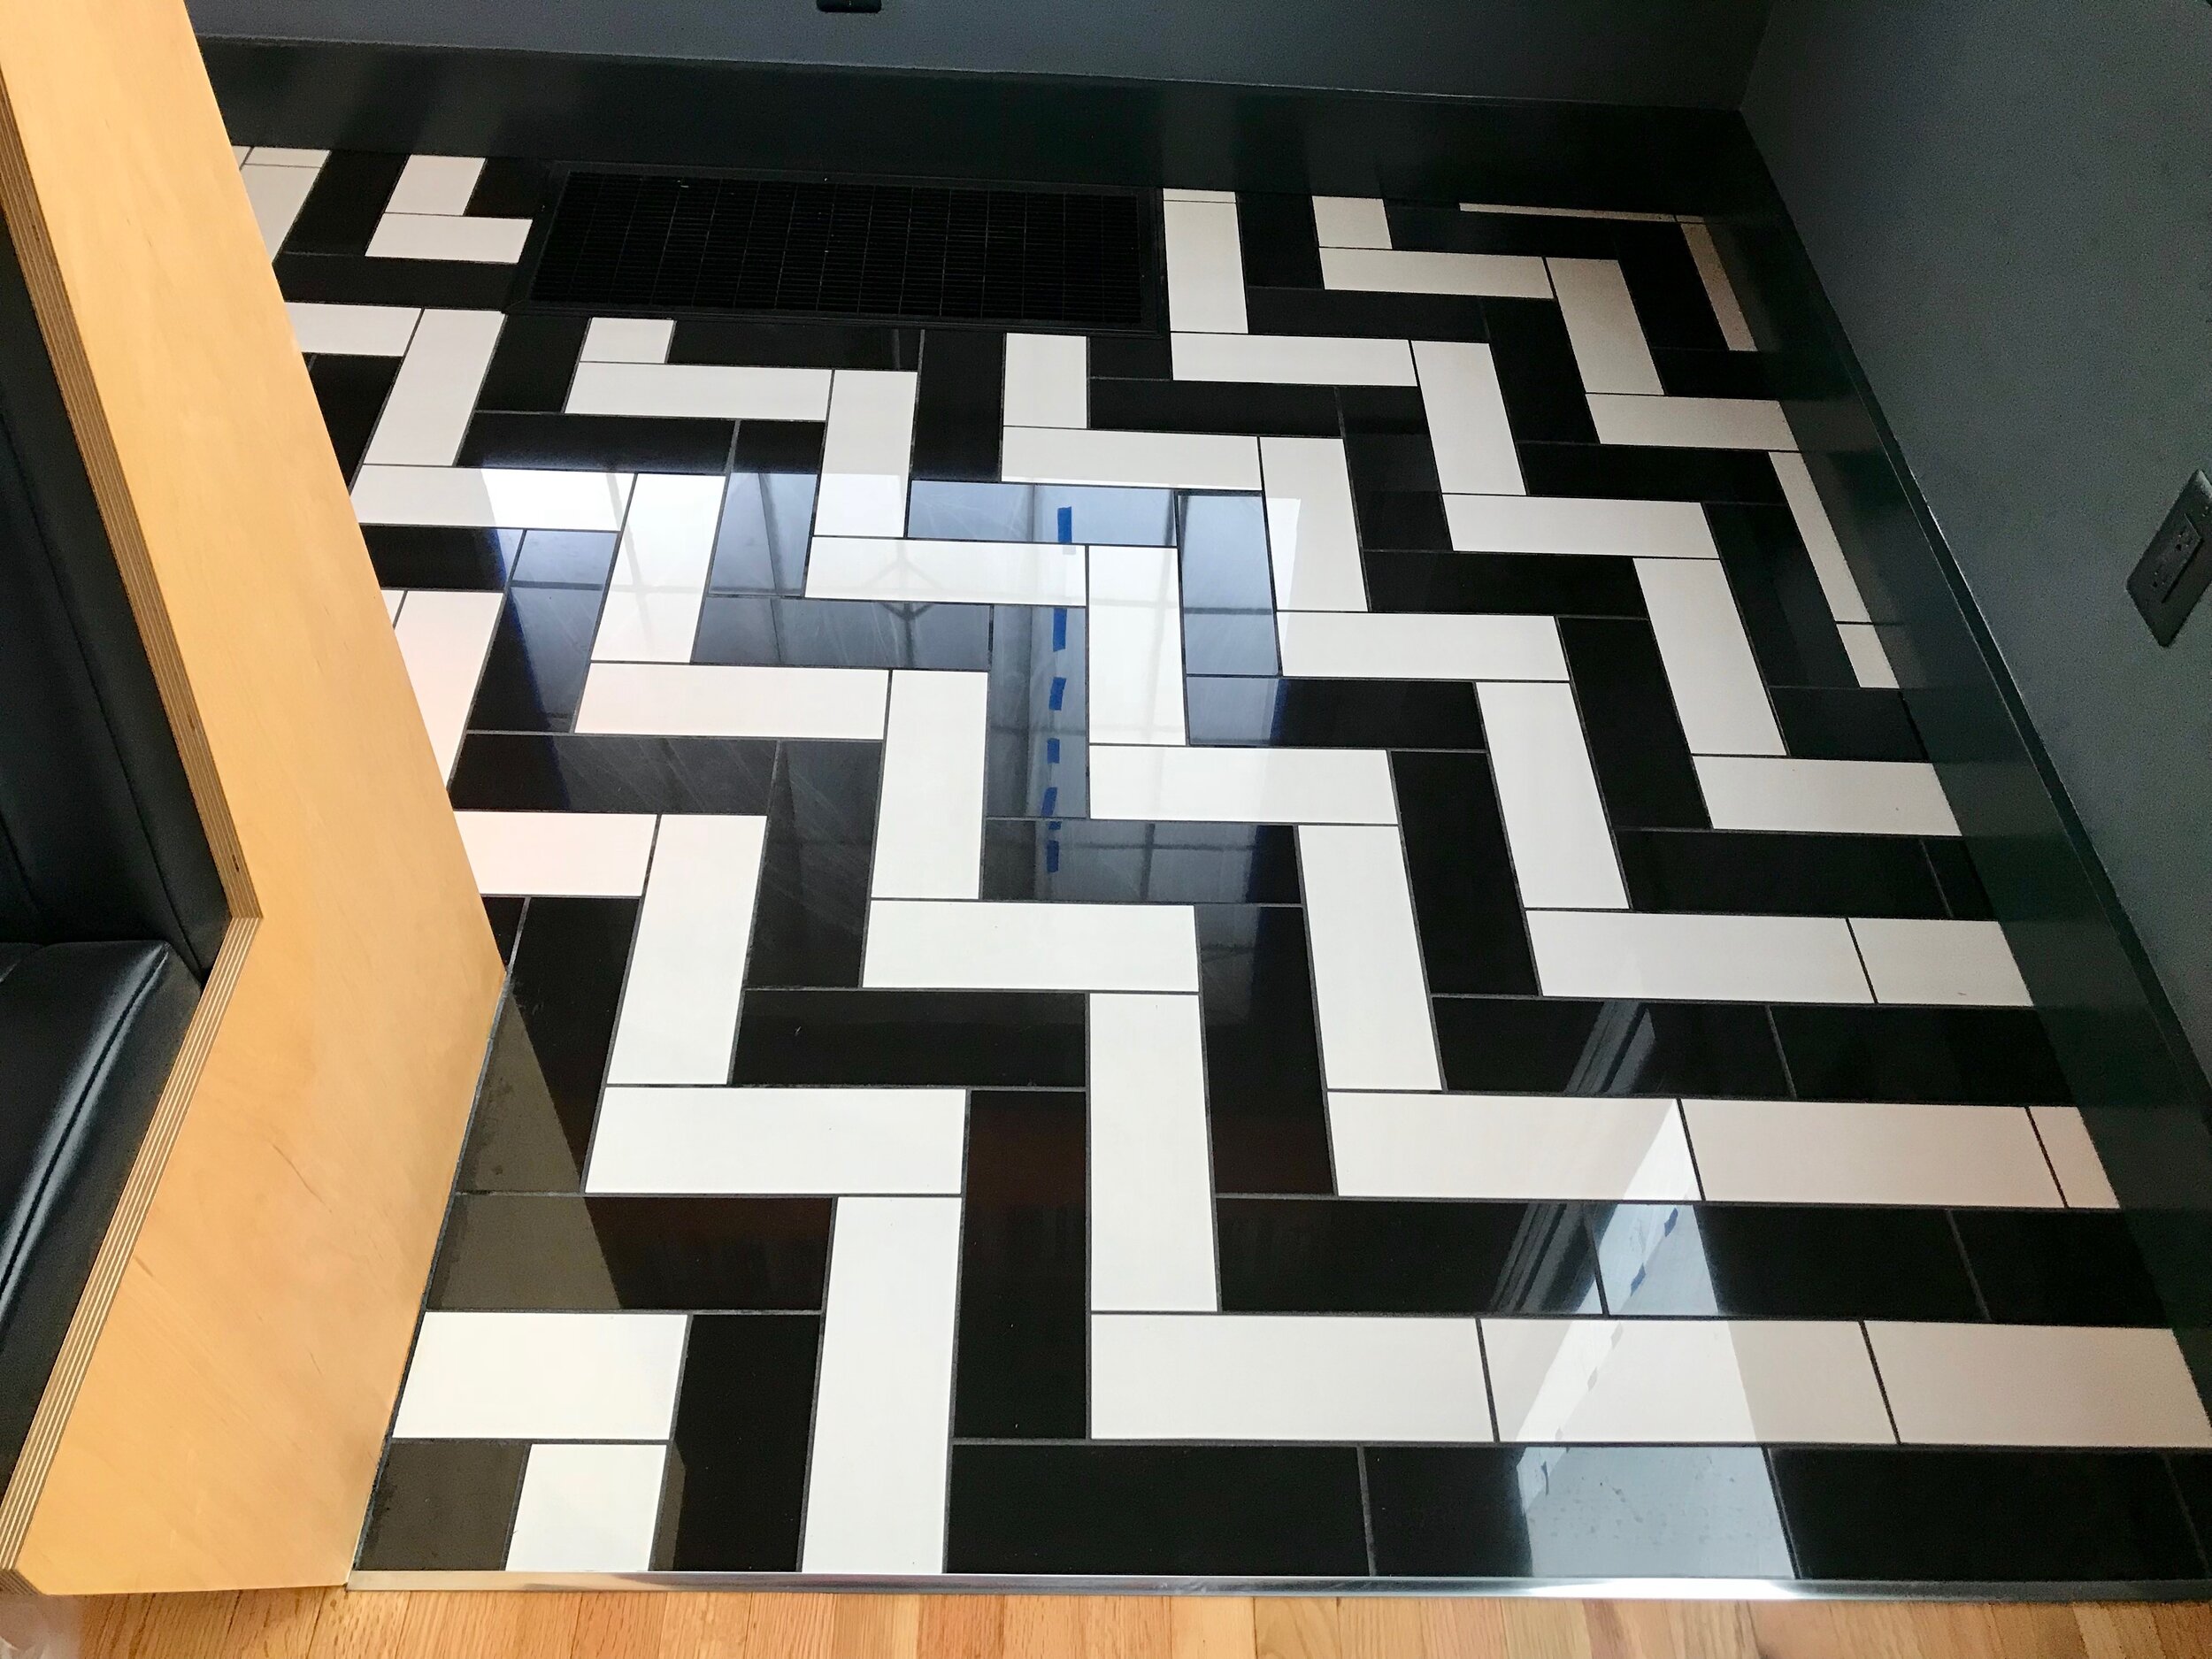
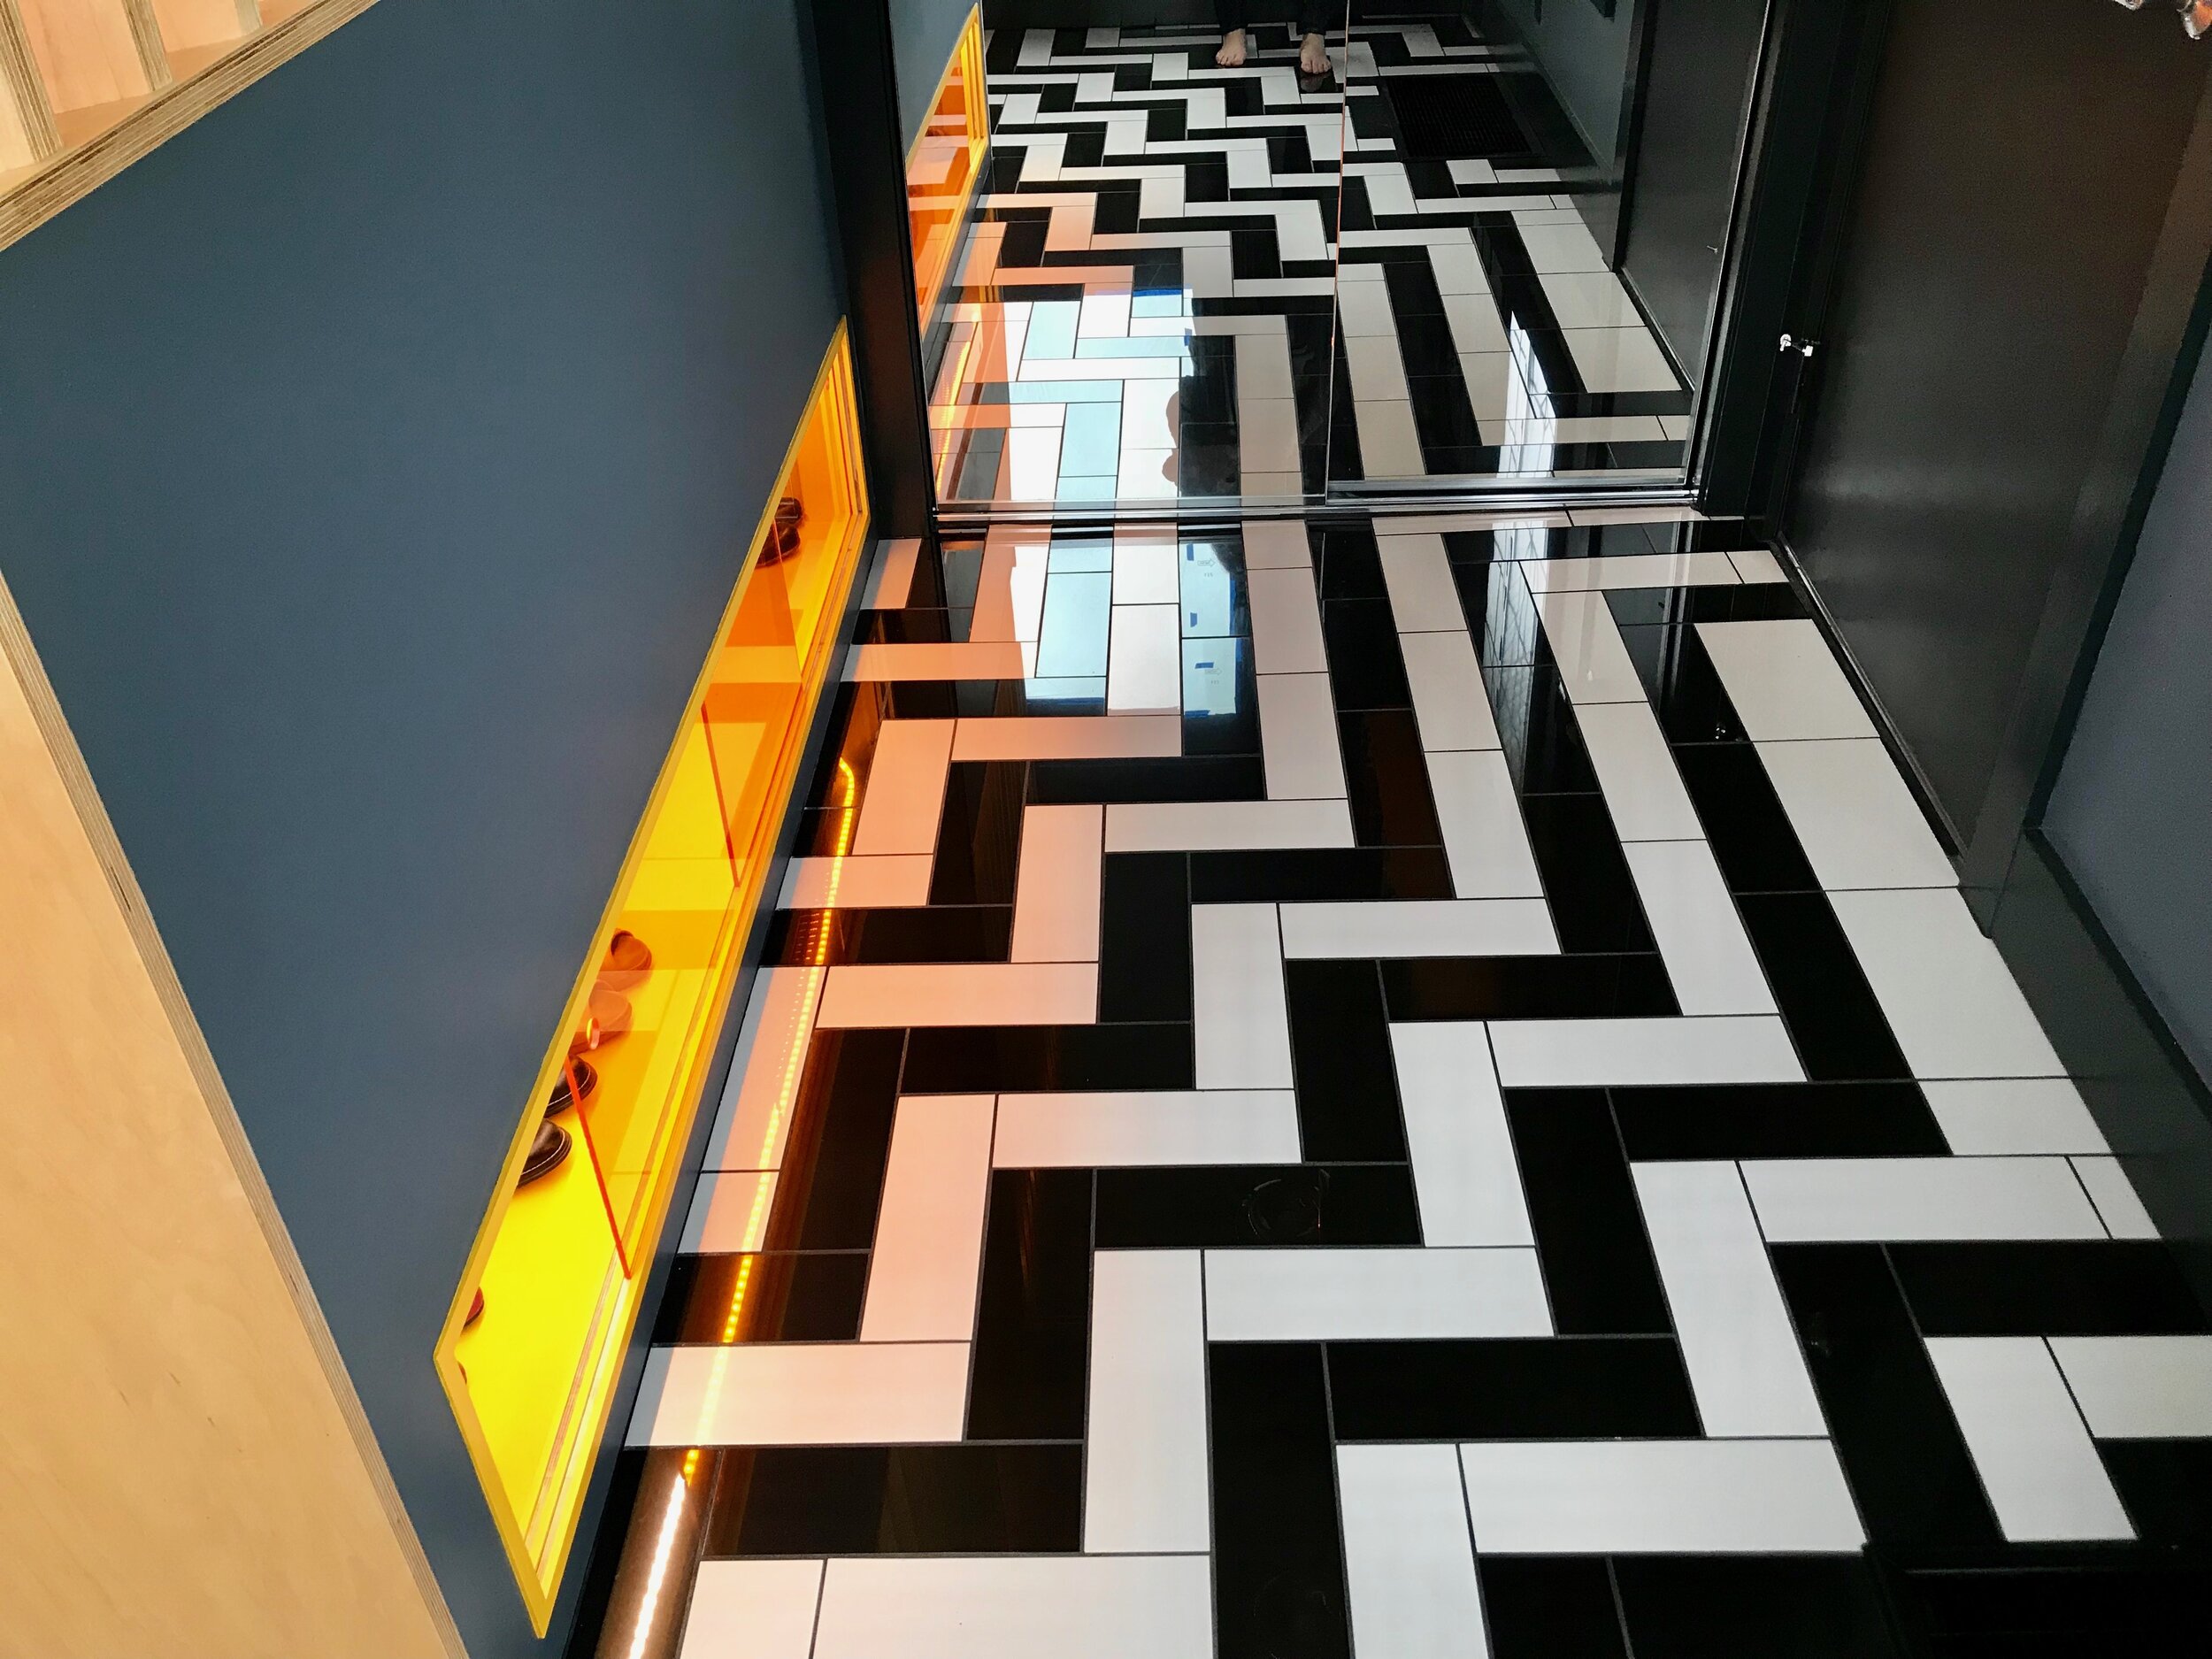
Inspiration came from a snapshot I took while traveling in Denmark in 2014. THE LOG LADY is a TWIN PEAKS themed bar in Copenhagen named after the psychic on that show. While waiting for the loo, I spied the painted floor meant to recall the red room from TWIN PEAKS. On the show, the red room is an extra-dimensional waiting room where people speak backwards. It felt like the perfect transitional space: crooked, but straight. I filed that in my mind for YEARS. Incidentally, I grew up in Issaquah, just a few miles from Snoqualmie where the show was filmed in the 80’s.


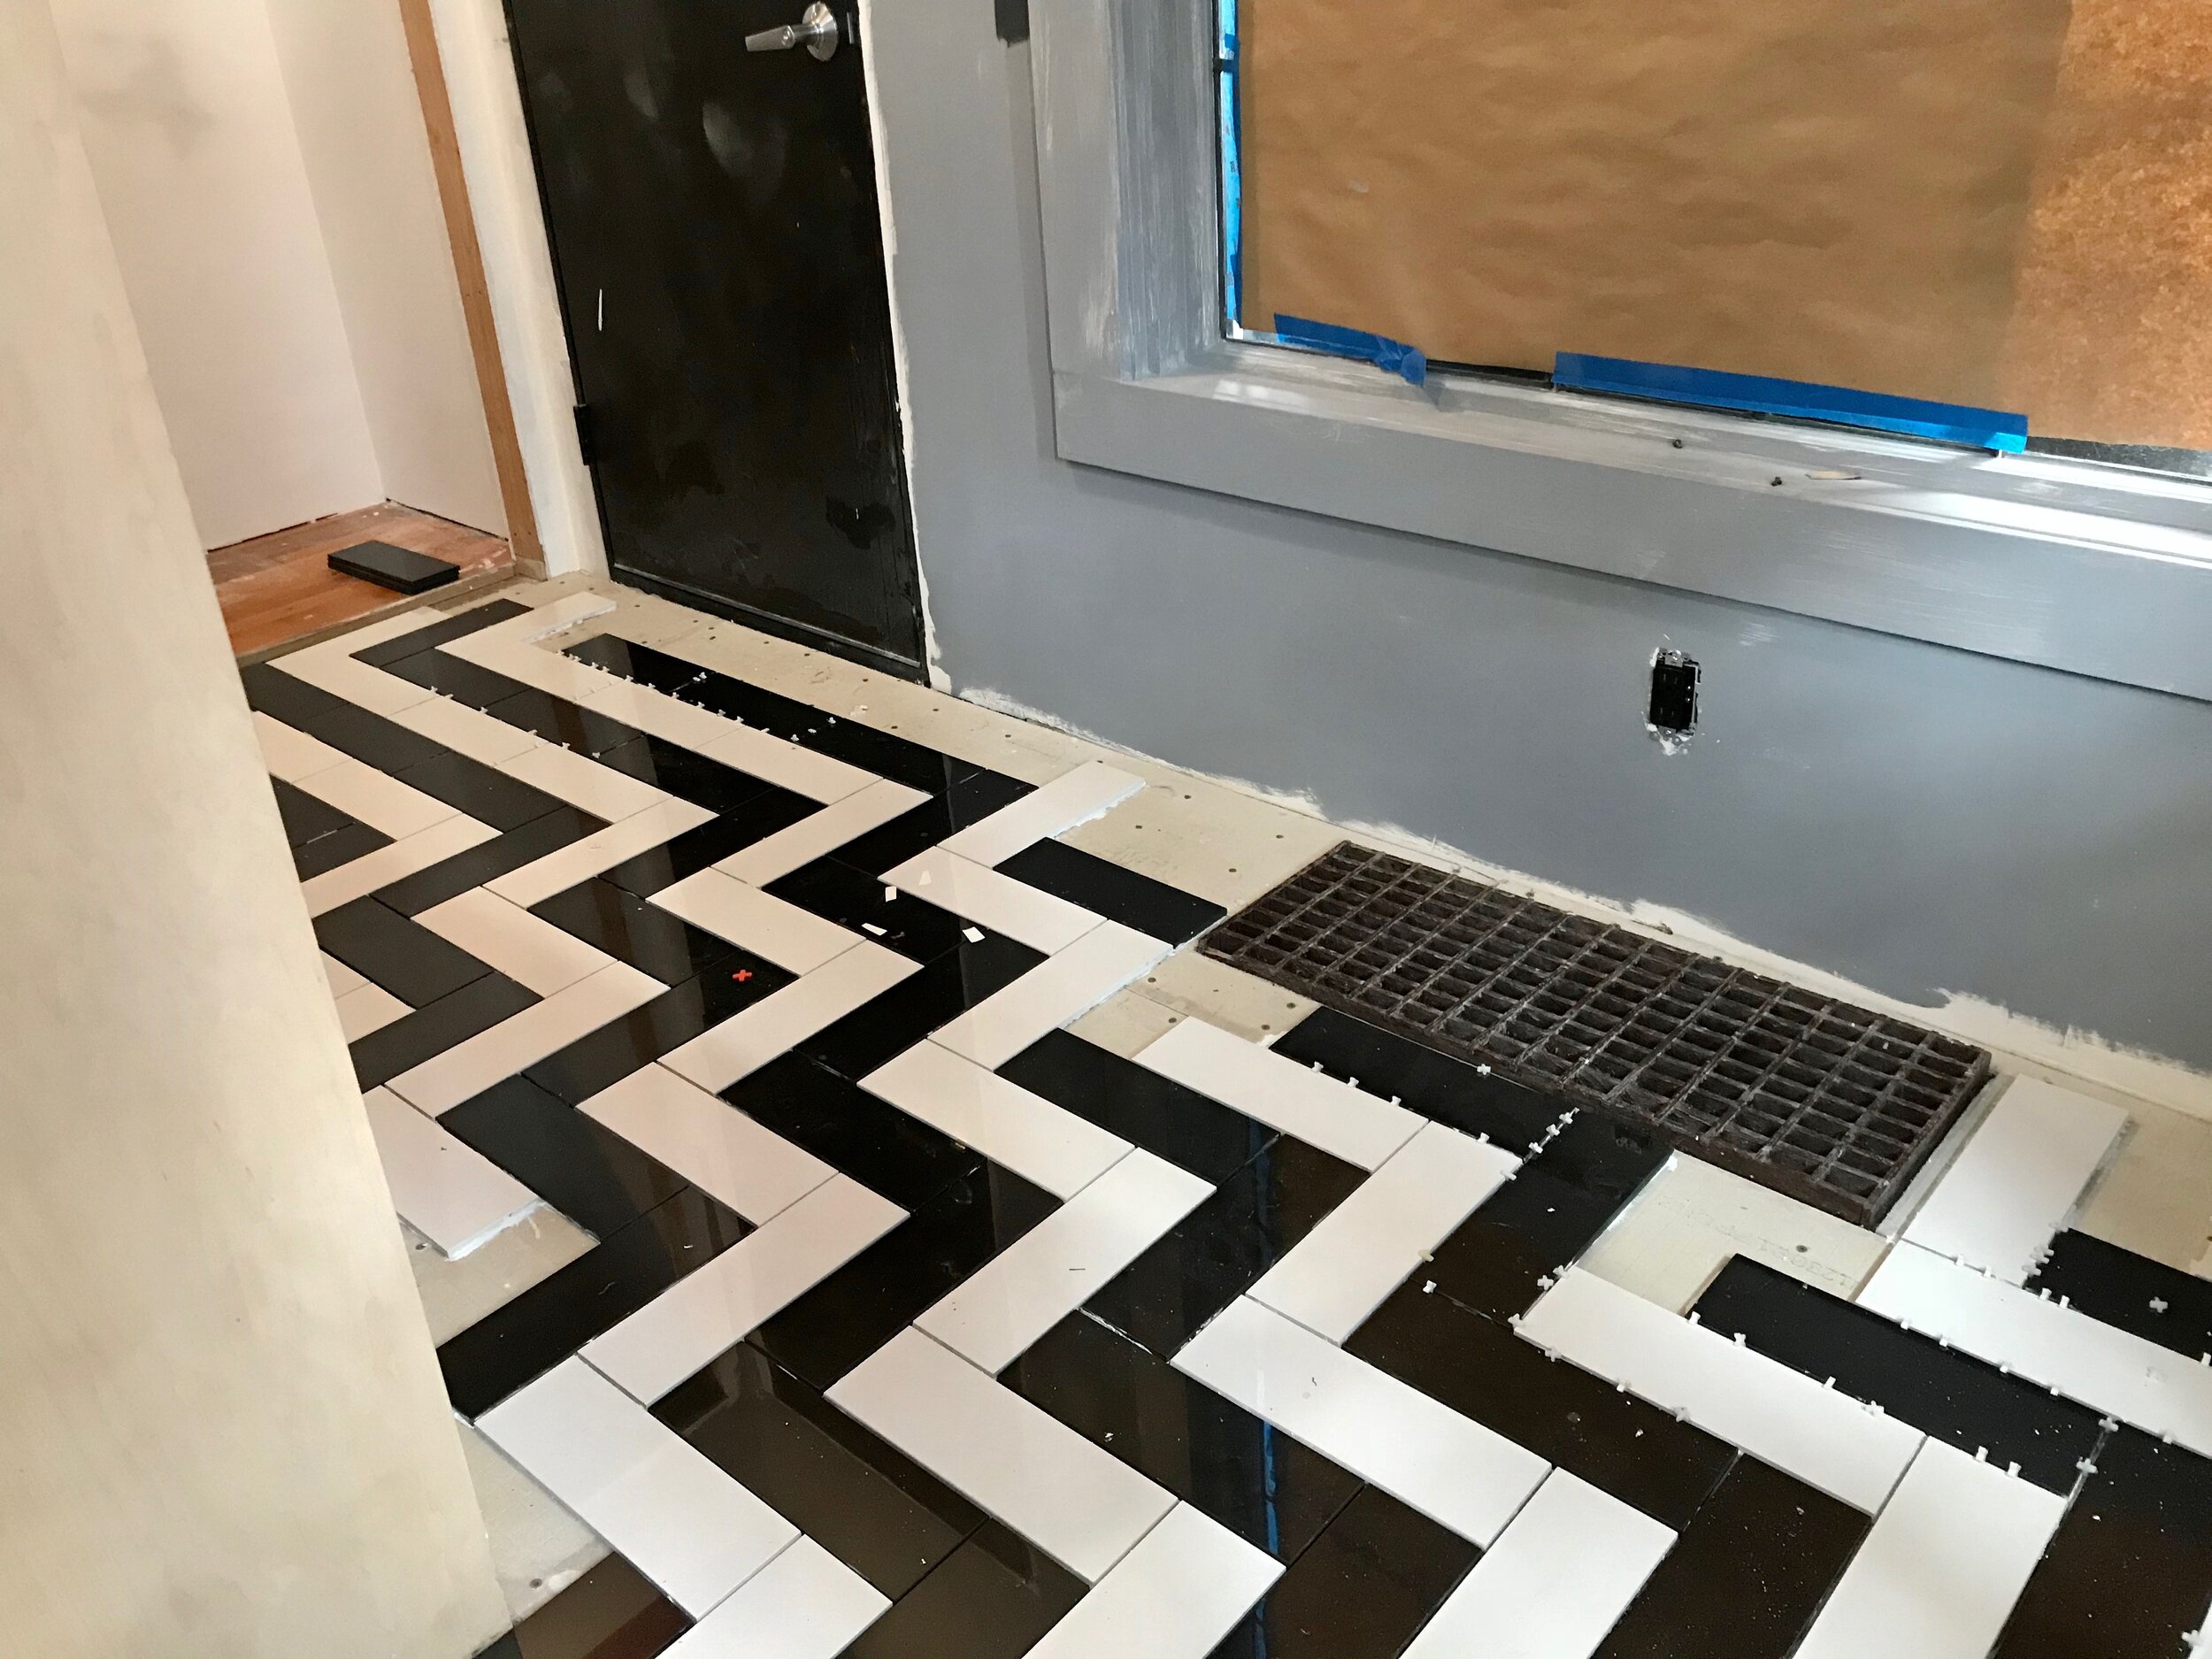
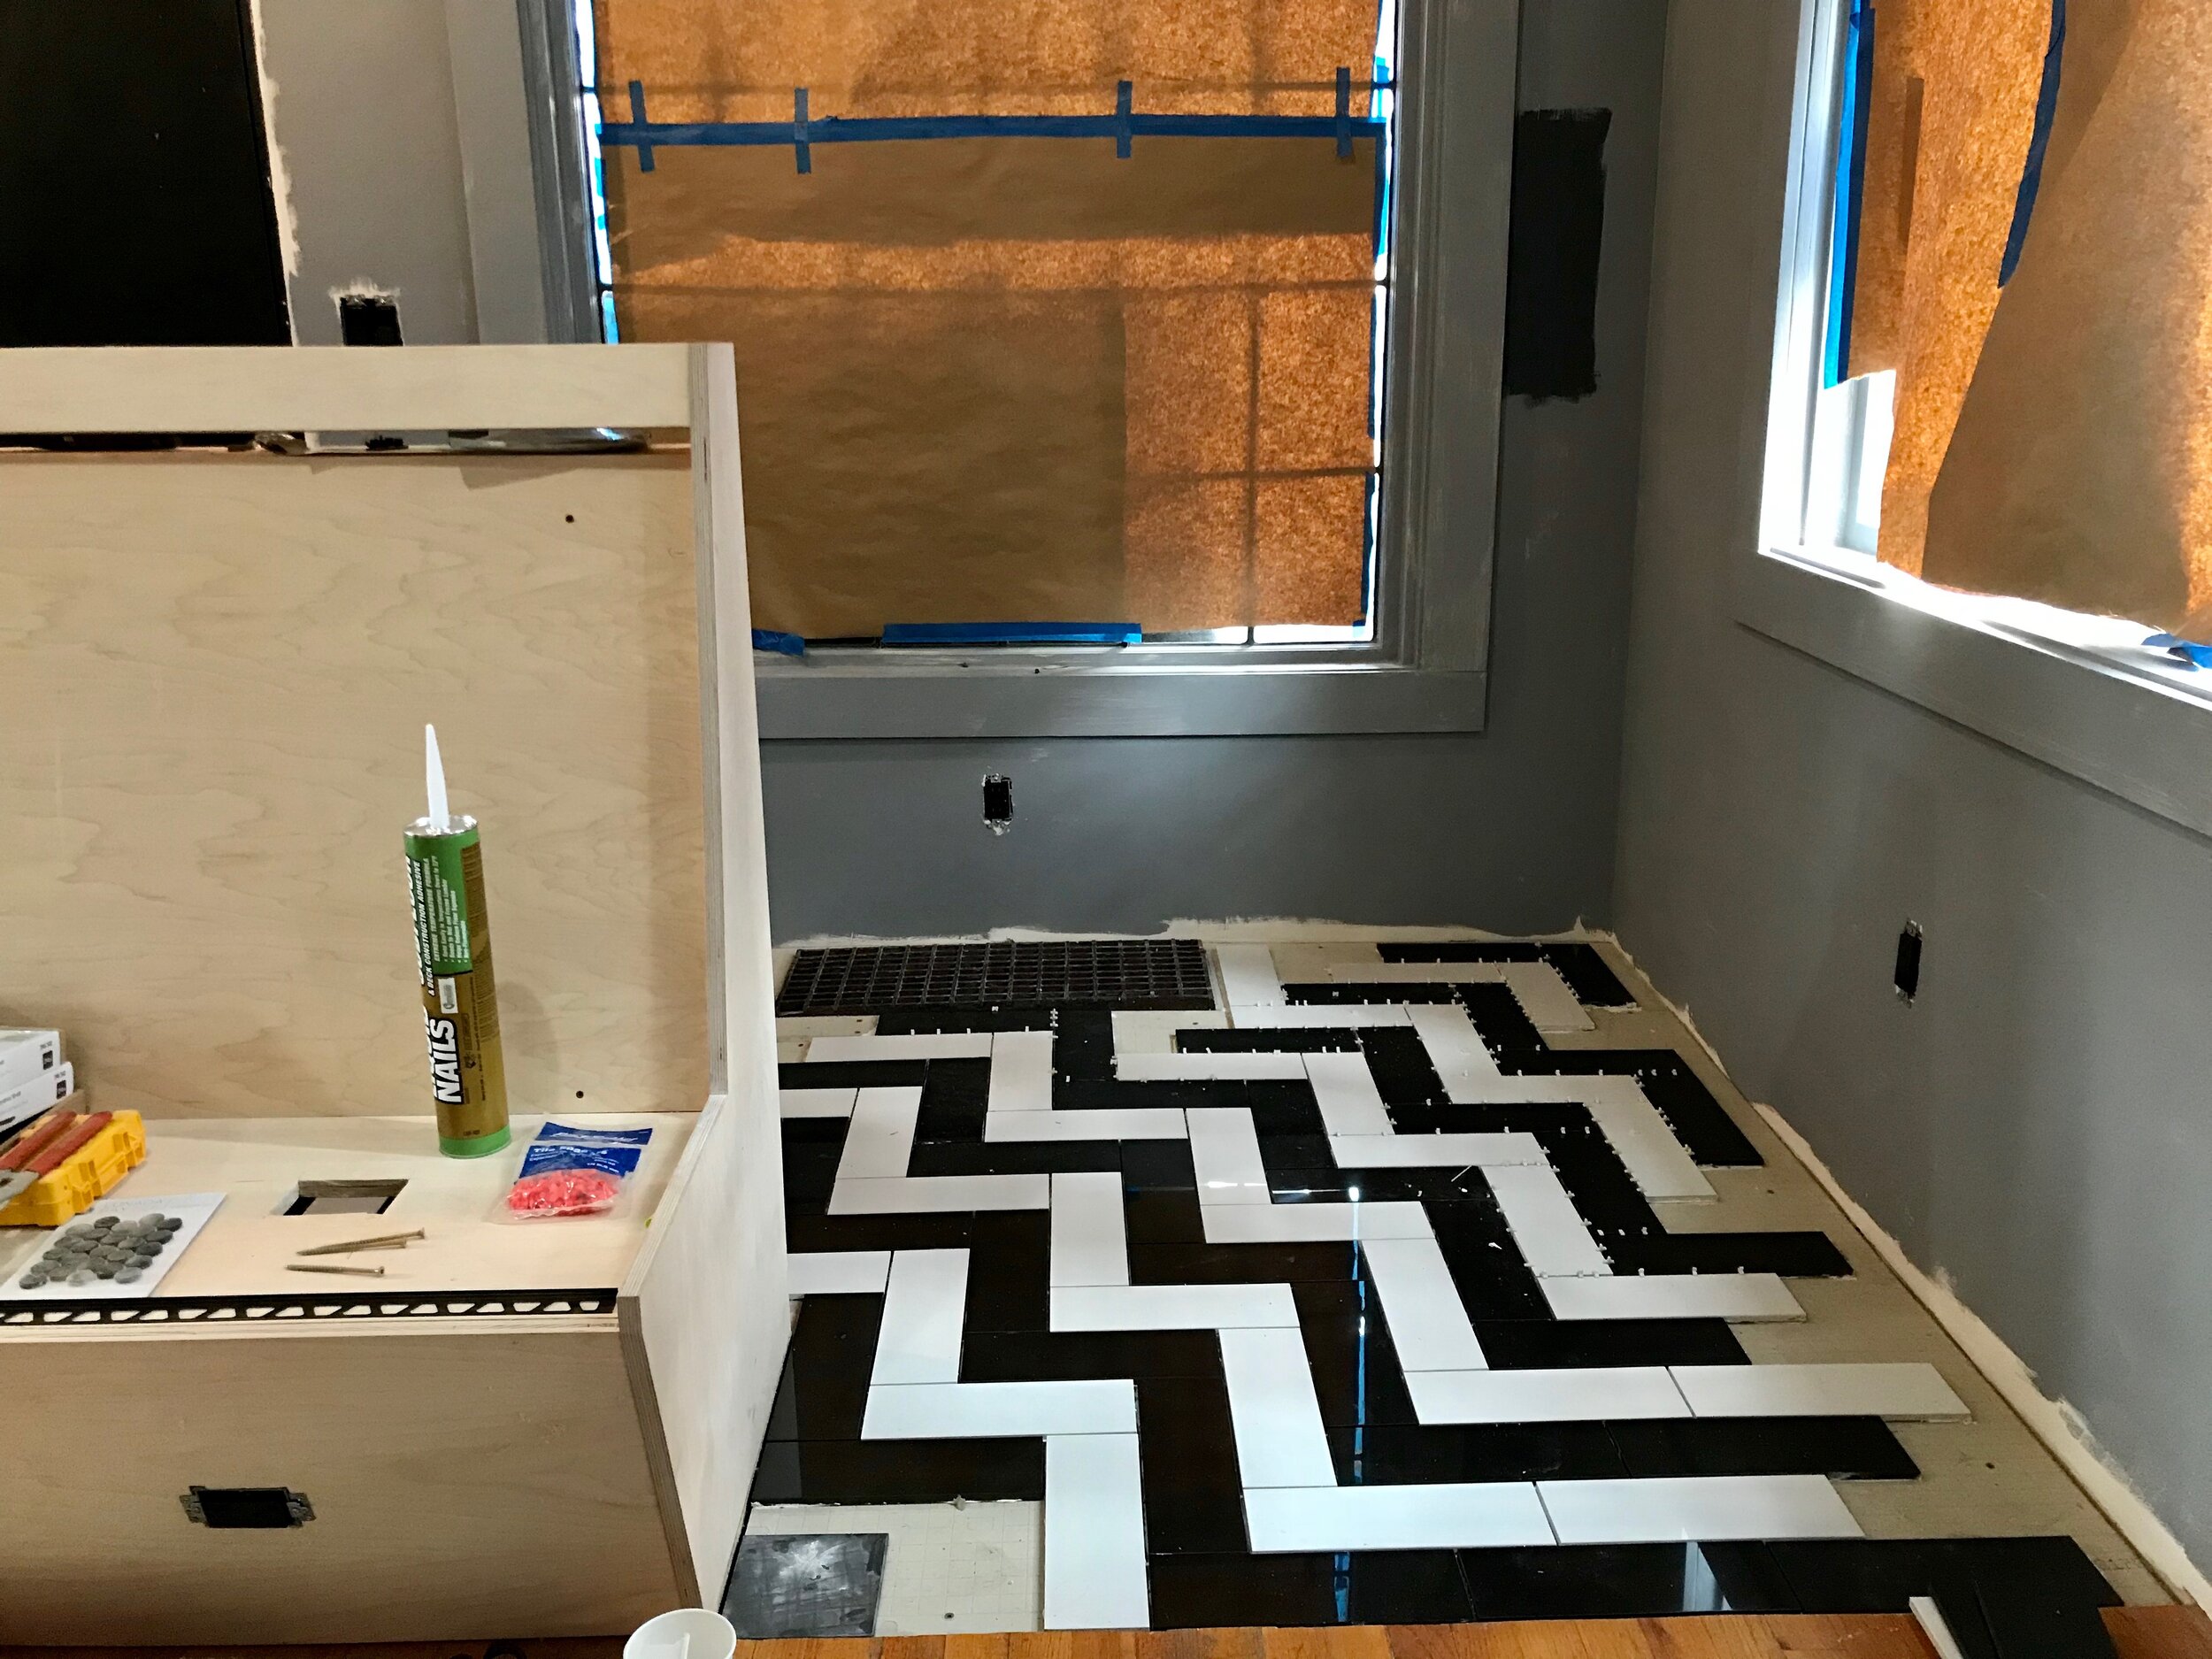
DIY TILE:
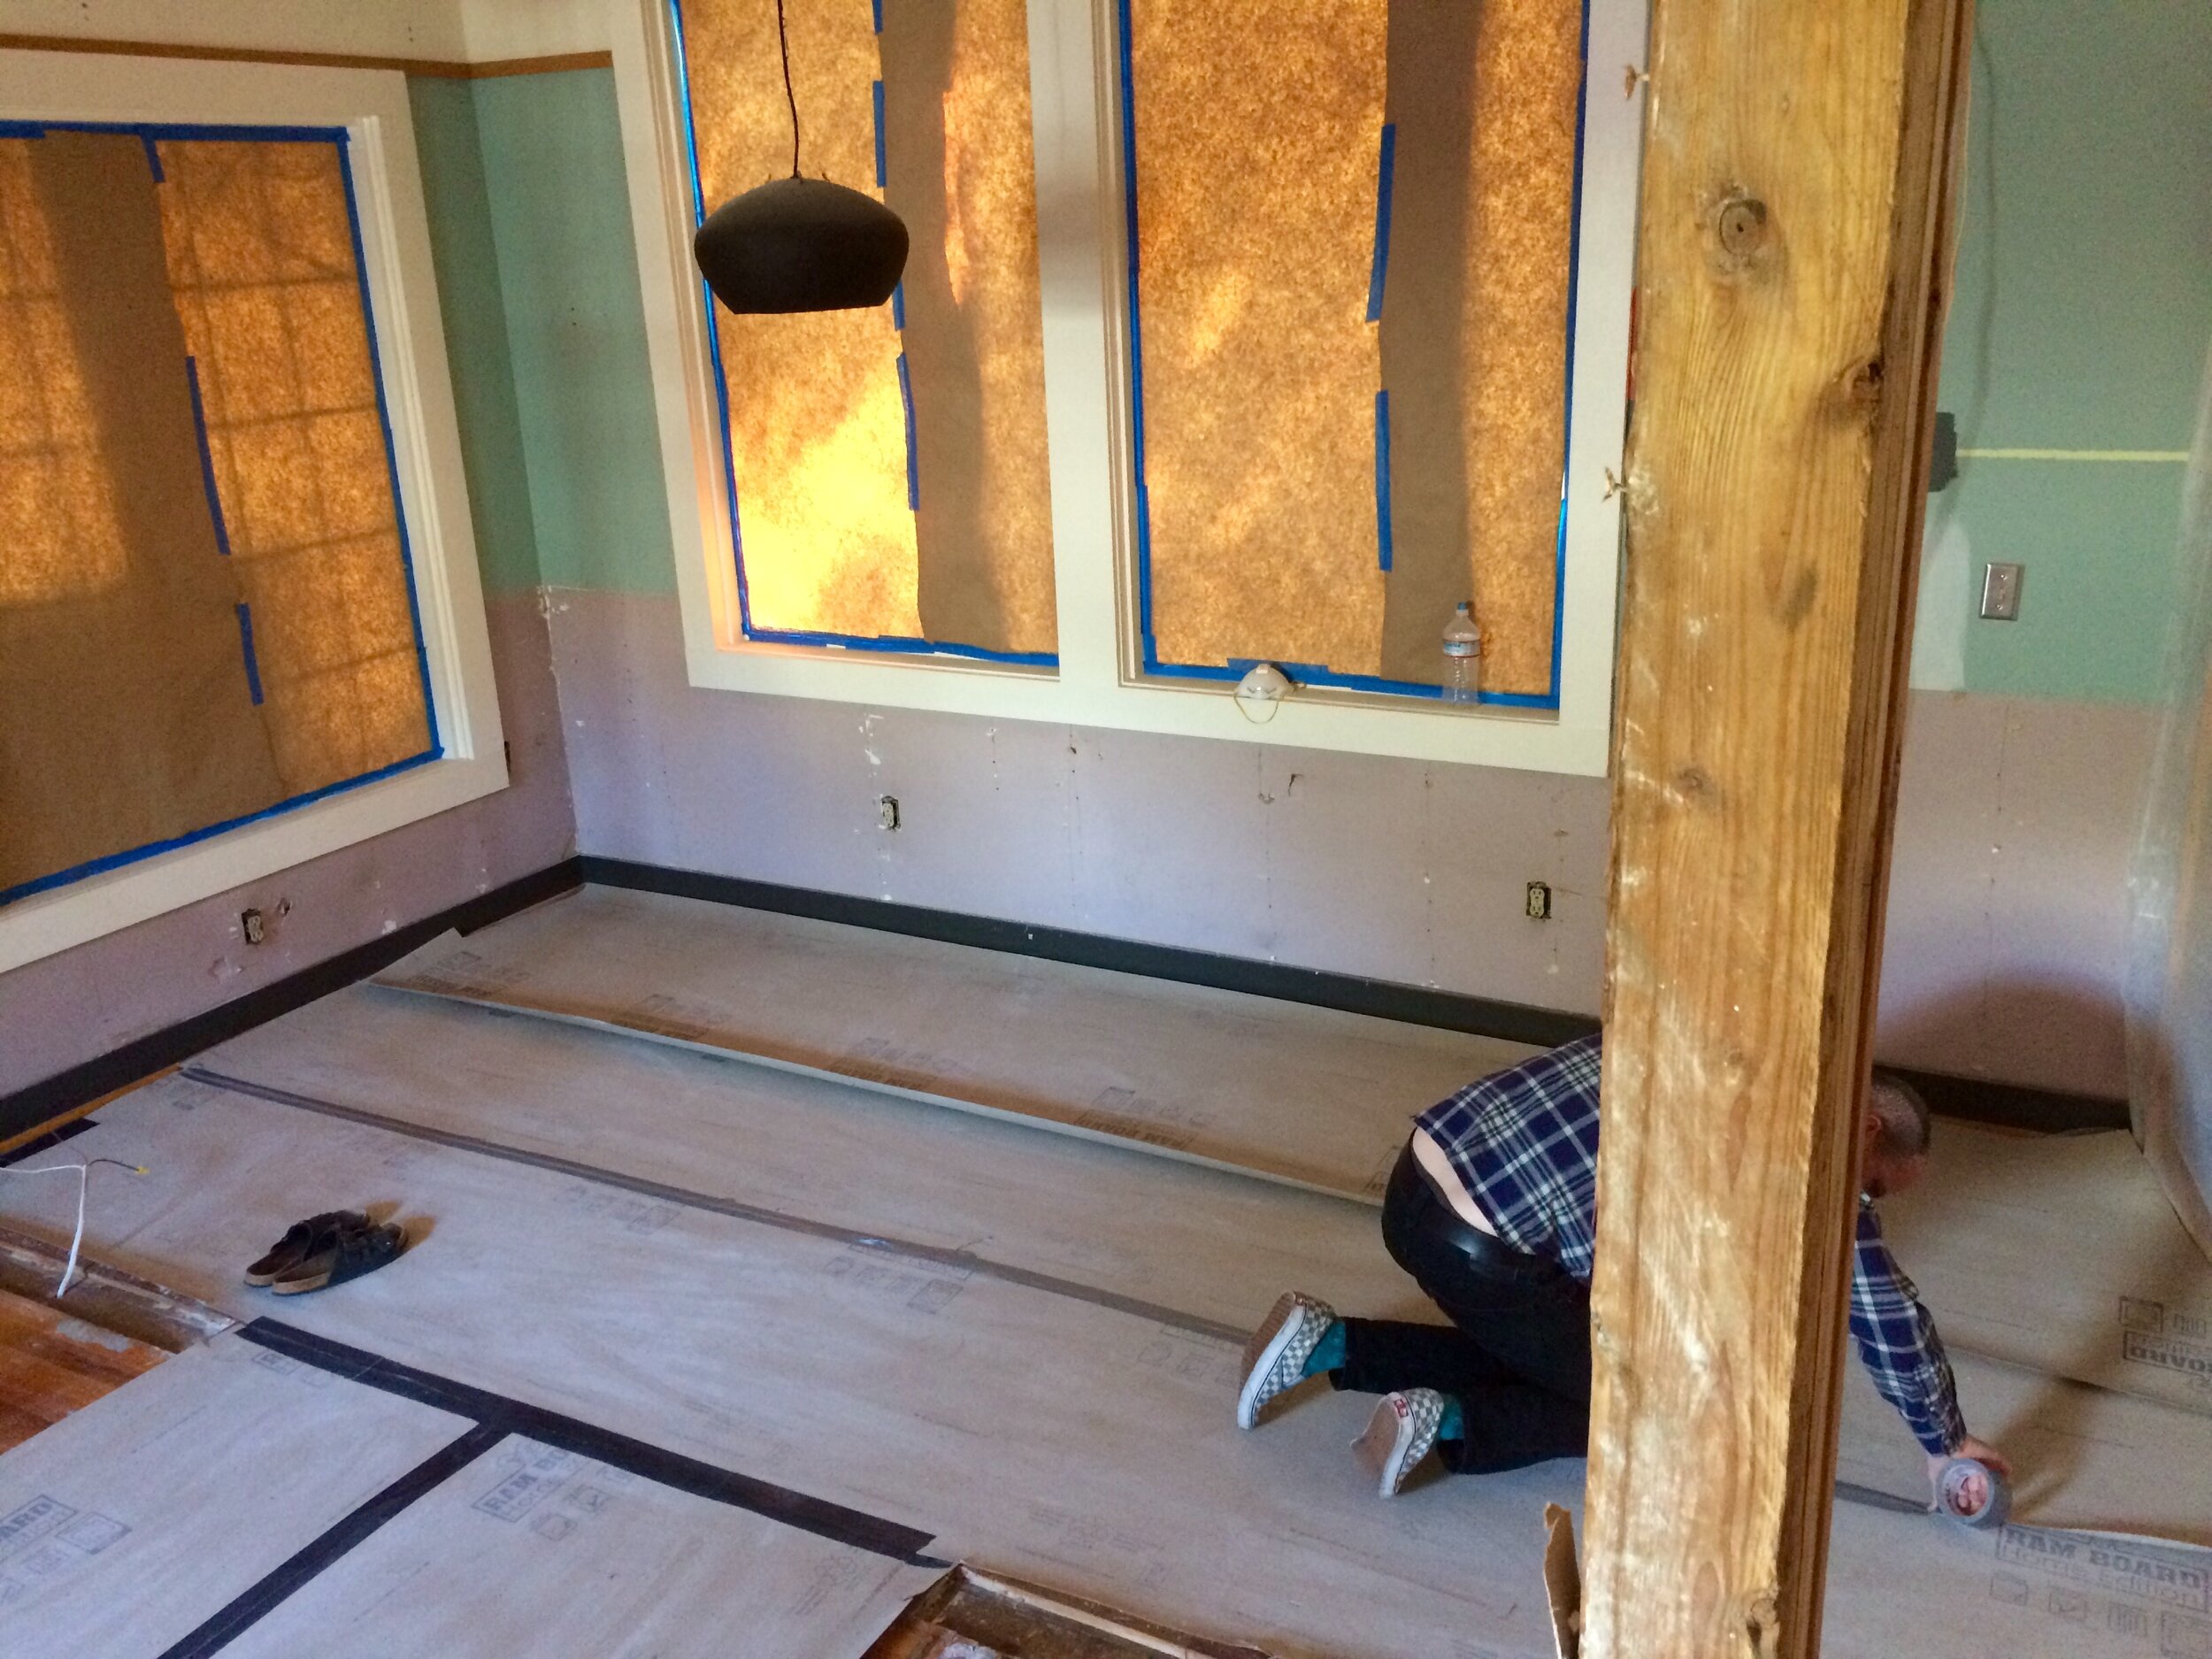
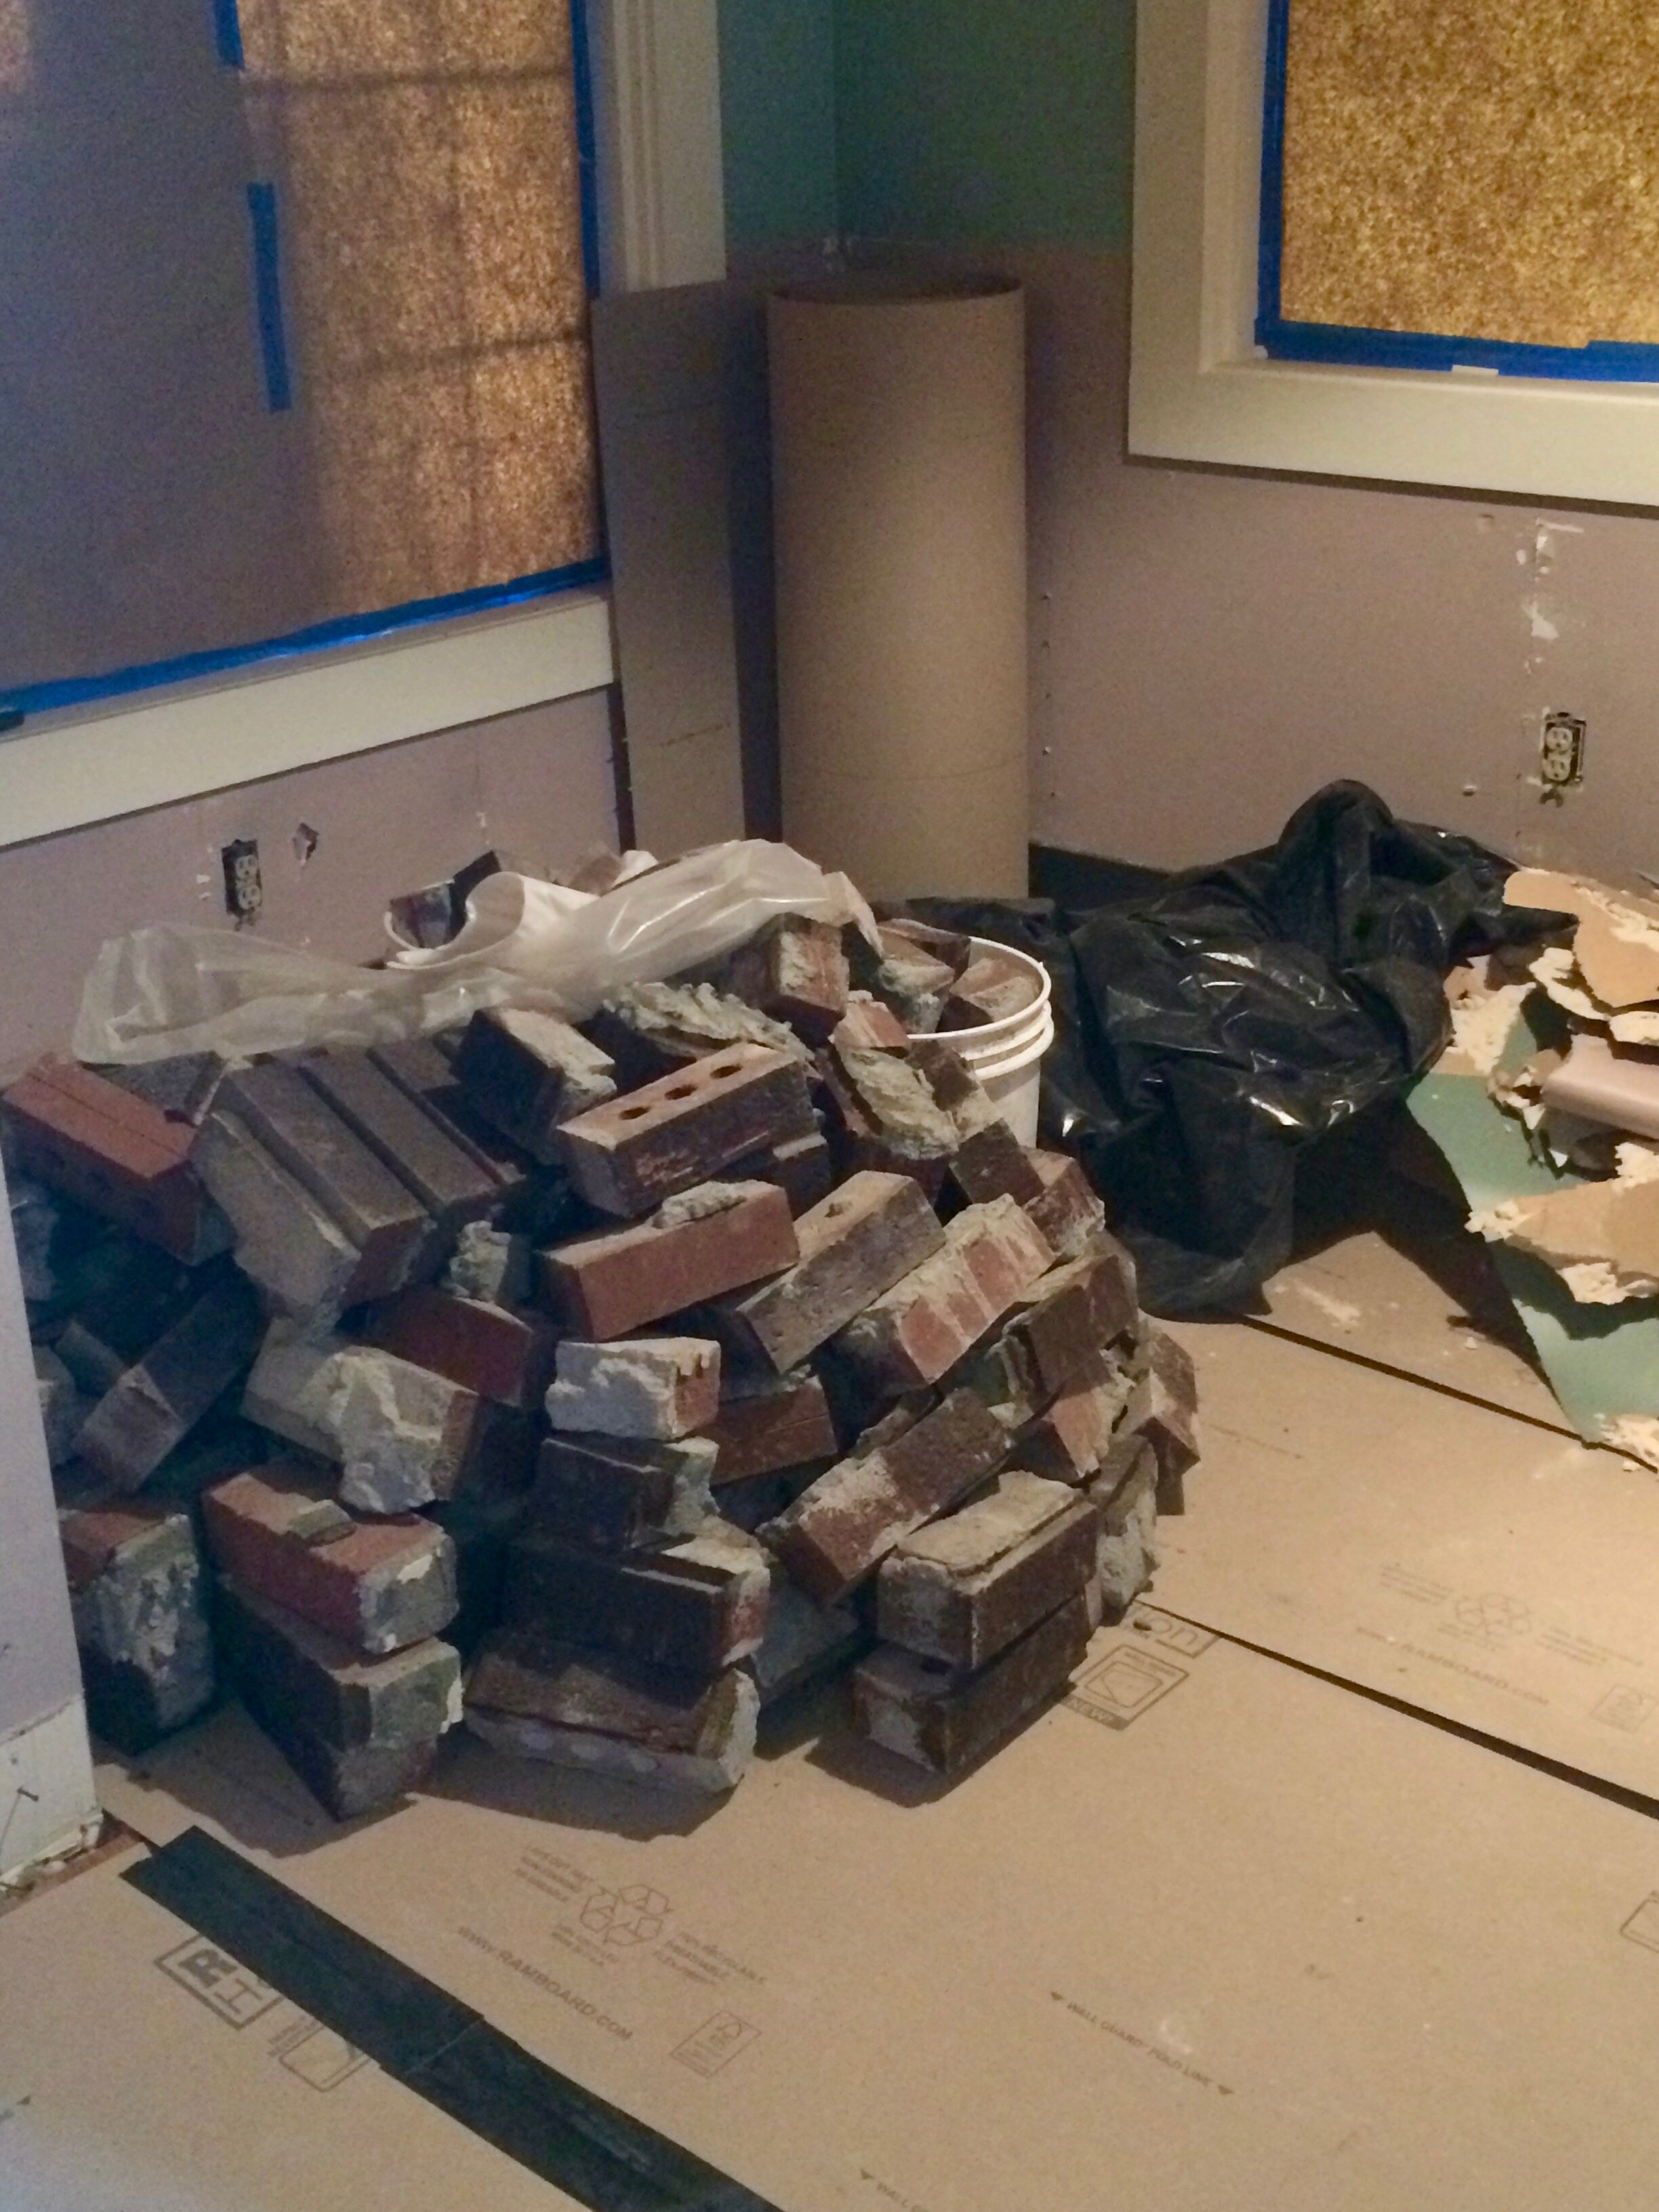
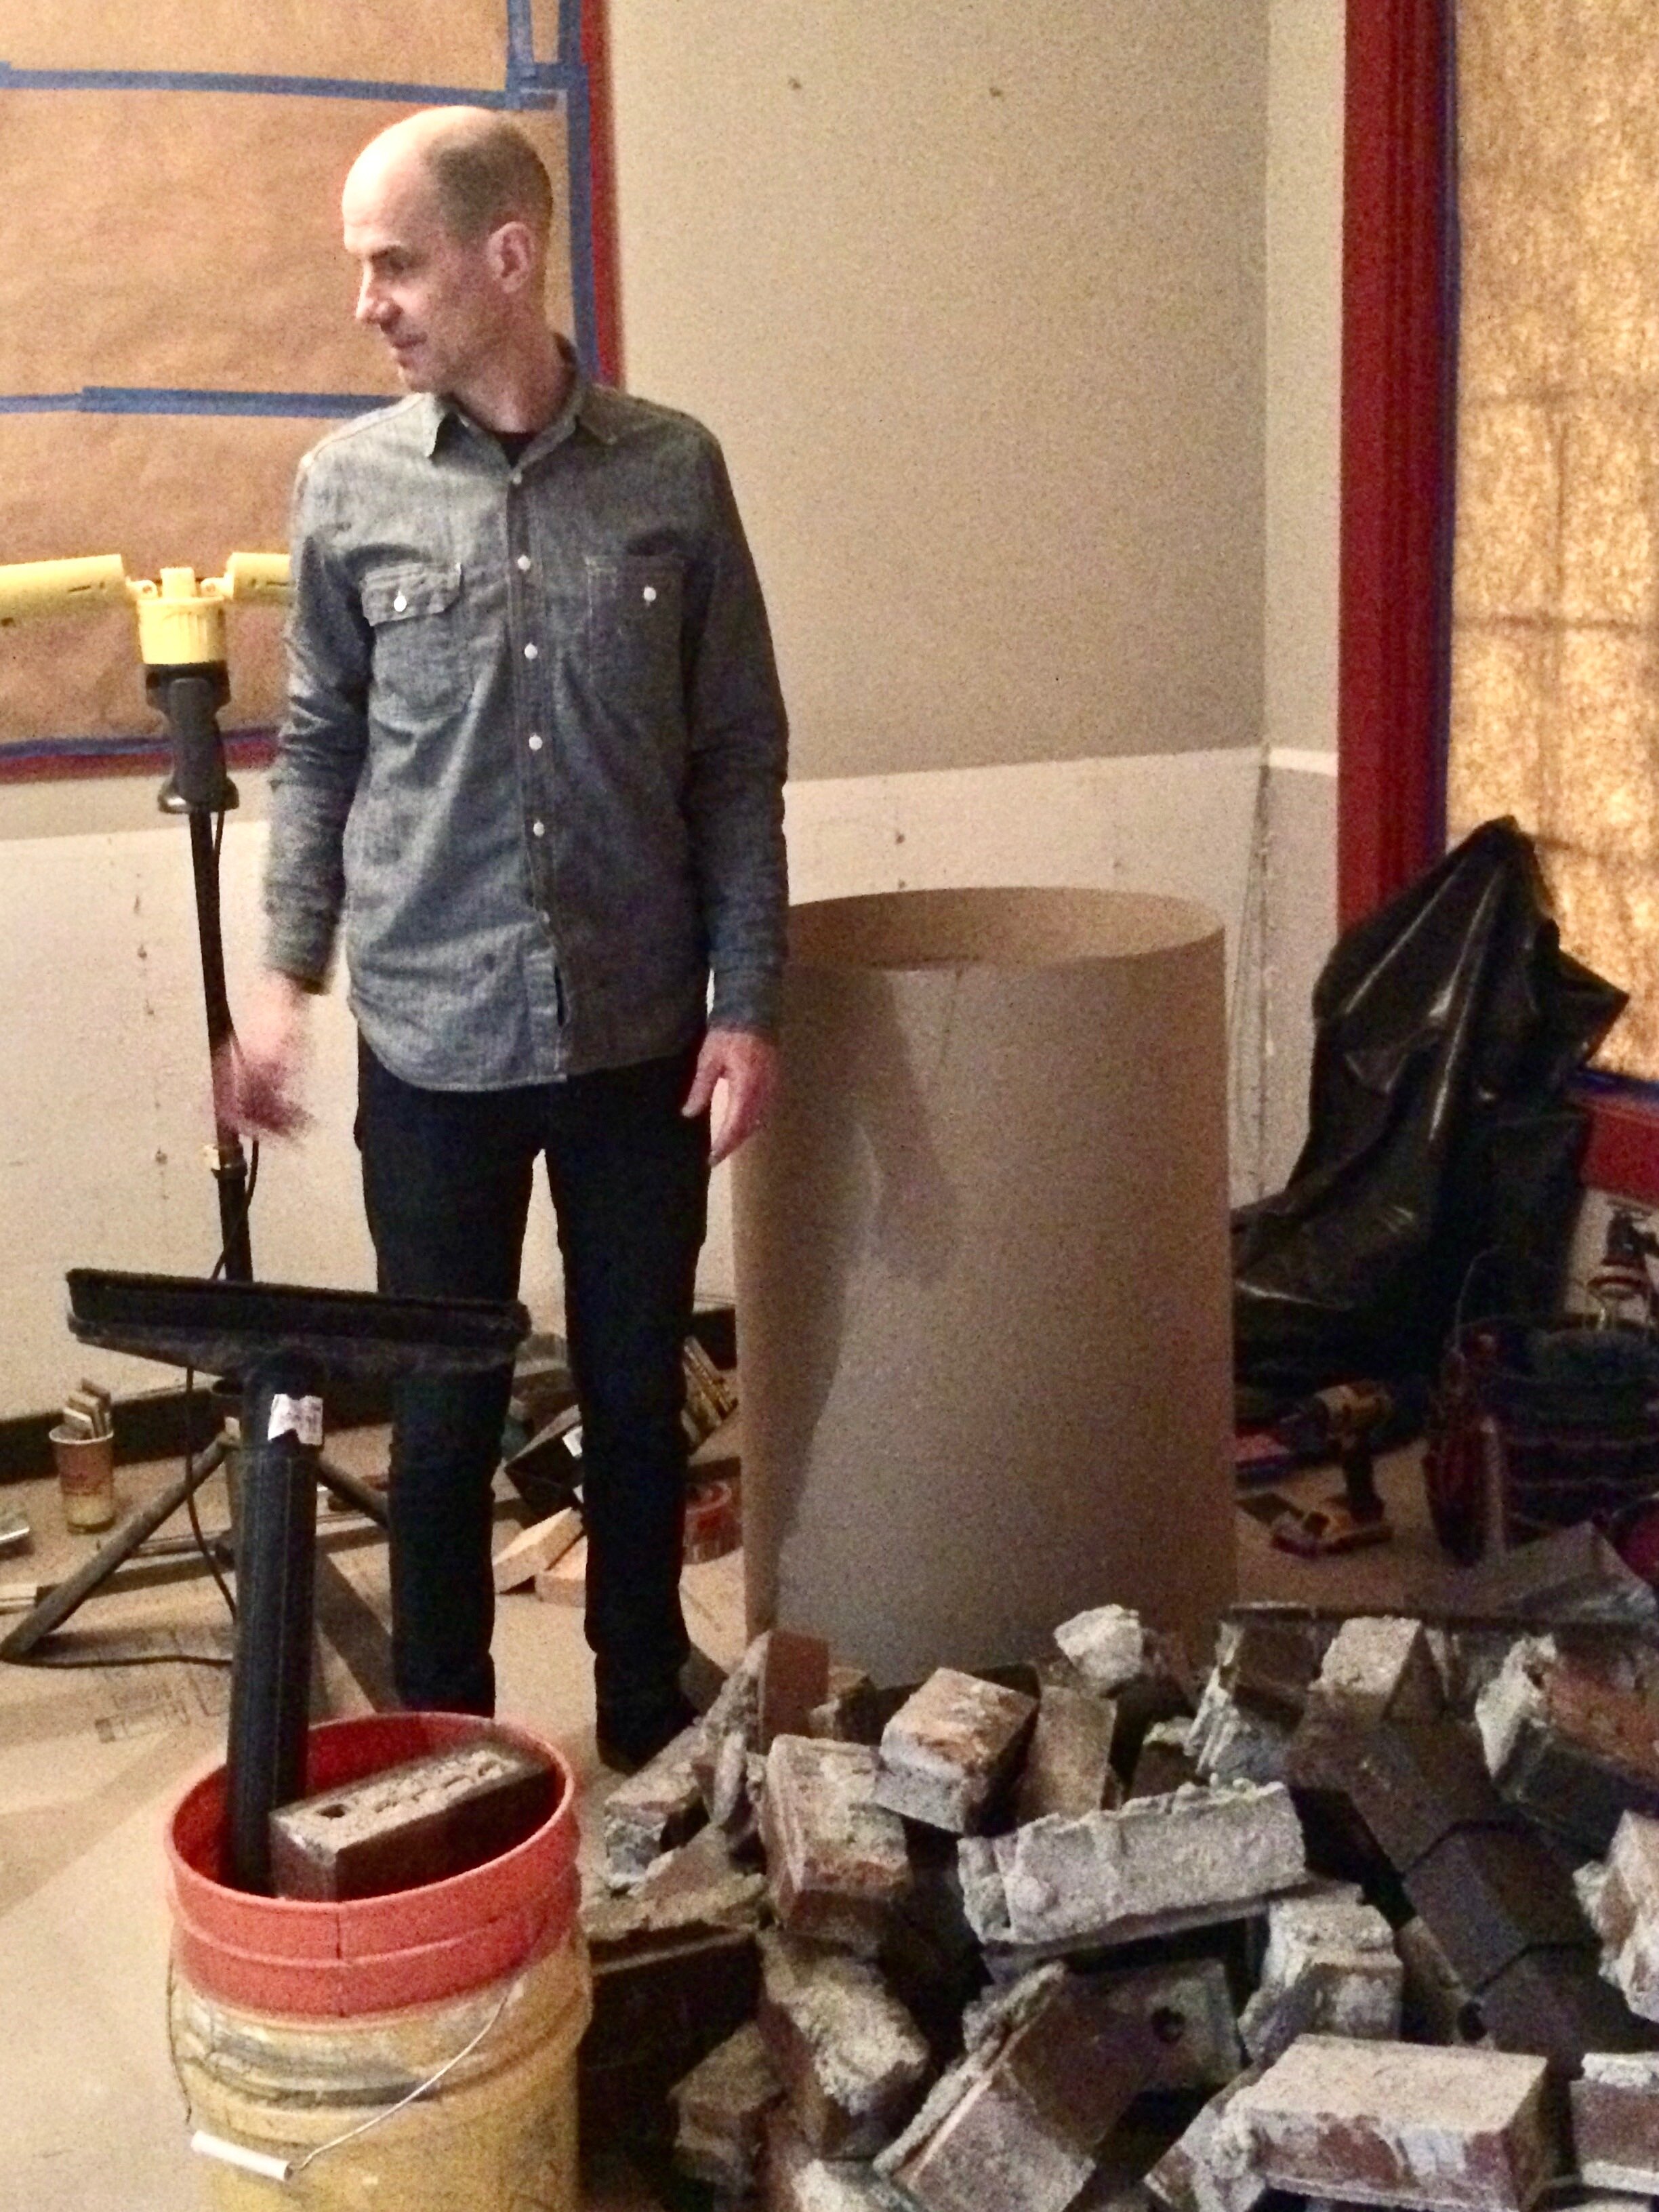
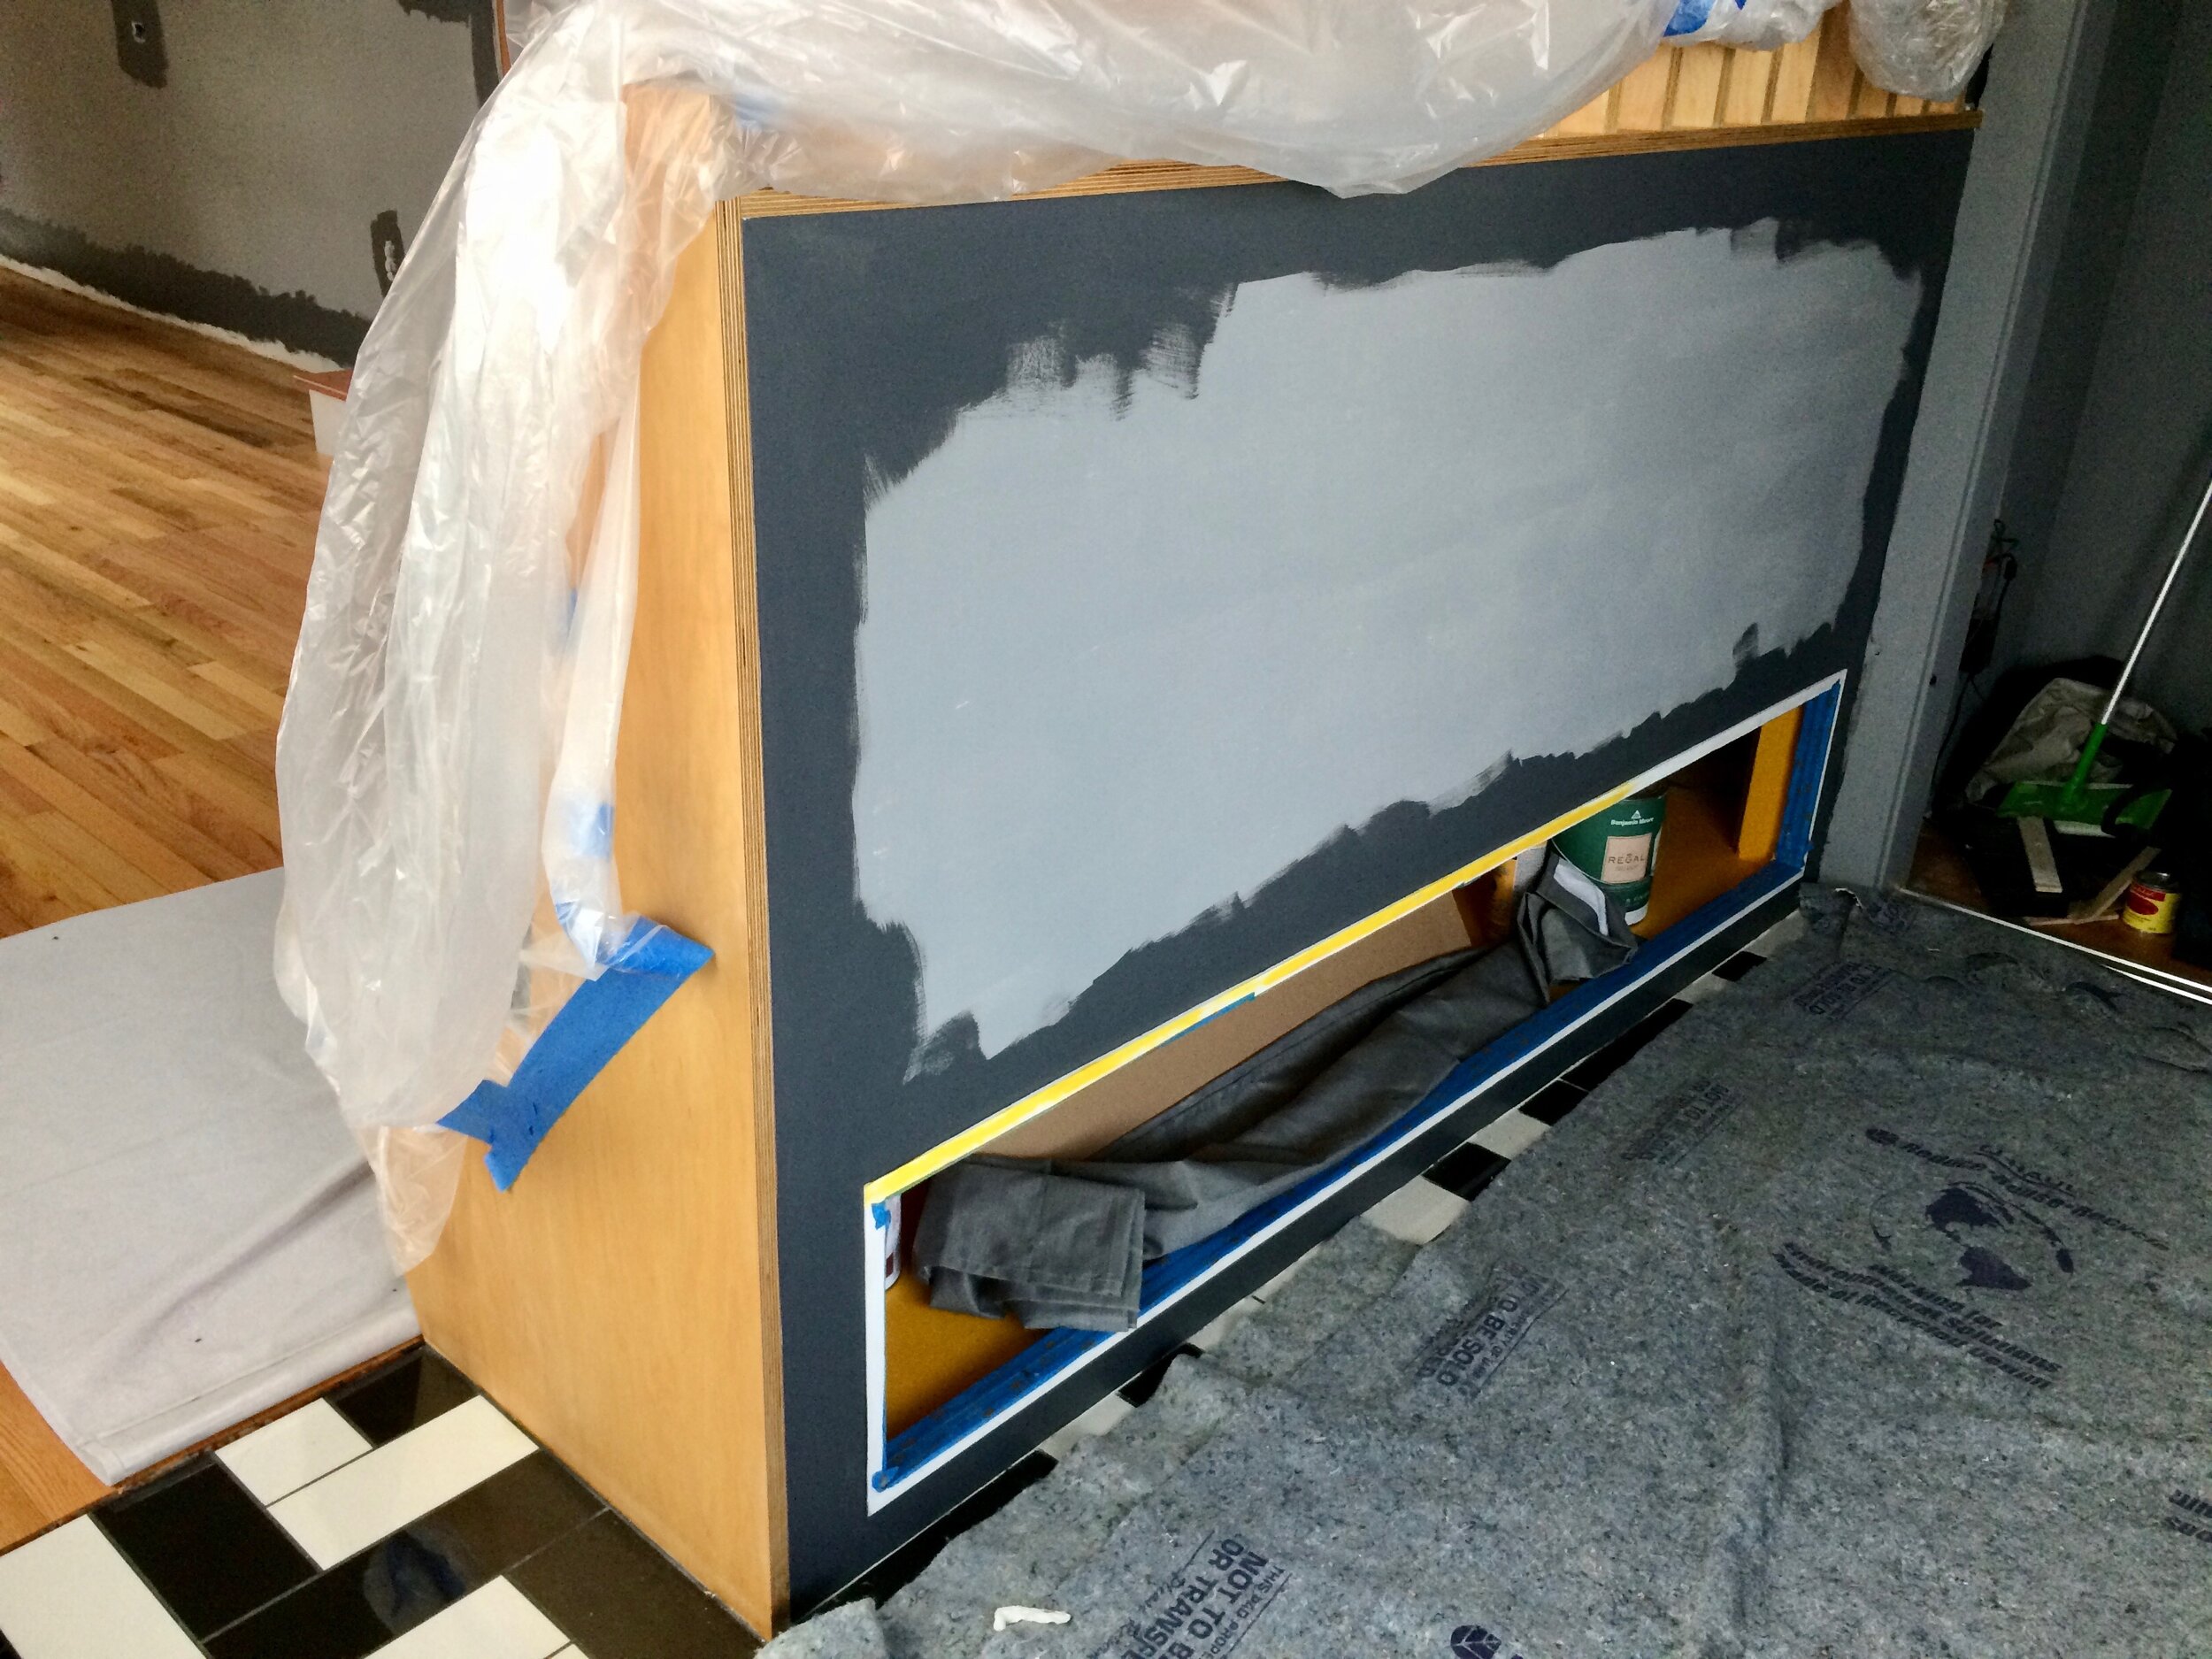
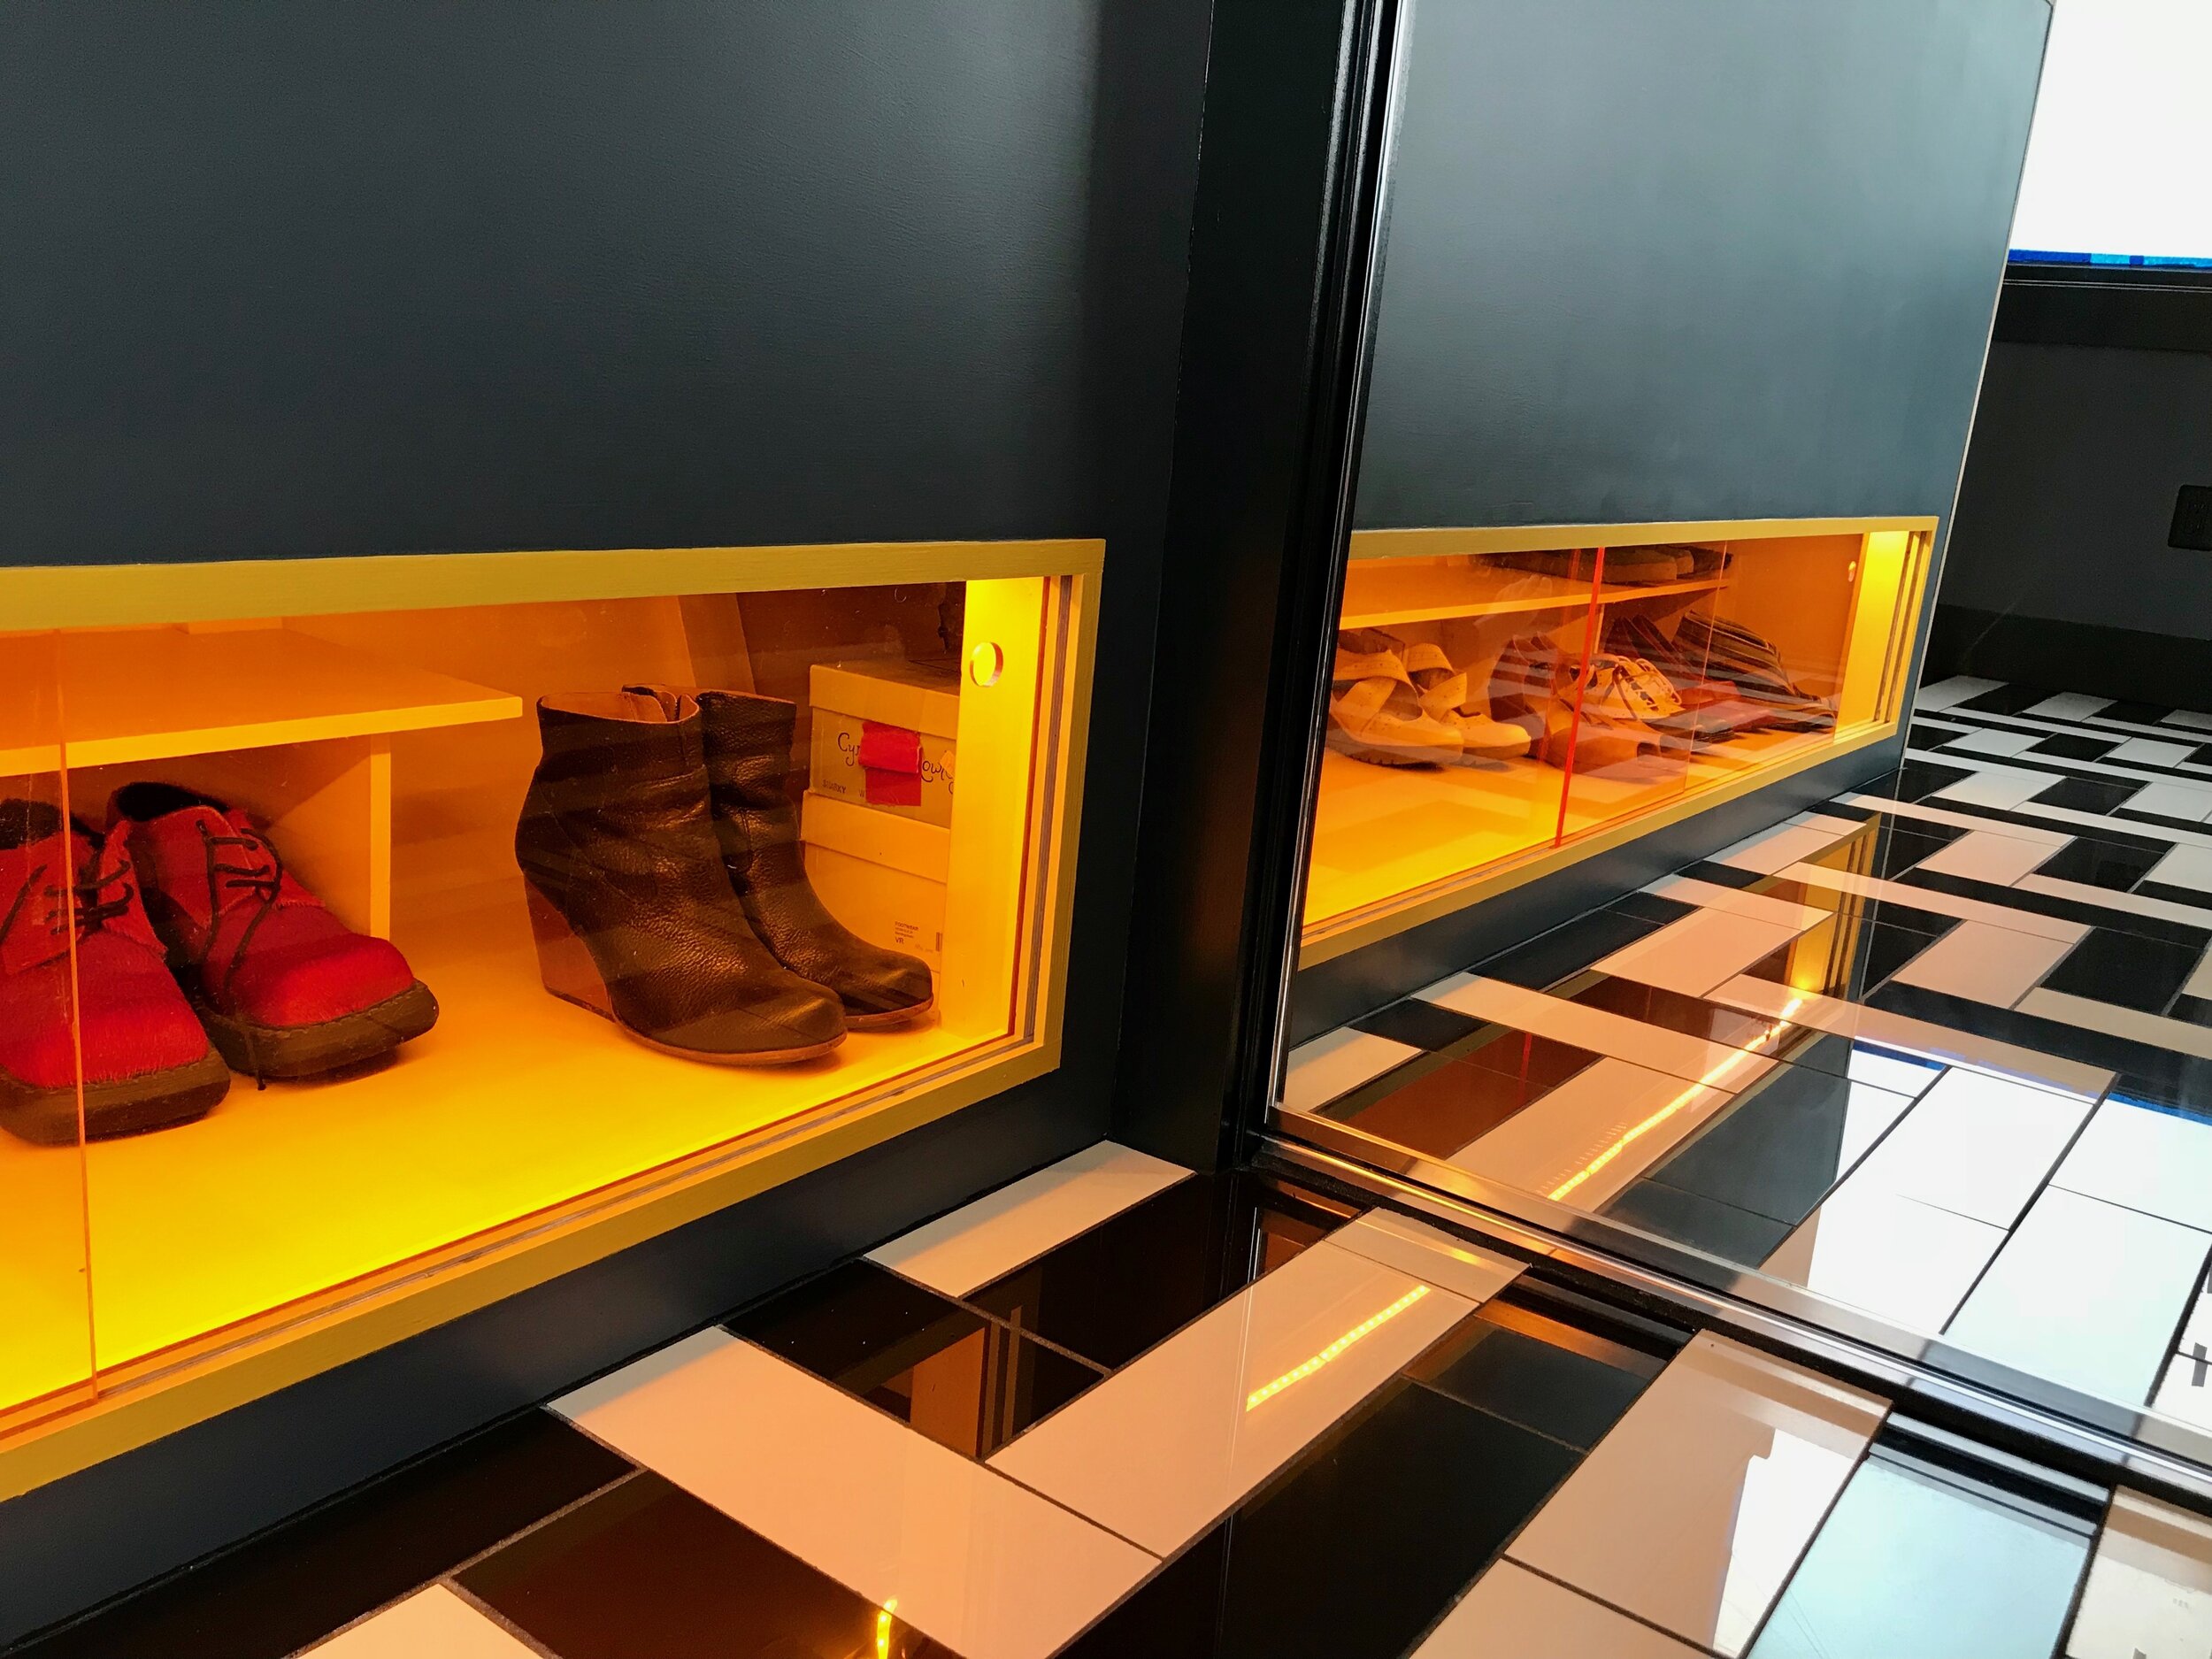
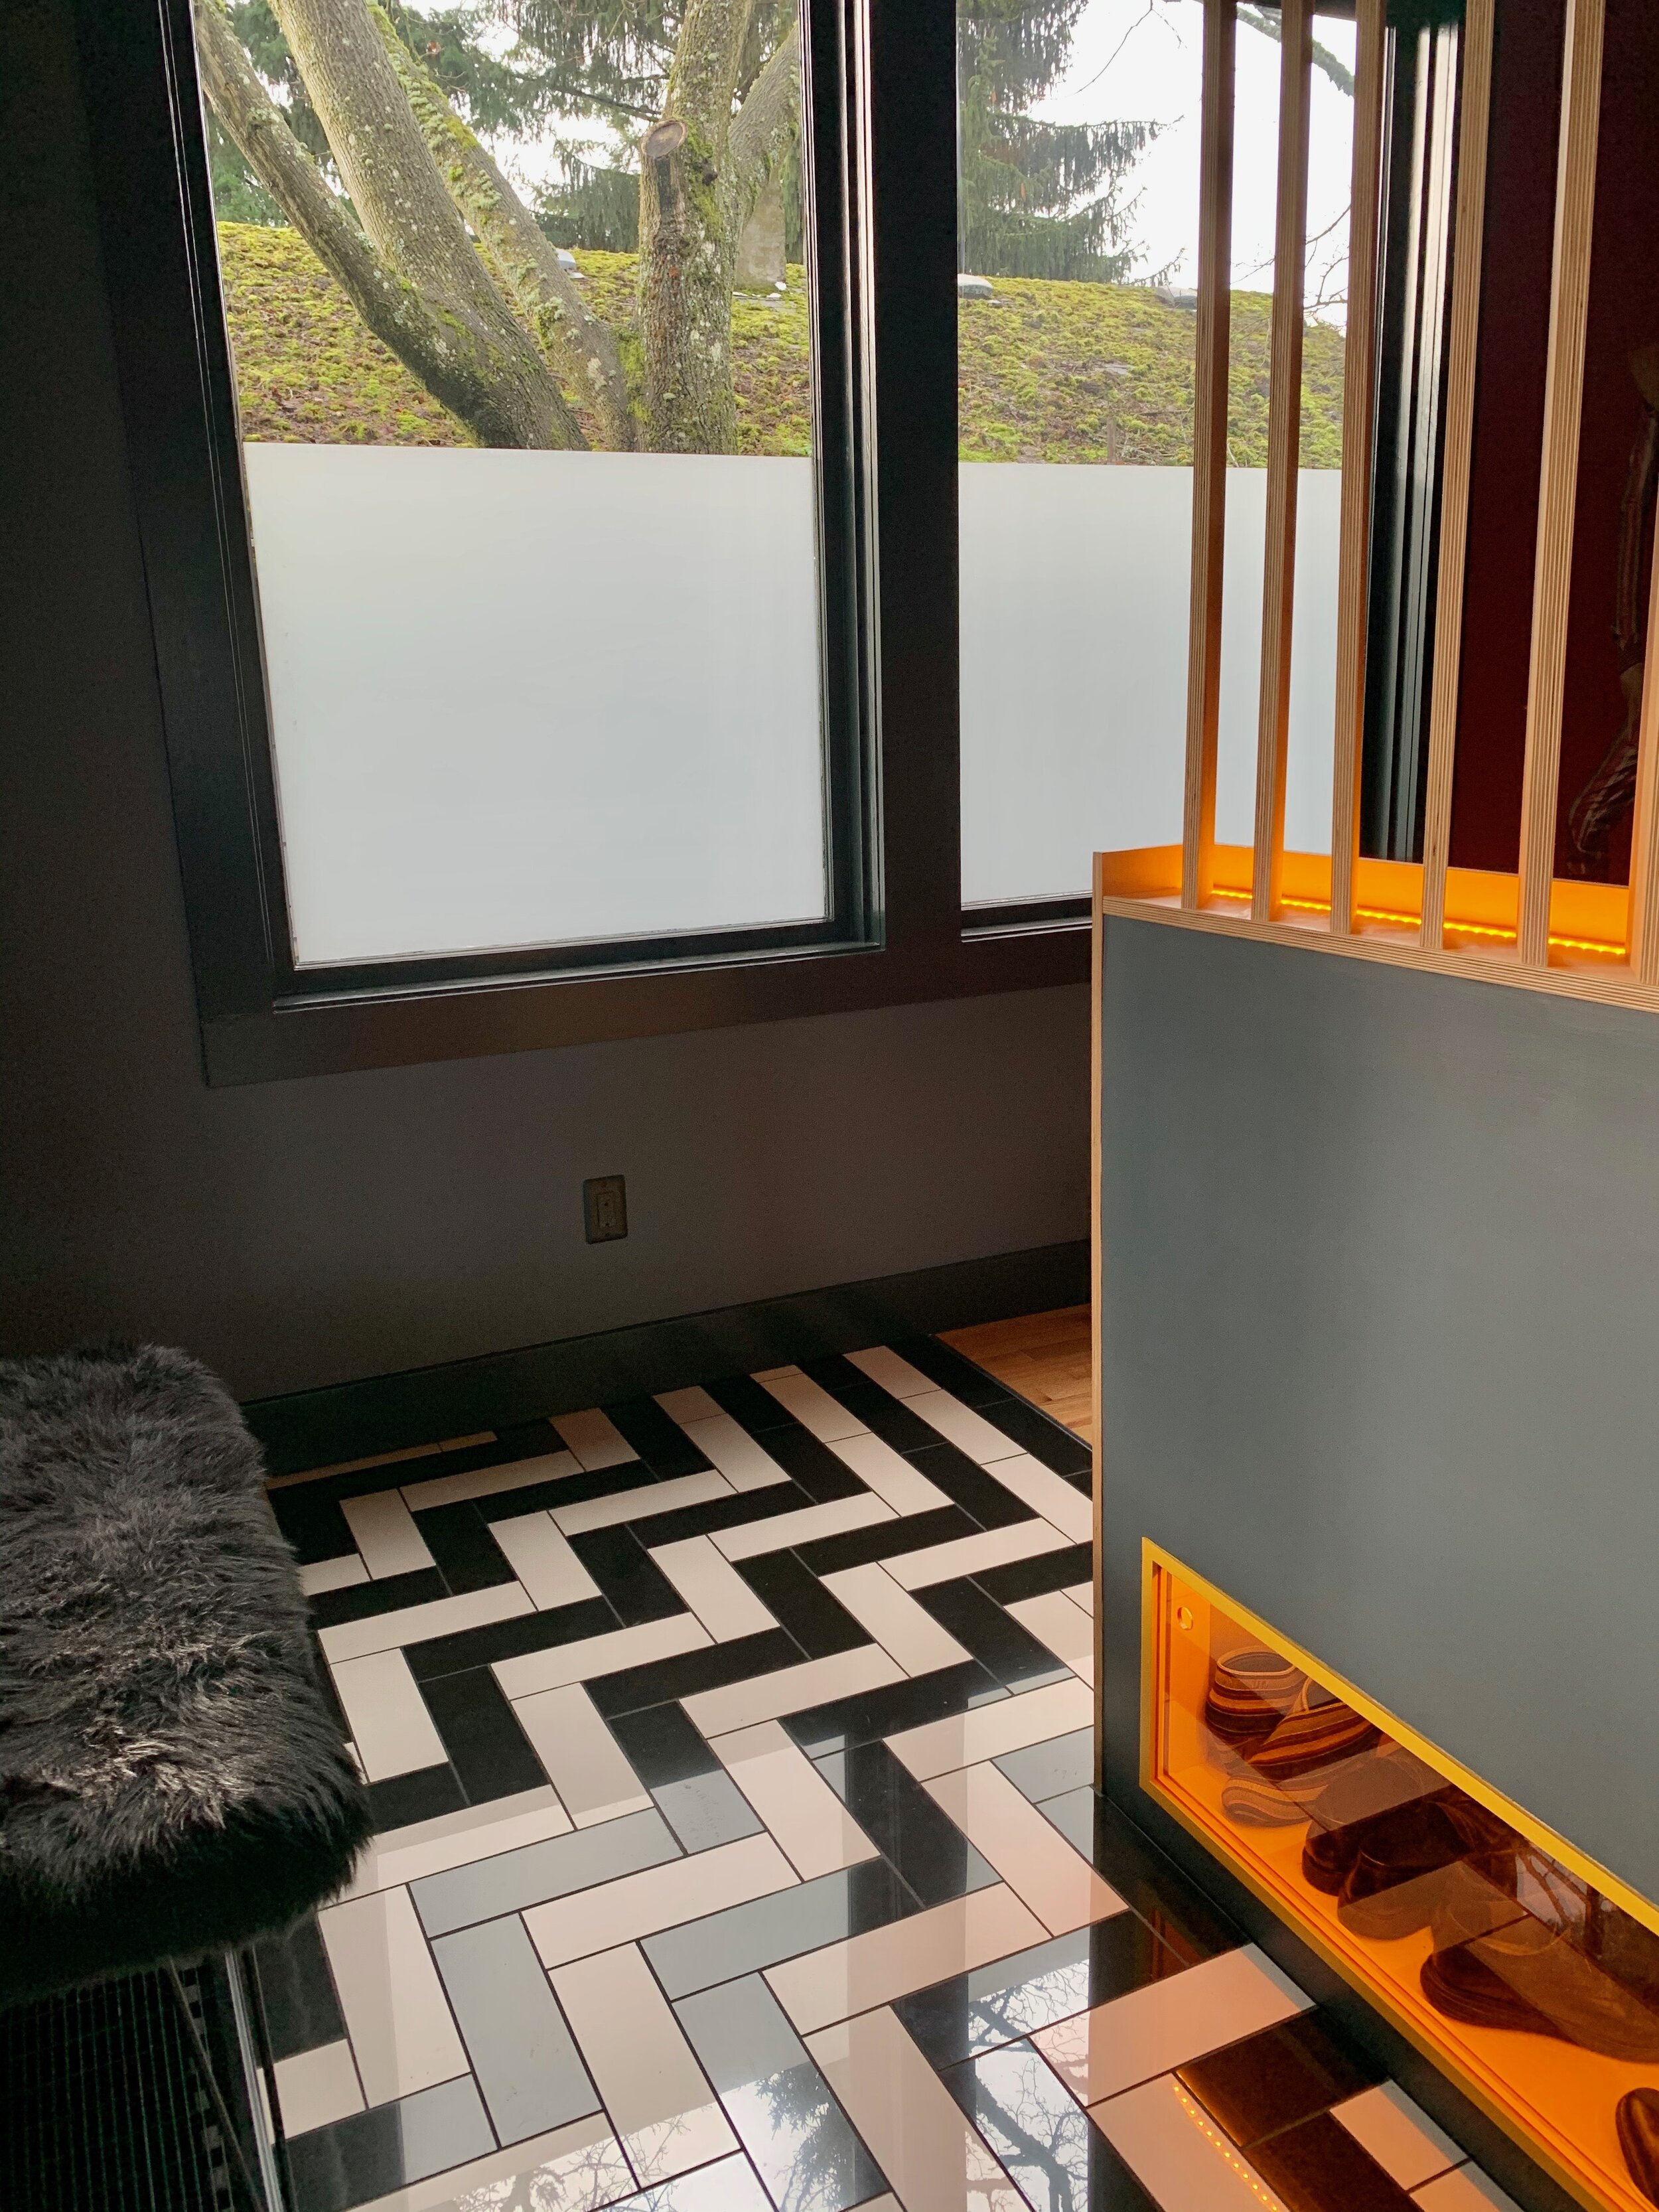
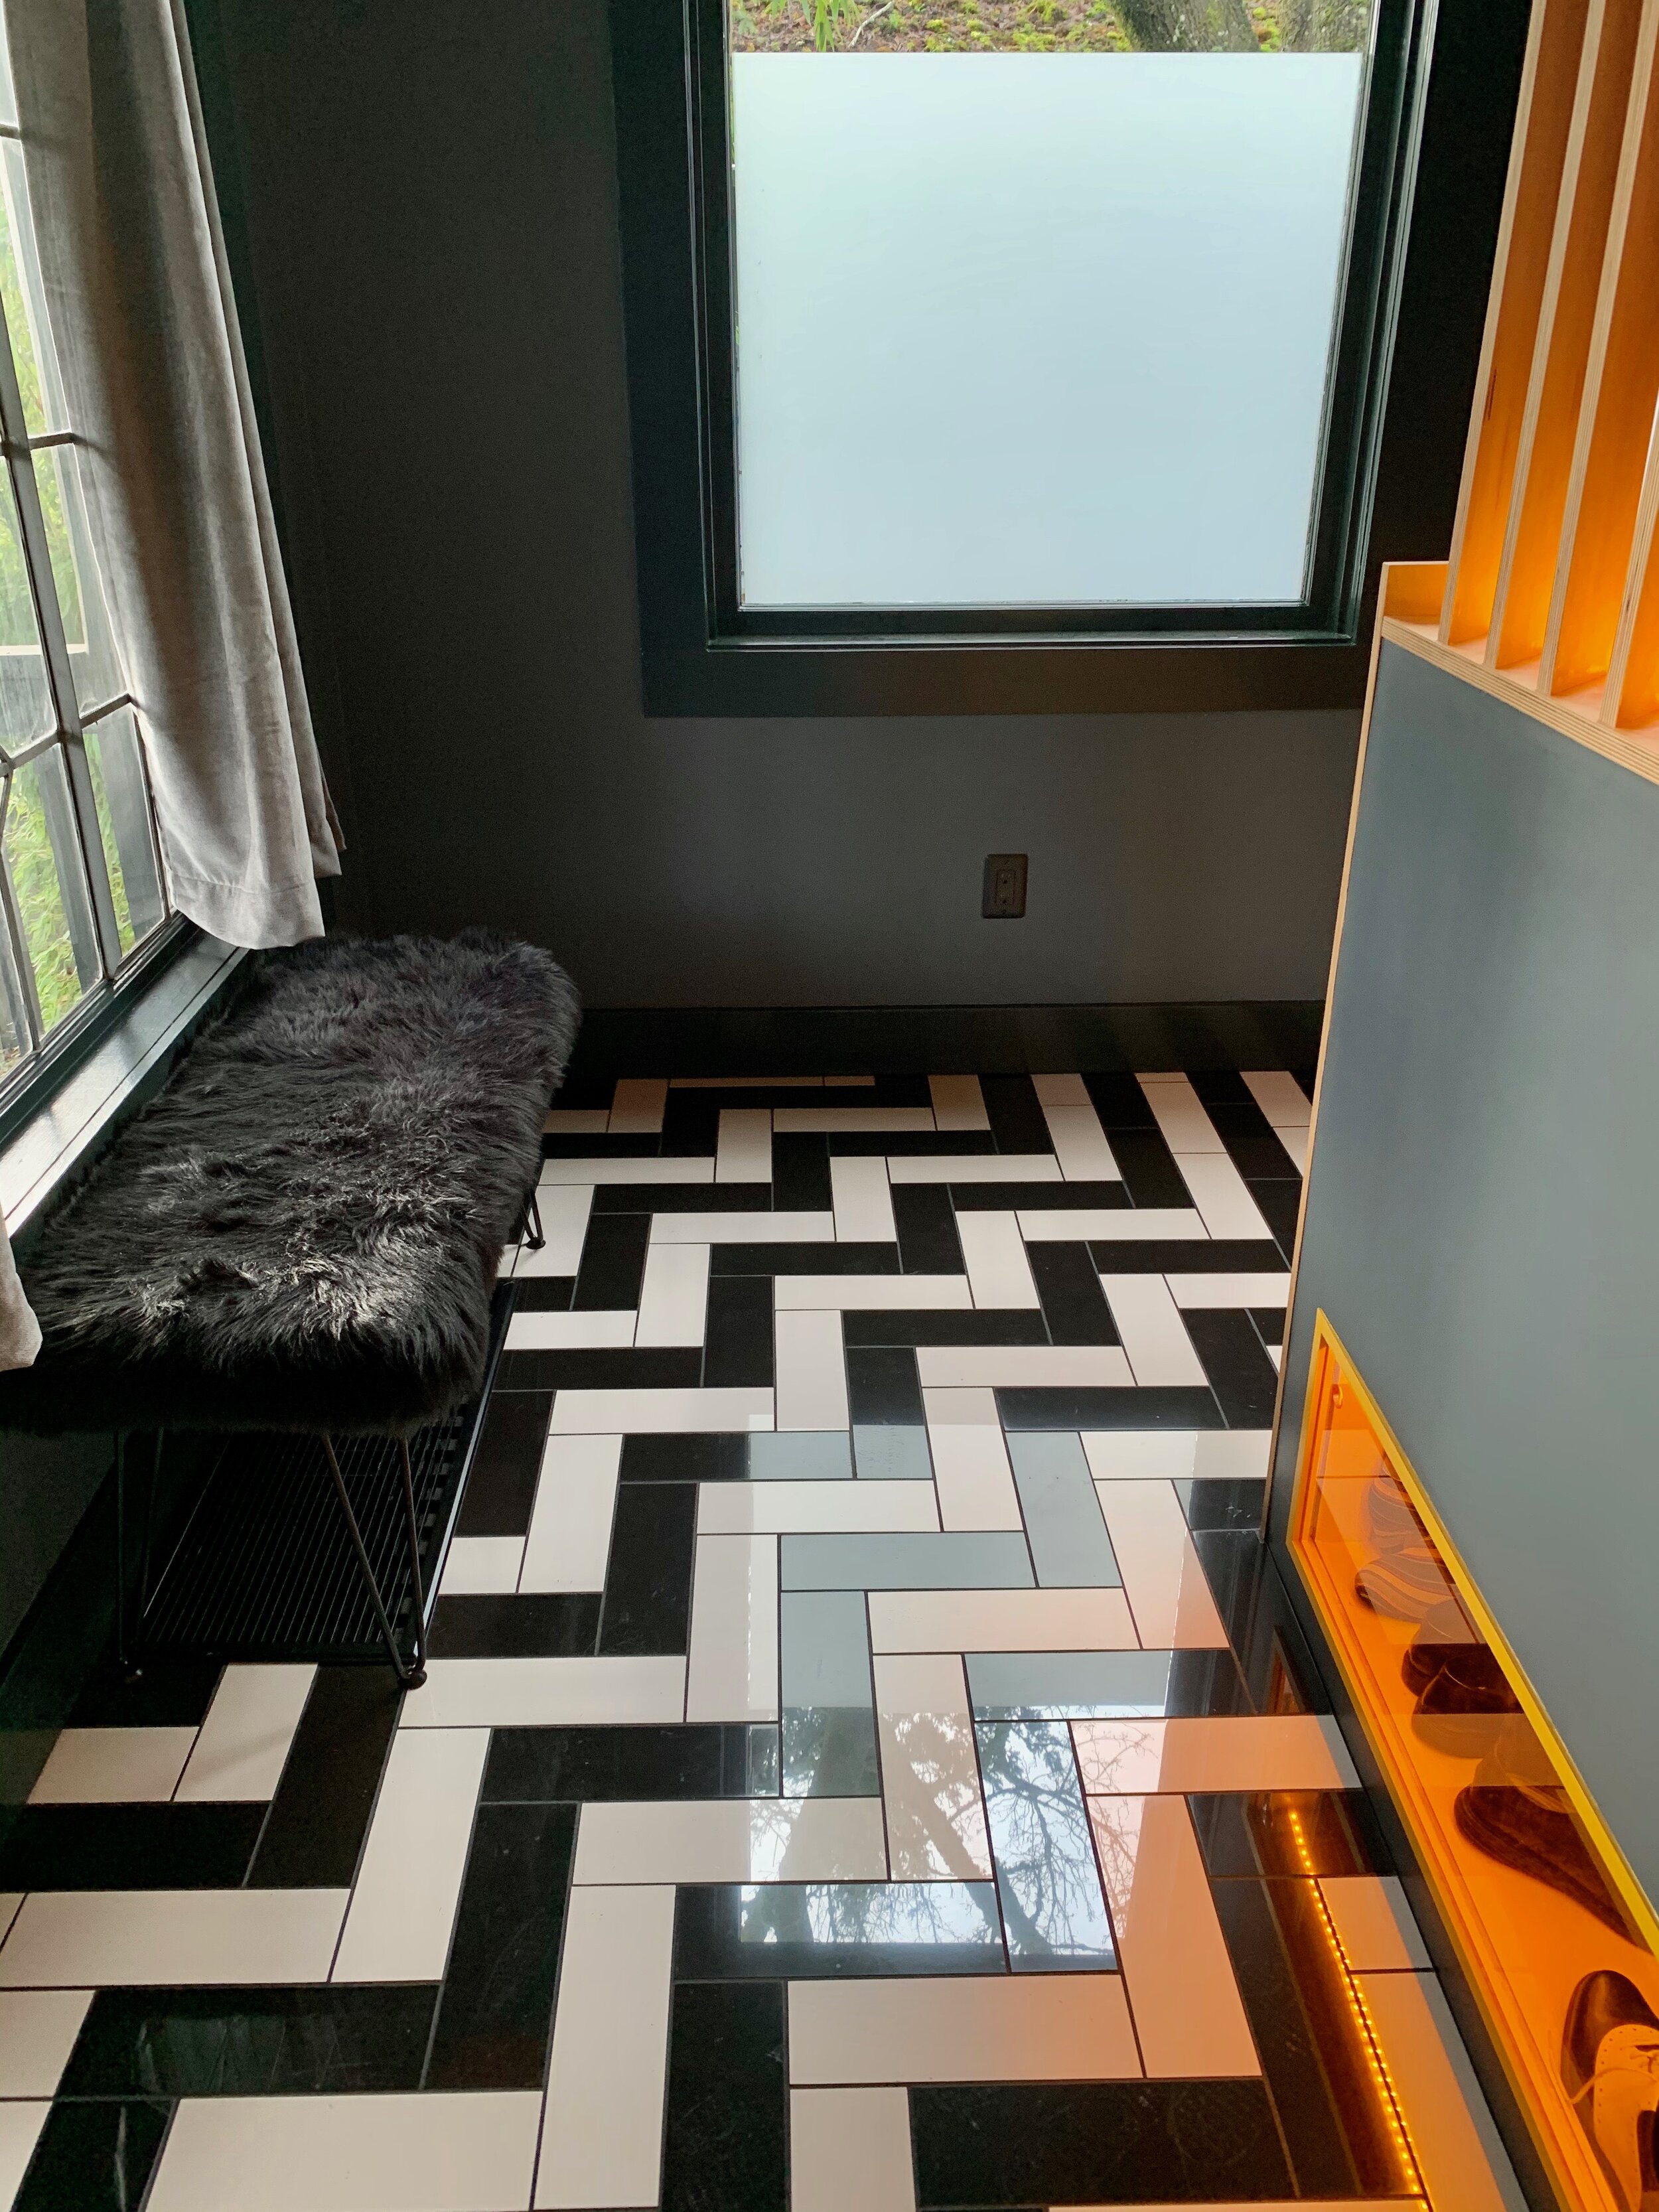
If you can’t find what you want, MAKE IT YOURSELF! I cut these bricks down from 12 x 12 porcelain tiles because I couldn’t find the right size. I’d never used a tile cutter before, so some edges were jagged enough that I also learned how to polish them. All this equipment was set up on our back porch during the winter. It was a freezing mess, but I was undeterred. Our contractor showed me how to mix mortar, and I set about laying the tile in the slightly off herringbone pattern I had in my head: crooked, but straight zigzag that hugs that corner. The results are beyond better than what I thought was possible. Mirrored closet doors double the effect. A return air-vent interrupts the pattern, but I painted it black and made a put-on-yer-shoes bench that covers it. Eventually, Mike and I installed privacy film on the two giant south-facing windows that used to be in our dining room. They let in all the light and none of the intrusion.


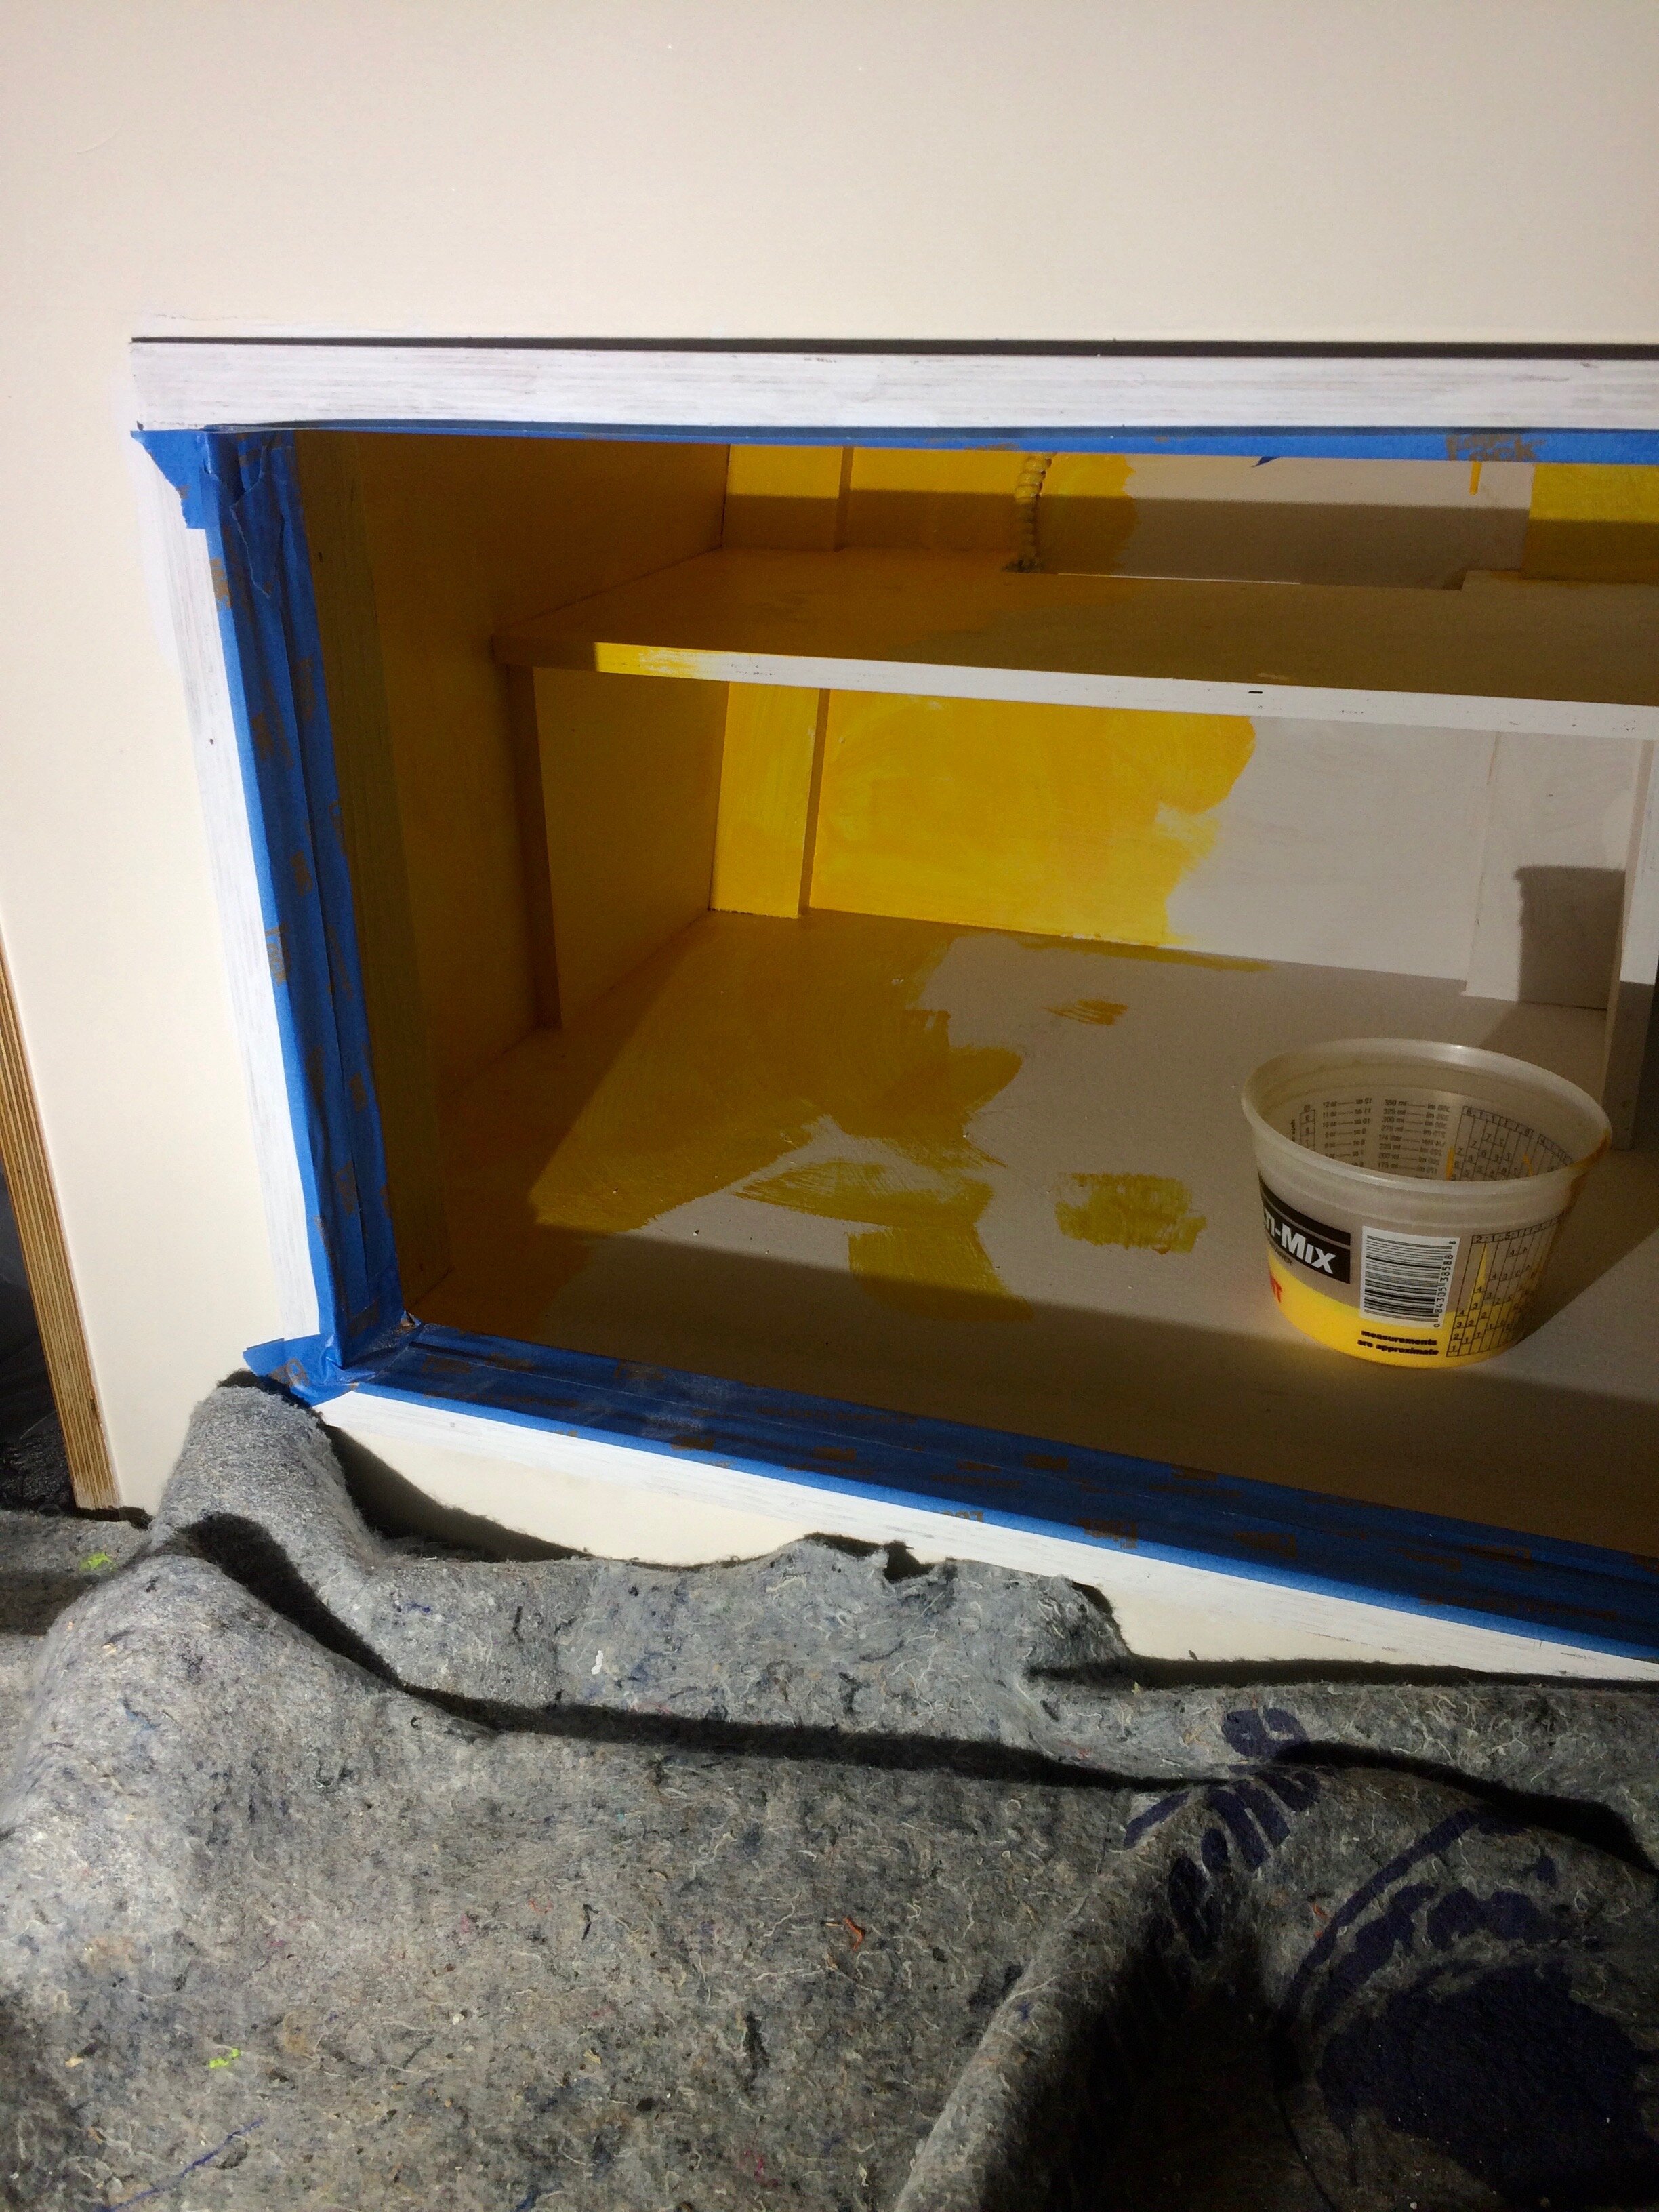
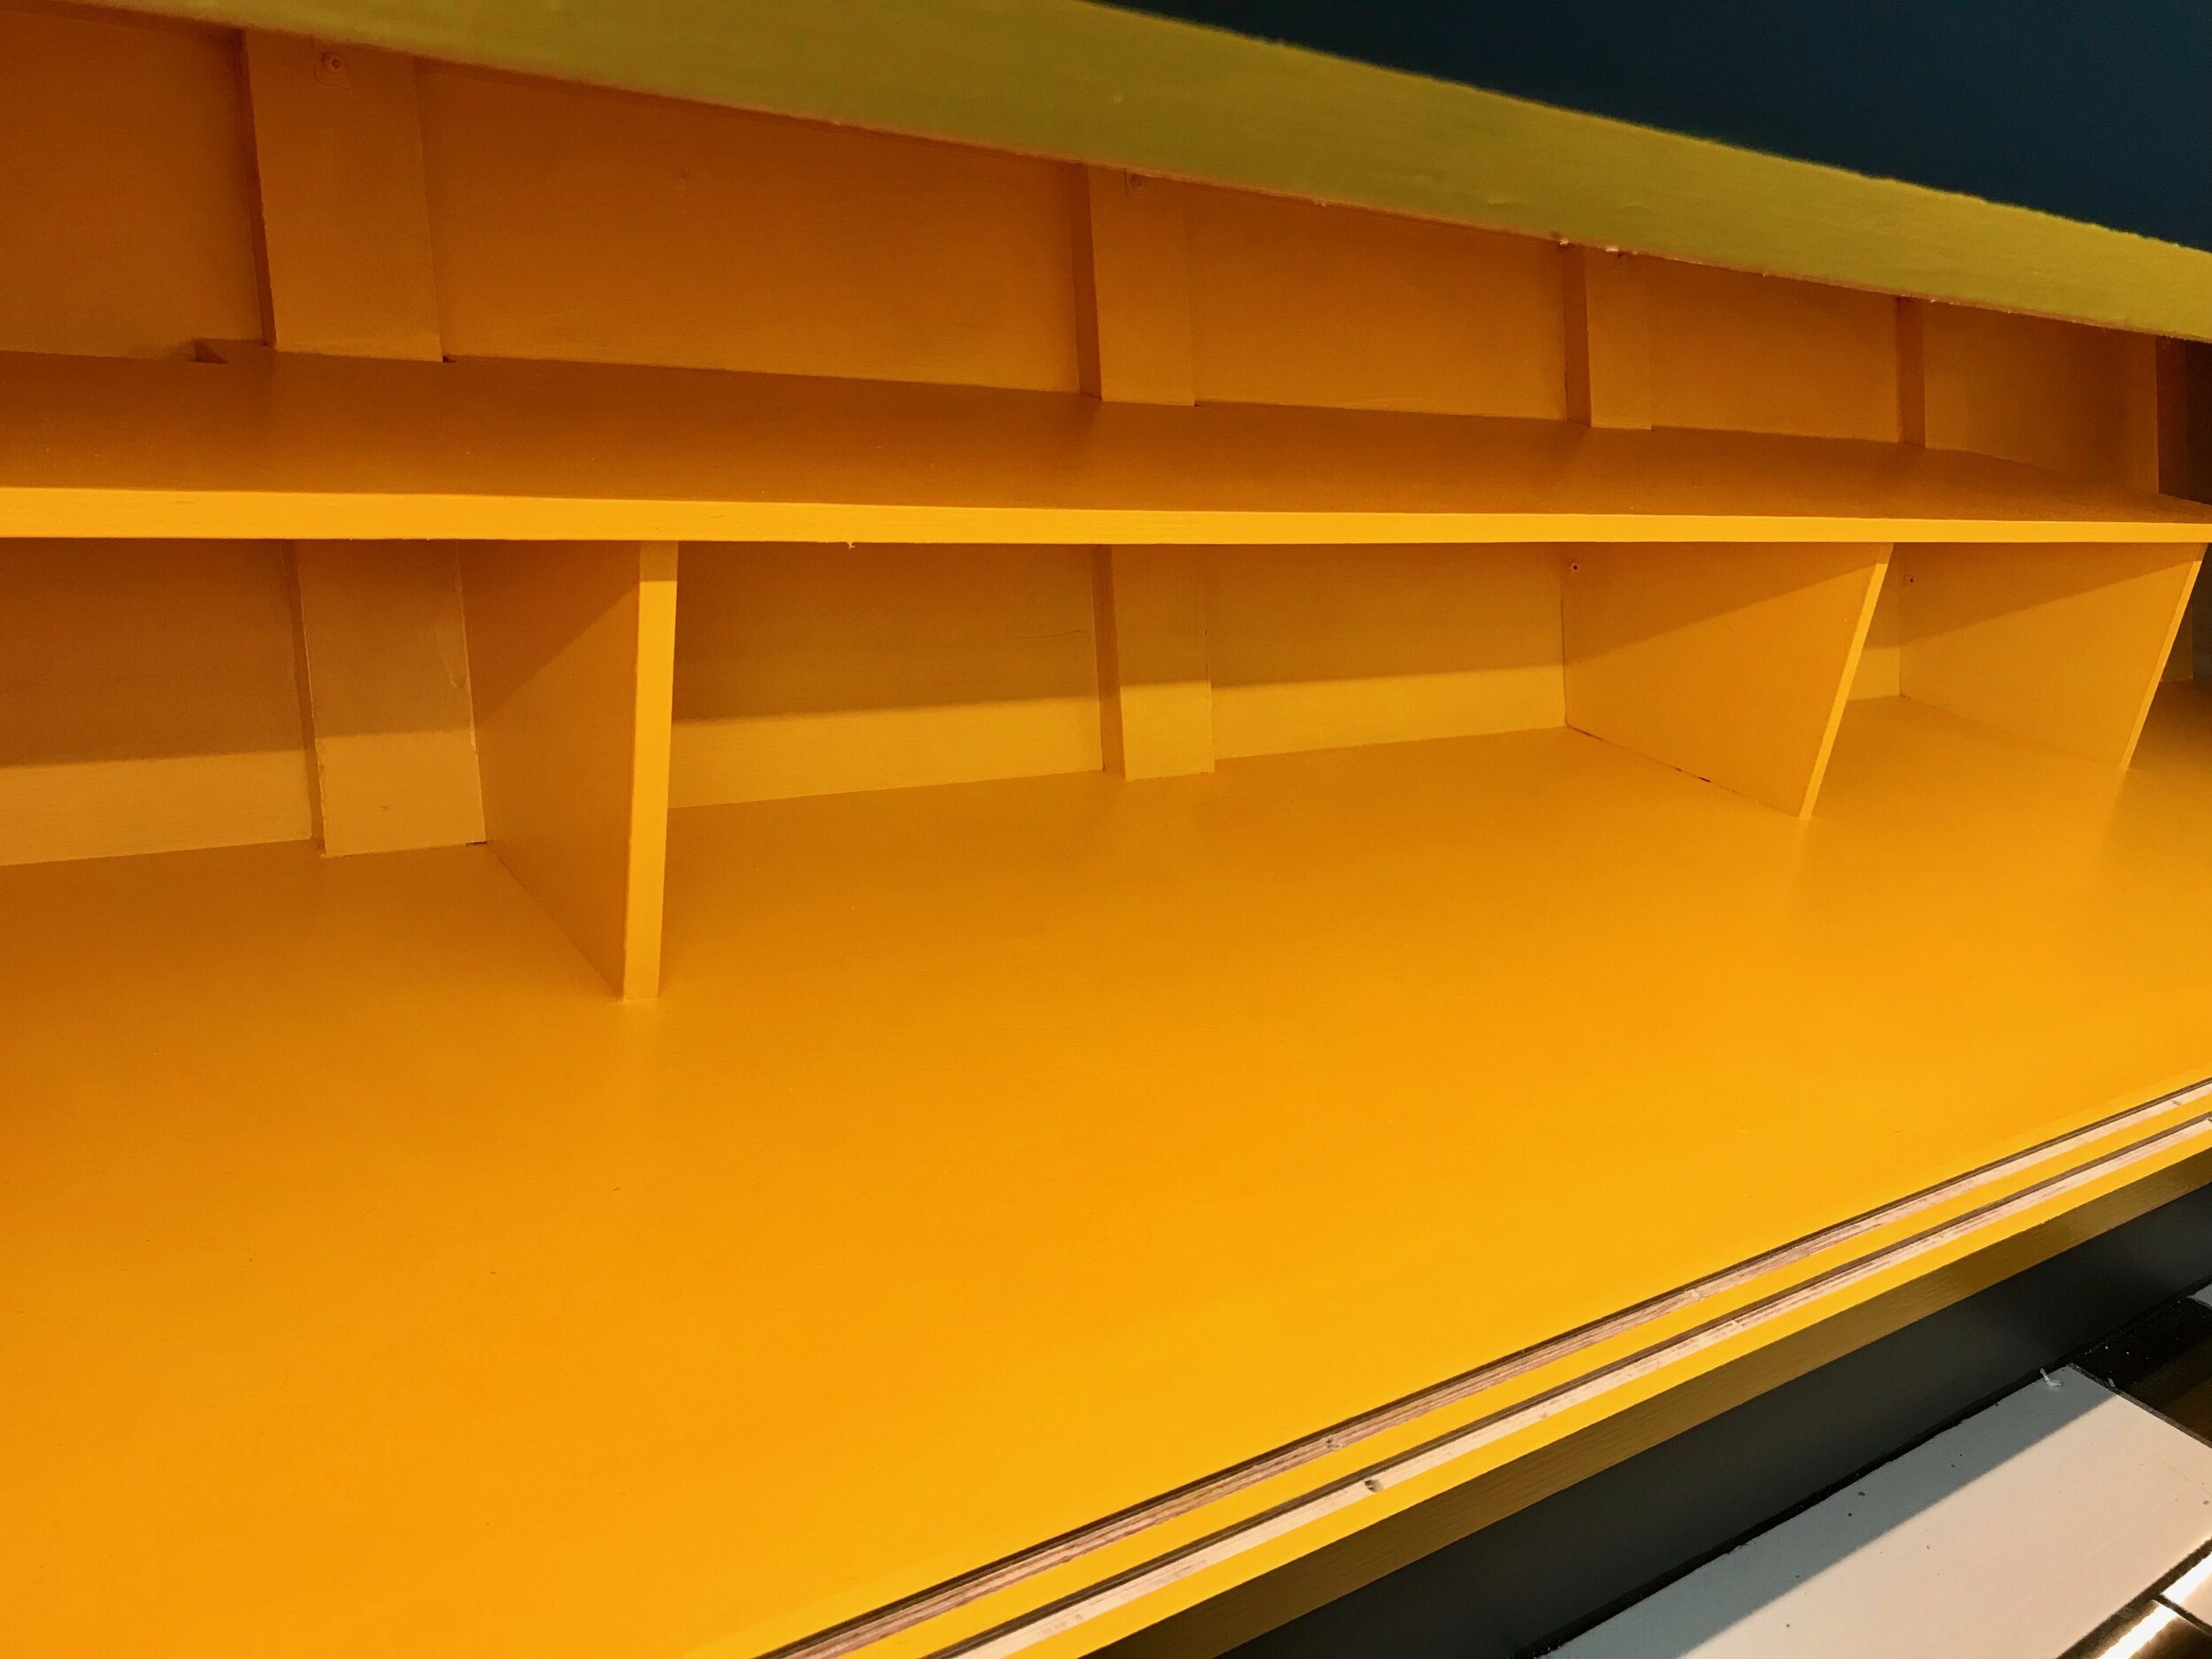
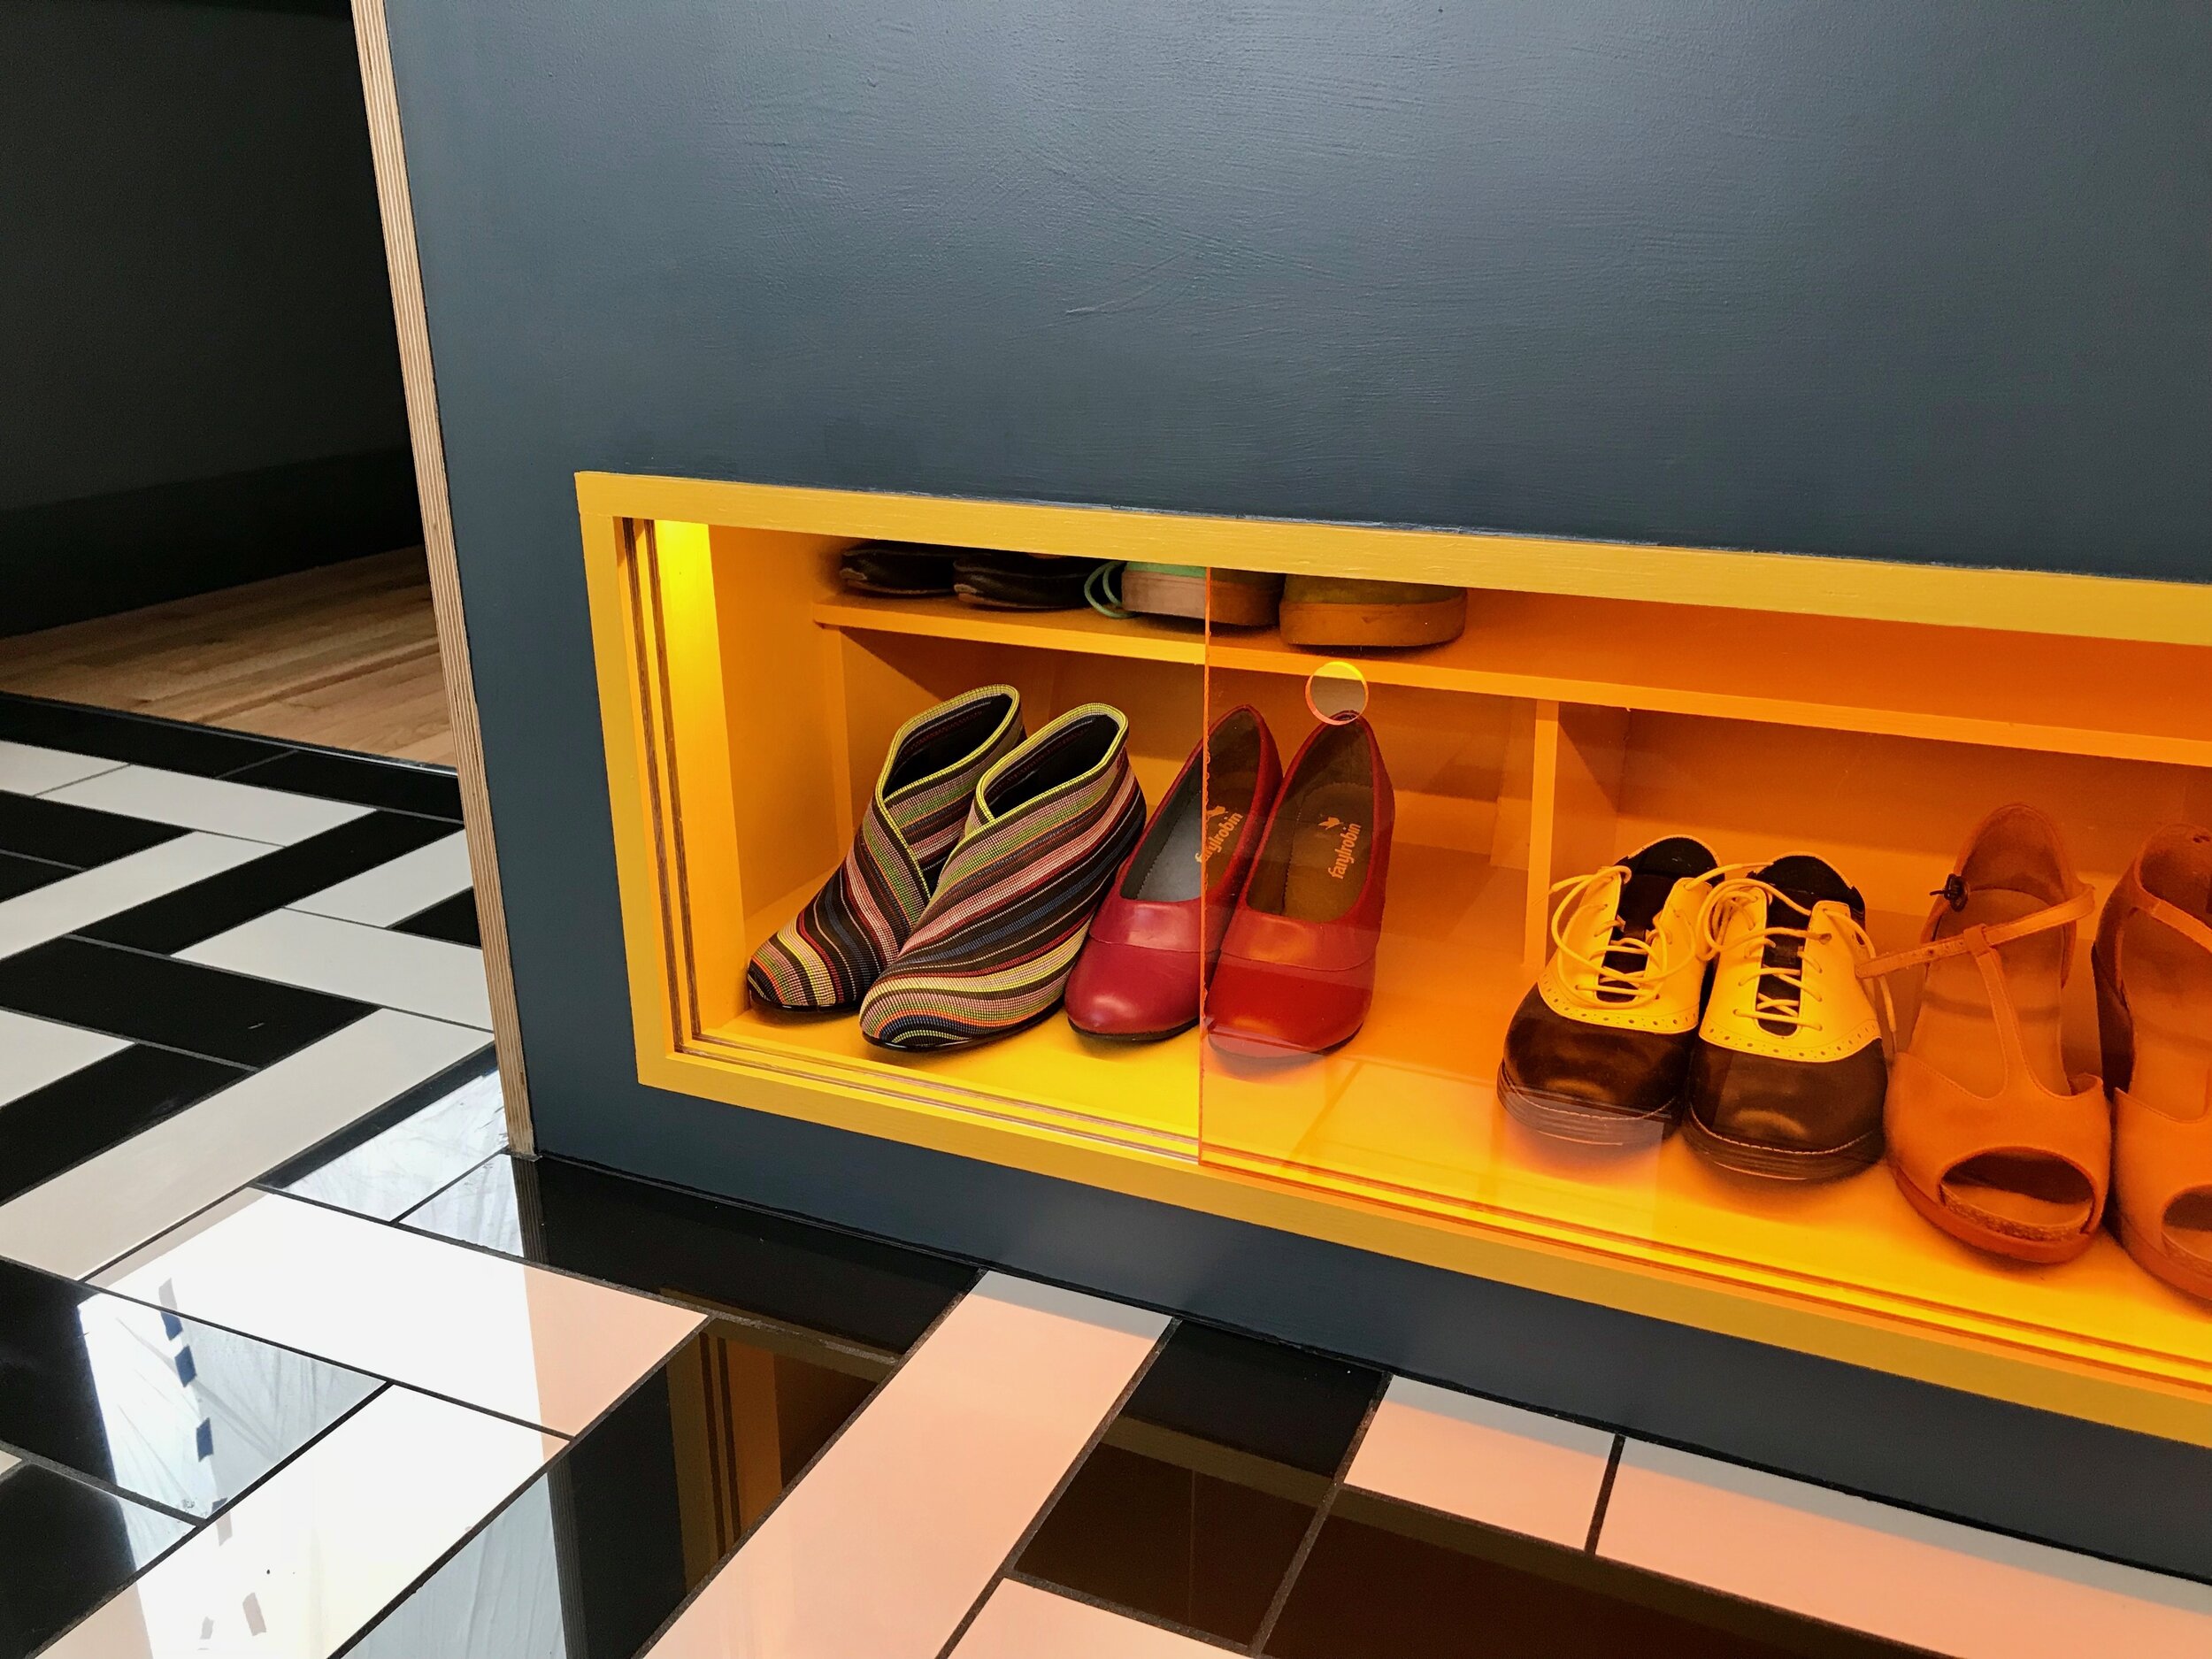
HOT ORANGE SHOE HUTCH
To maximize space below our dining banquette (you’ll see that in the next post…) why not make a hot orange shoe hutch!! As I mentioned before, we did not have any closets downstairs, and while I’m not exactly a shoe horse, I’ve got game. We would be no-shoes inside people once this reno was done.
I’m crazy for plexi-glass, you’ll see it throughout the house. I paired transparent amber cast acrylic panels from TAP with Bumble Bee Yellow paint and stapled up an LED rope light inside there. It glows.

AFTER

COMING UP: The next post will show you the other side of the shoe hutch: our seating banquet and dining table.